Mobile App: Routes and Stops
Introduction
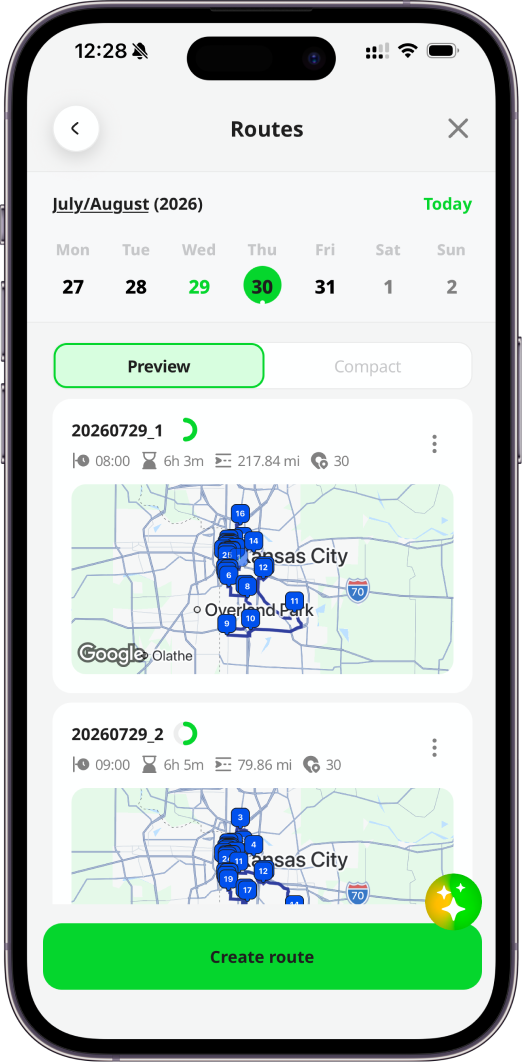
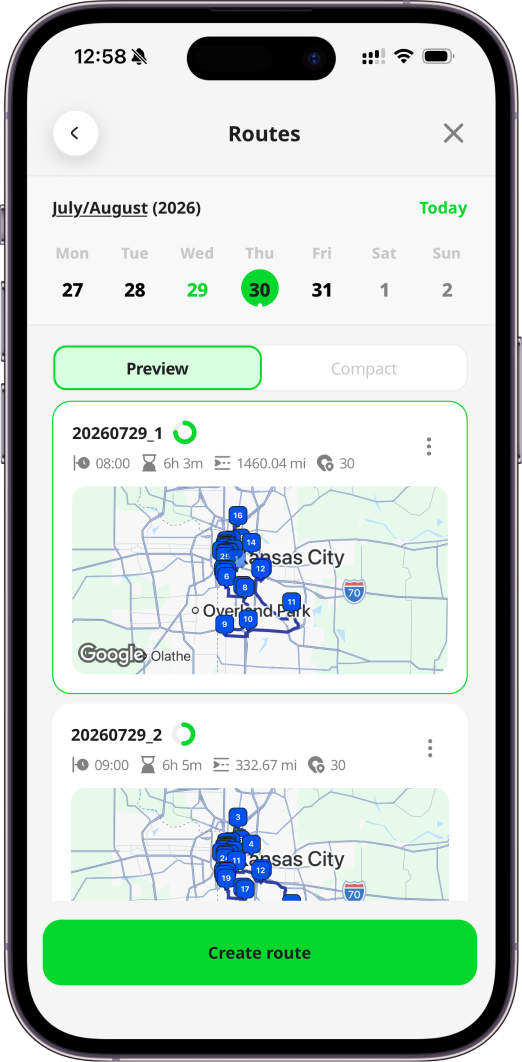
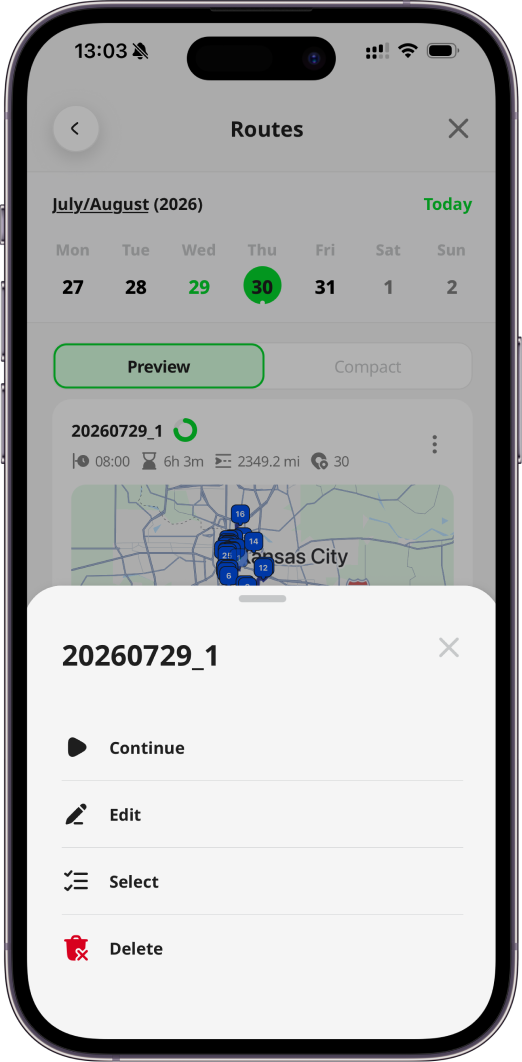
Routes page lets you view routes that have been released to you, each displayed with a small map preview. You can access the Routes page from the Menu options. By default, routes planned for the current date are shown, but you can select other dates to show routes for those dates. The green dot below the date means that you have planned routes assigned to you for this date.
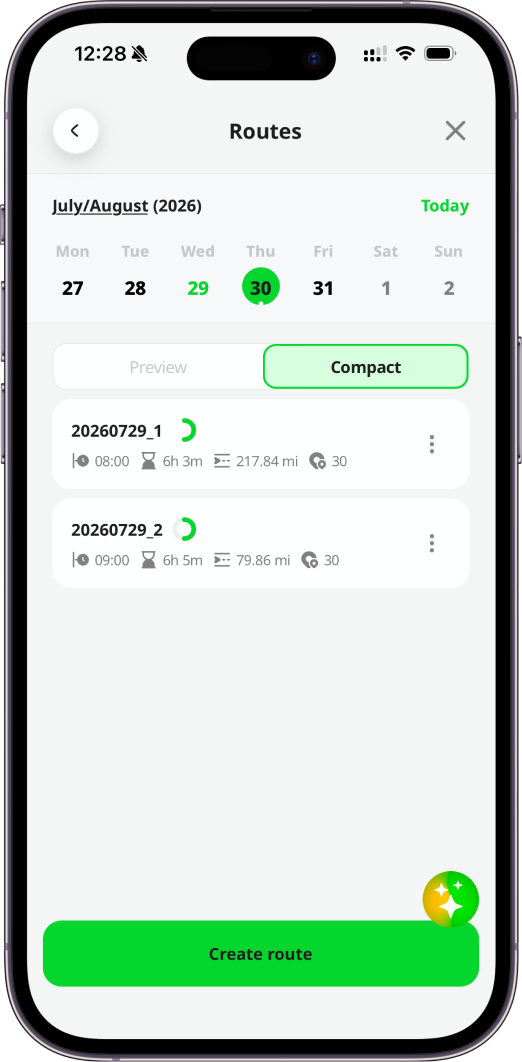
The Routes page supports two display modes: Preview and Compact. A toggle above the route list allows you to switch between the two views. Preview mode (default) displays each route together with a map preview, while Compact mode hides the map and shows a simplified route card. The selected view is saved per user on the current device, so the same mode is restored the next time the Routes page is opened on that device. On low-performance devices, Compact mode is enabled by default to improve performance and provide a smoother user experience.
Route Statuses
There are three route statuses relevant to the mobile app:
| Status | Description |
|---|---|
Released  | The route has been released to you. |
Started  | You have started to deliver the route, linking your location tracking to the route. |
Completed  | You have finished delivering the route. Location tracking is no longer linked to the route. |
Starting Route
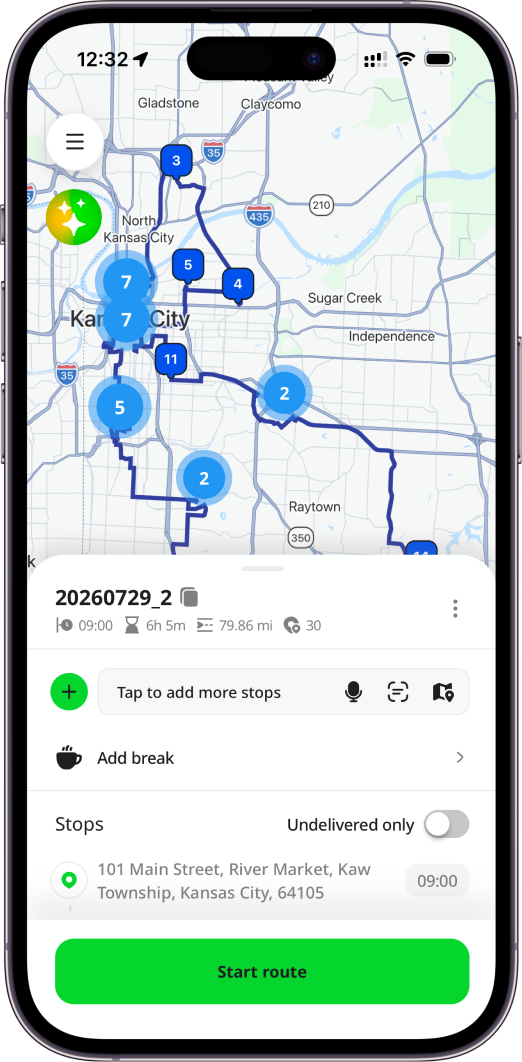
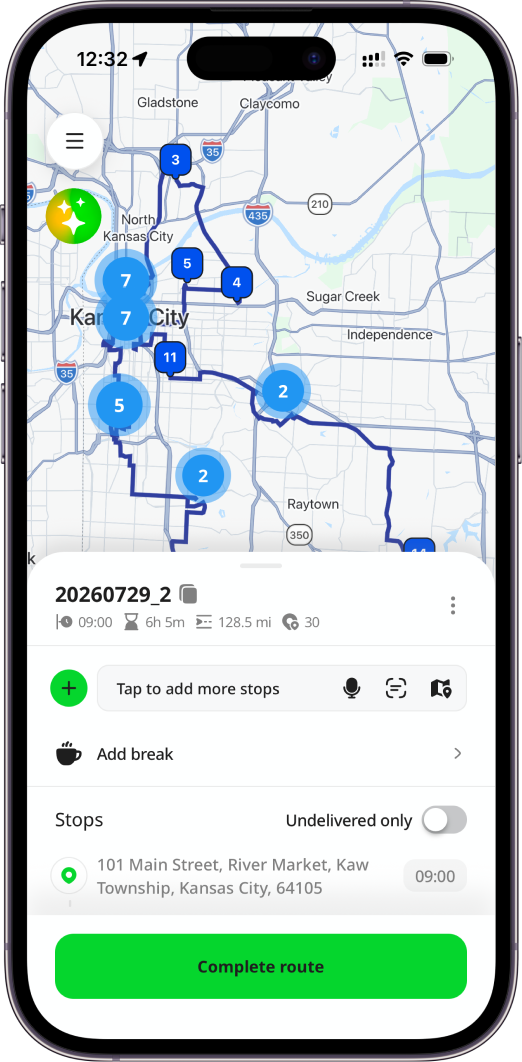
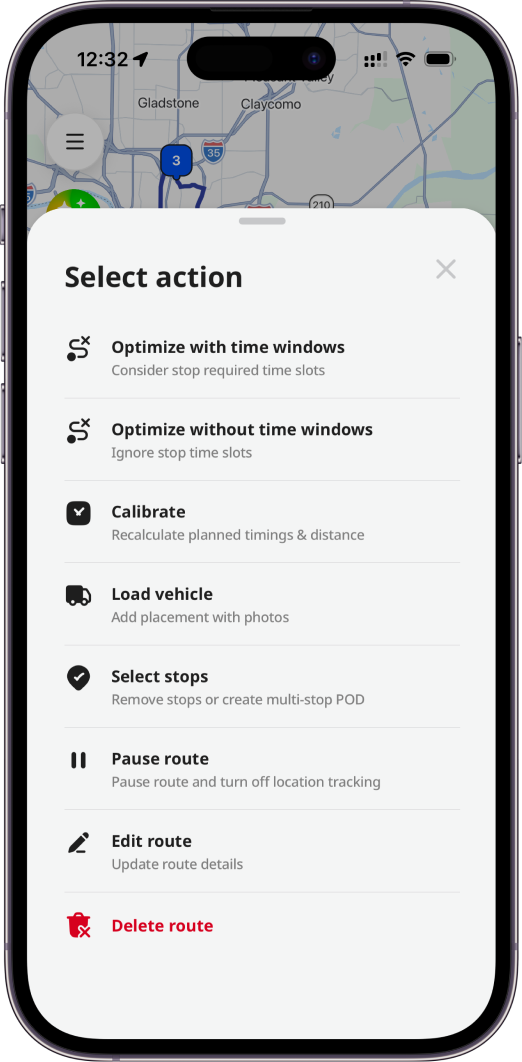
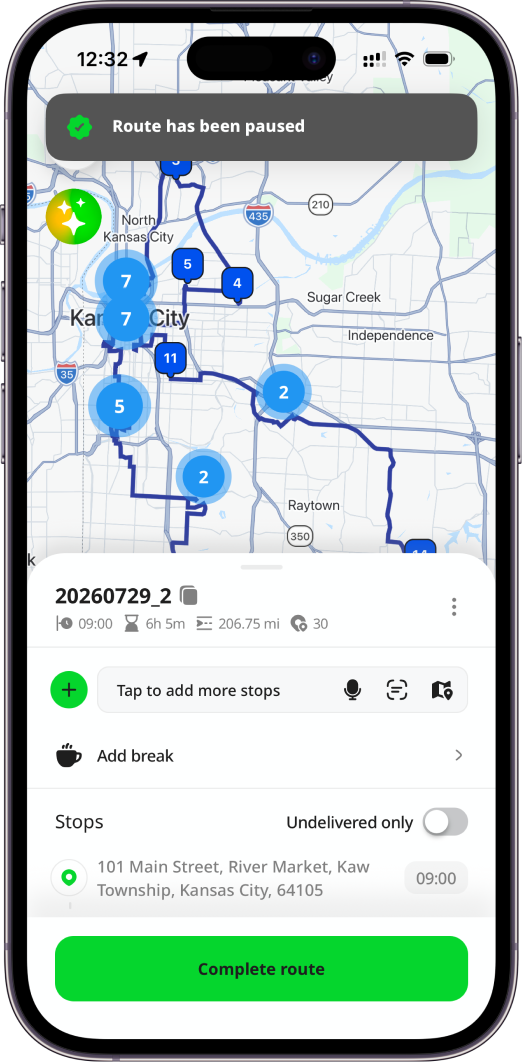
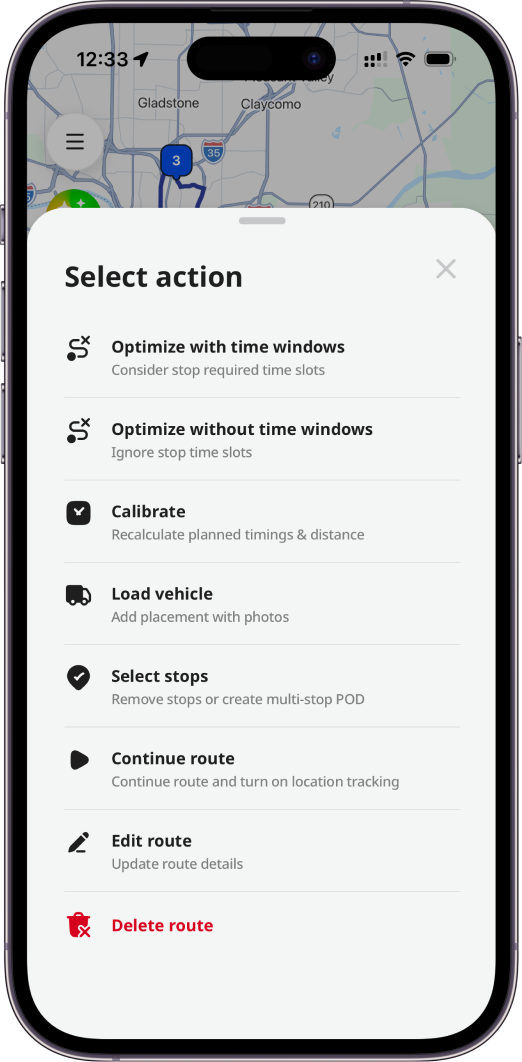
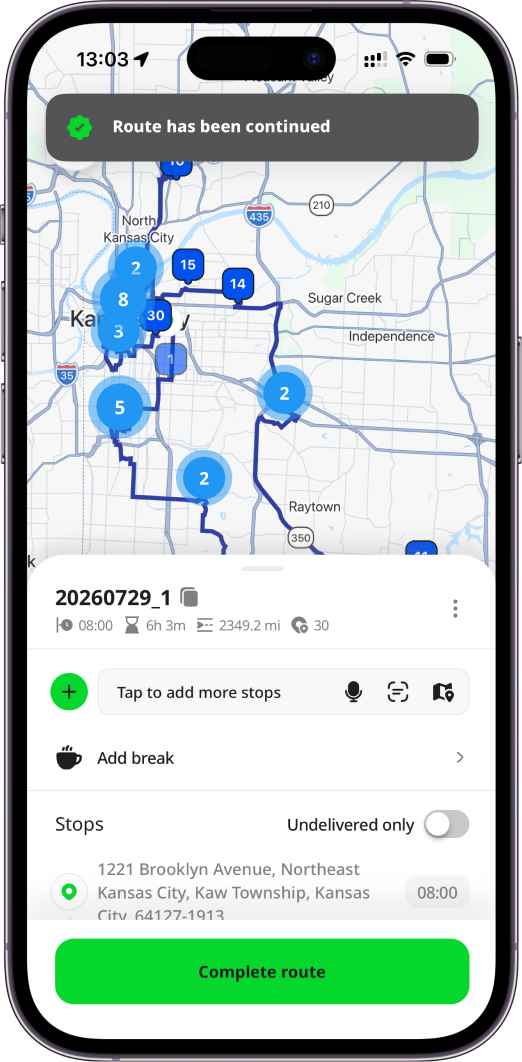
You can click on the route card on Routes page to view its details. At the bottom, you will find the Start route button. After starting the route, the Start route button is replaced with the Complete route button. To temporarily pause a route (location tracking for this route will be paused) press the arrow icon near the Complete route button and select Pause route. To continue the paused route again, you need to press the Continue route button. It's not possible to continue the route that has been completed already.
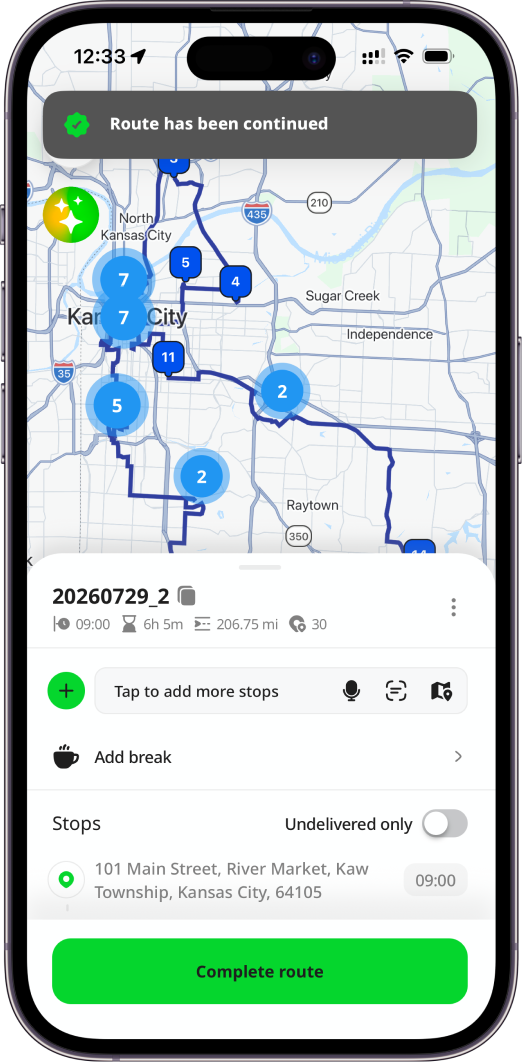
Current Route
When you have started a route and location tracking is enabled (the route is not paused), it will be displayed with a green frame around the route card on Routes Calendar page.
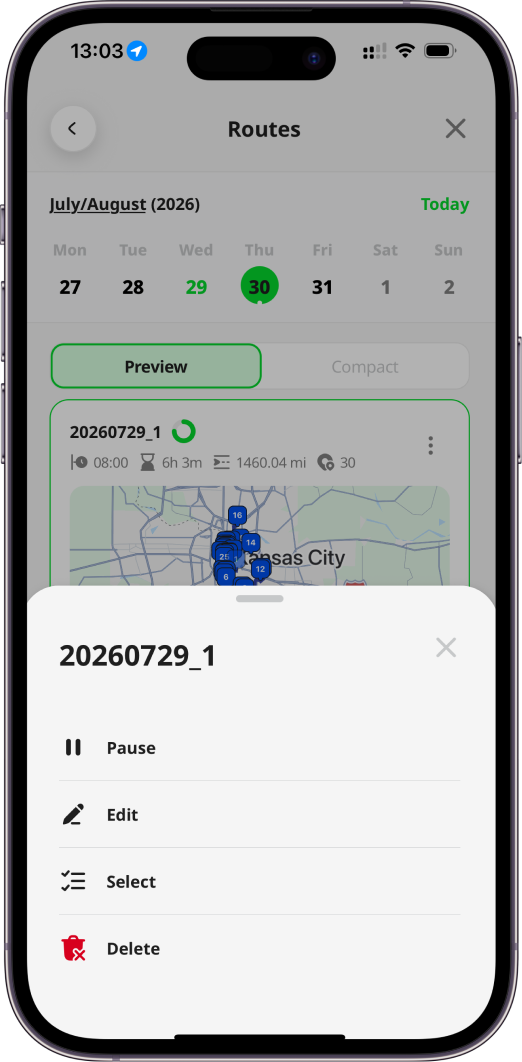
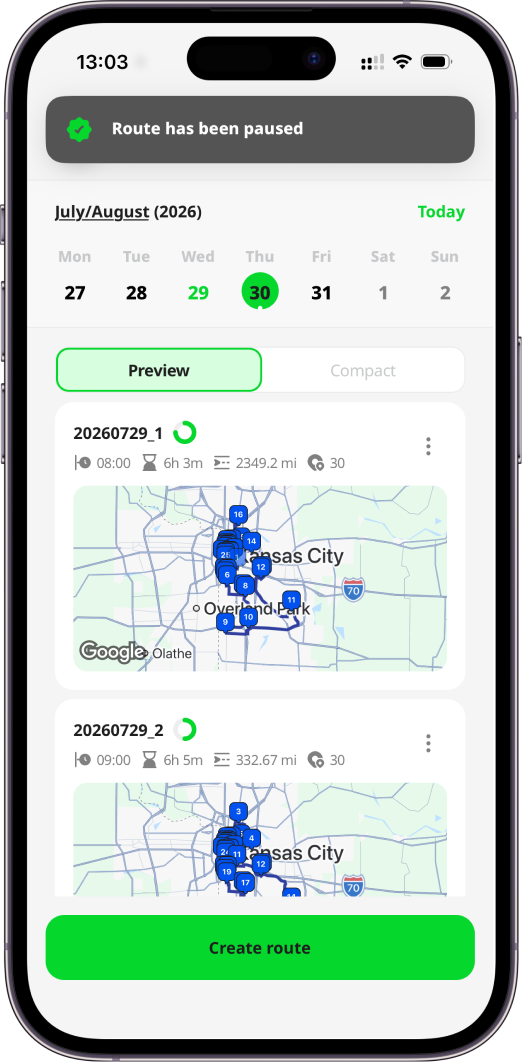
You can also temporarily pause a route (location tracking for this route will be paused) from Routes calendar by pressing the 3 dots icon on a route card and selecting Pause route option. To continue the paused route again, you need to press the Continue route button. It's not possible to continue the route that has been completed already.
Route Creation
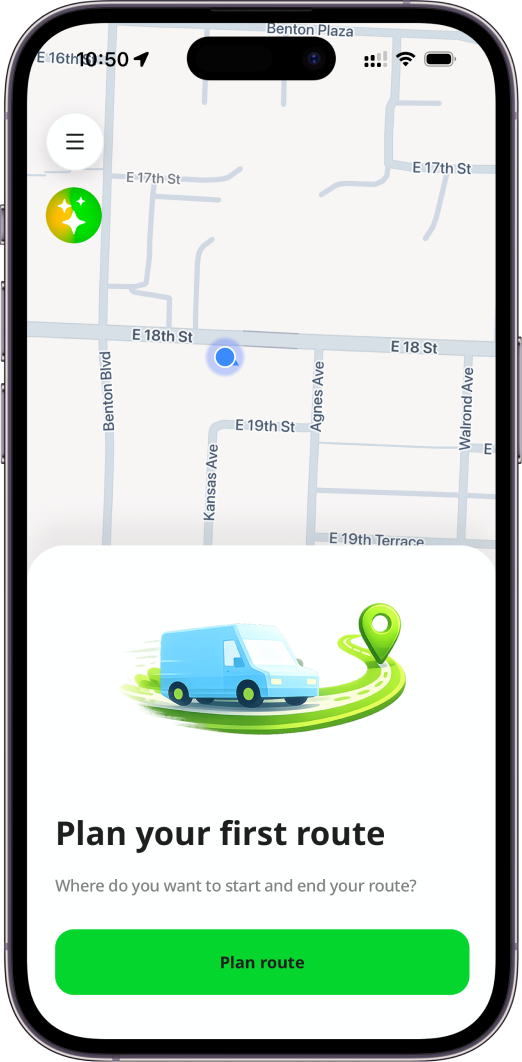
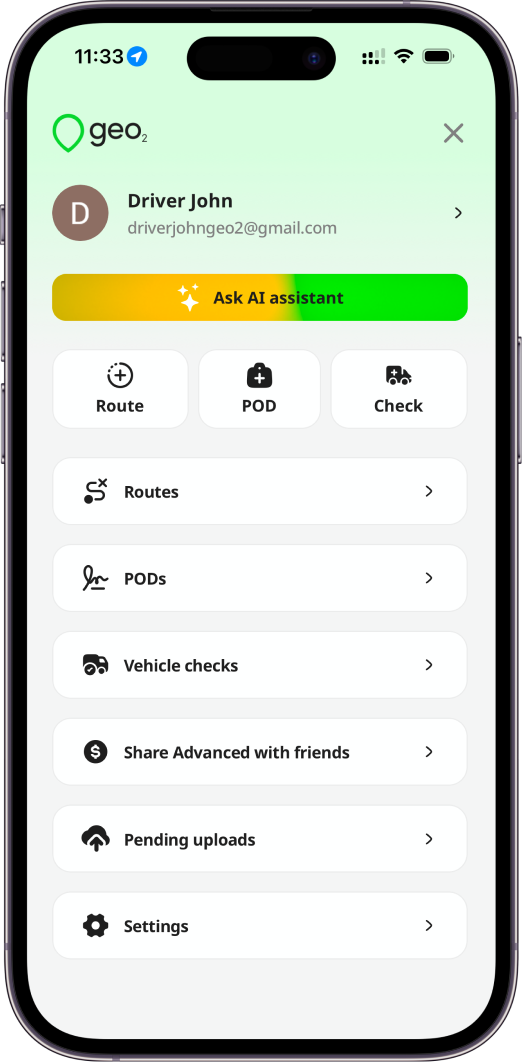
Depending on your permissions in the environment, you can create a route in the mobile app as well as in Geo2 Hub. To create a route, you need to press the Plan route in Menu or on Routes page. If you do not have any assigned to you routes for today, you will also see the Plan route button at the bottom of Map page.
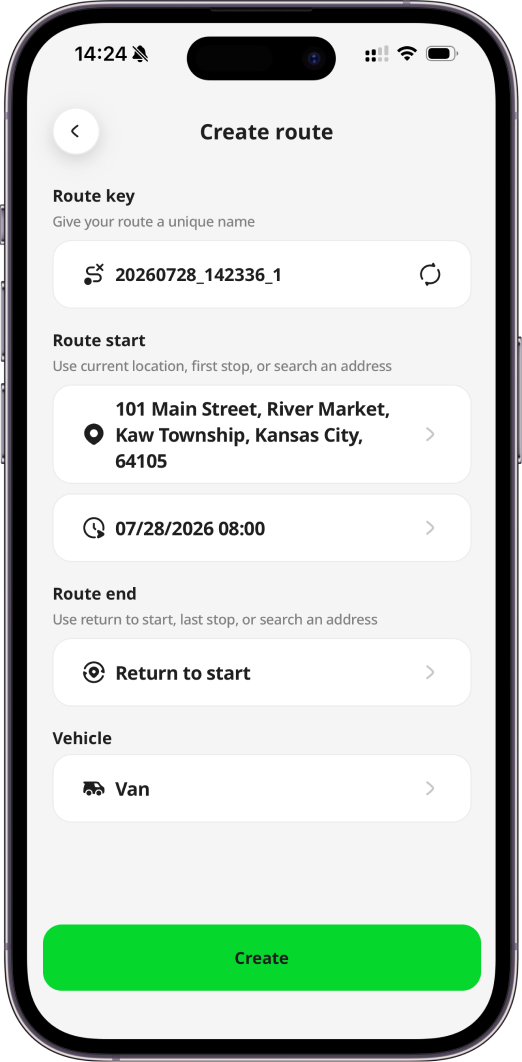
After pressing the button, Create route page will be displayed where you need to fill in the following fields:
| Fields | Description | Required field |
|---|---|---|
| Route key | Unique route key within an environment. It will be automatically generated from a date, depot (if it exists in your environment), and trip number if you leave it empty. It can be a route number, for example, 1, 2, 3, etc. | Yes |
| Route start | Before planning your route, you will be asked to use your current geolocation as a route start point but it can be changed. By pressing the Route start field, you can also select other depots from your environment if they exist, first stop location (first stop recipient’s address), or search address. If you select to search for an address, the Search address dialog will be displayed where you can start typing and selecting an address from the drop-down which appears, use voice search, scan an address, or search location on the map. If no suitable match is found, press the Can't find the address you need? button and continue entering the address in the relevant address fields manually. Once it is done, press the Confirm button. Your address will be saved as a route start. | Yes |
| Planned start | Expected dispatch date/time of the route from the route start location. By default, it is taken from your settings. | Yes |
| Route end | By default, the Return to start option is selected for a route end but it can be changed. By pressing the Route end field, you can also select depots from your environment if they exist, last stop location (last stop recipient’s address), or search address. If you select to search for an address, the Search address dialog will be displayed where you can start typing and selecting an address from the drop-down which appears, use voice search, scan an address, or search location on the map. If no suitable match is found, press the Can't find the address you need? button and continue entering the address in the relevant address fields manually. Once it is done, press the Confirm button. Your address will be saved as a route end and you will be redirected back to Create route page. | Yes |
| Vehicle | Vehicle assigned to the route. Once a new organization/environment is created, the following default vehicle are created: van, truck, car, motorbike, bicycle. If there are no vehicles in your environment, press on the Tap to add a vehicle to add it. Vehicle dimensions (“Gross weight”, “Height”, “Width”, and “Length” fields) can be used for route calibration/optimization with vehicle restrictions. The system will factor these dimensions into route building to generate the most efficient outcomes, for example, to avoid bridges with height restrictions, narrow roads unsuitable for wider vehicles, or areas with weight limits that could affect the selected route. | No |
| Driver | User responsible for the route. By default, it's a user creating a route from the mobile app. It can be changed. Once a route is released, the assigned user sees the route in the mobile app. A driver has permission to start/complete the route. Once the route is started and location tracking enabled, the driver’s location will be displayed Hub: Routes and on the Hub: Analytics on Analytics page in Hub, as well as on the recorded Hub: Vehicle Checks. The driver’s location can also be optionally displayed on Hub: Environment Settings. However, for POD's, the geolocation of the user who records it will be captured (either the driver or participant). This field is displayed only for Enterprise level users. | No |
| Participants | Up to 2 additional users assigned to the route. Once released, the assigned participant sees the route in the mobile app. While the driver retains the ability to start and complete a route, participants will have access to a route to check the list of stops and create POD's for them. Participants field is displayed only to users with Enterprise subscription level. | No |
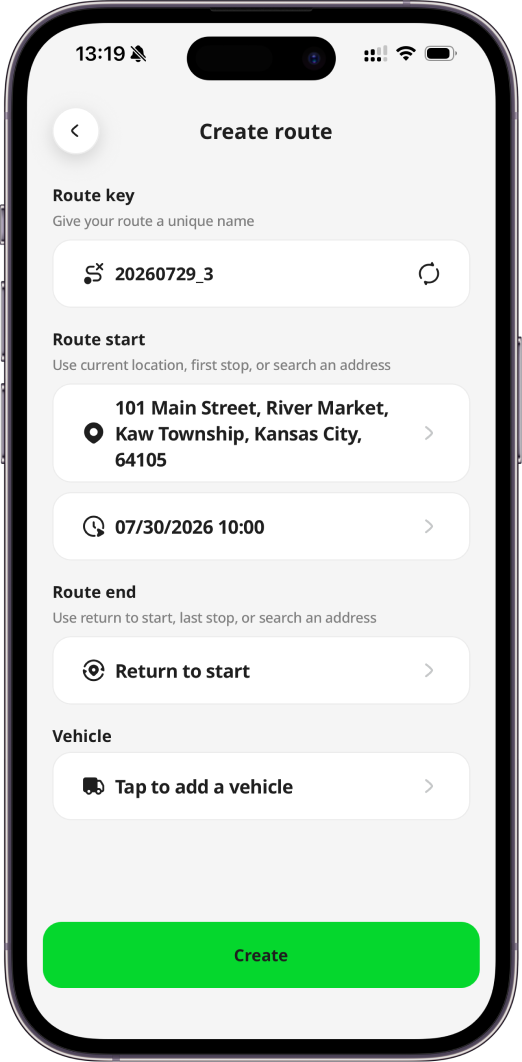
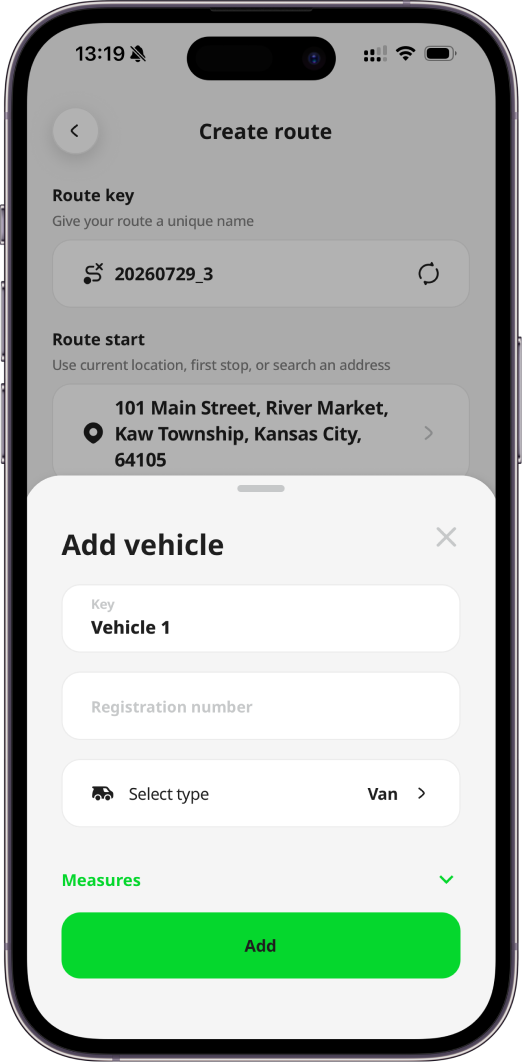
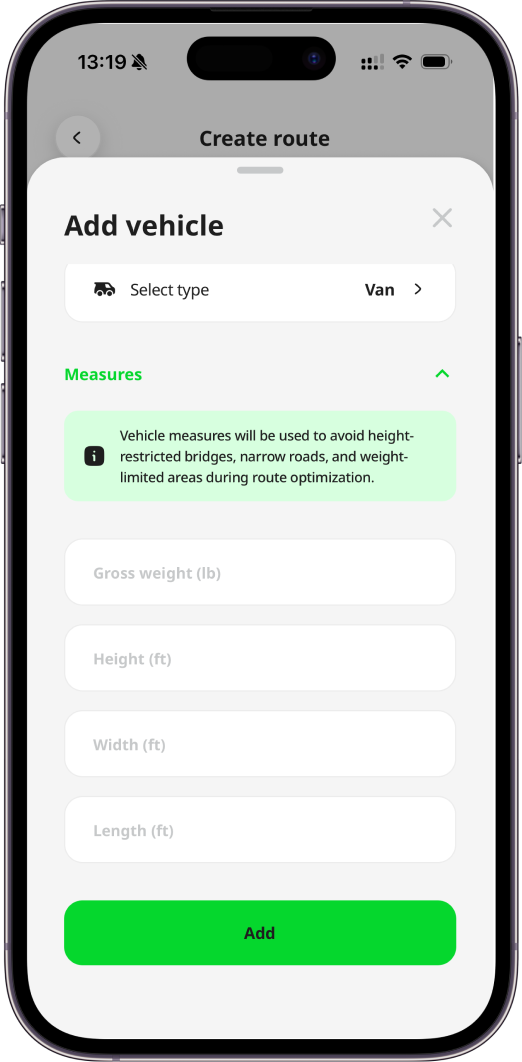
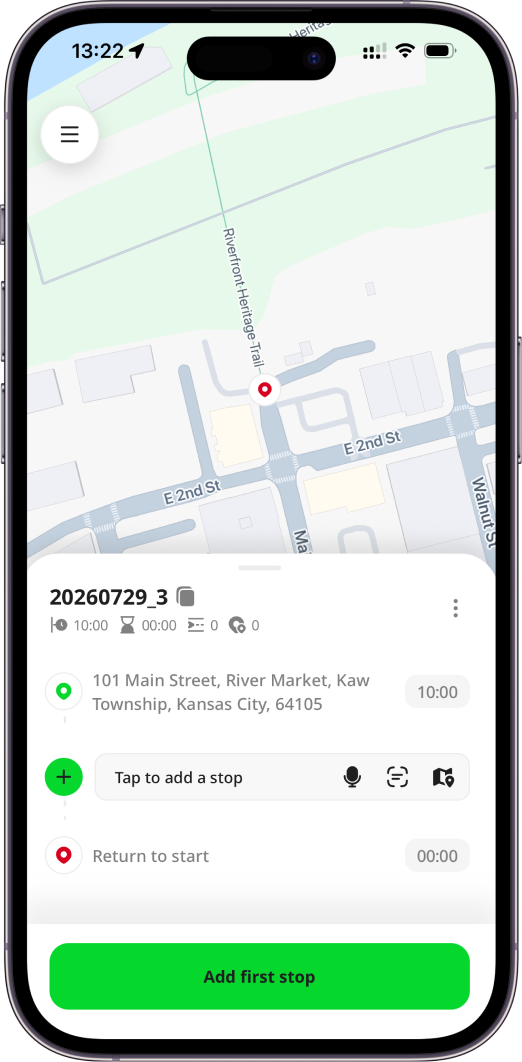
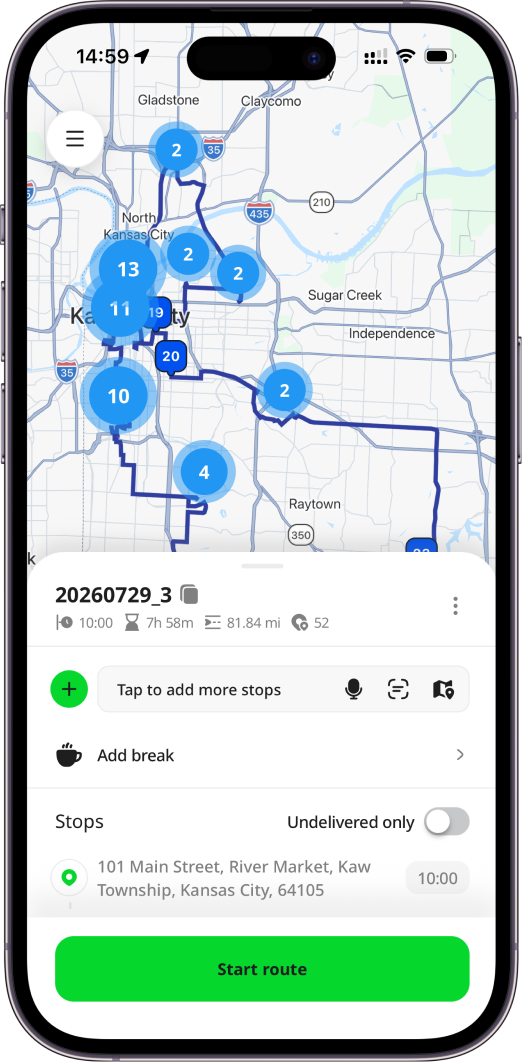
After filling in all the fields, you need to press the Create button to save the route data. You will be redirected to Route view page where you can add stops to the route.
Adding/Creating Stops
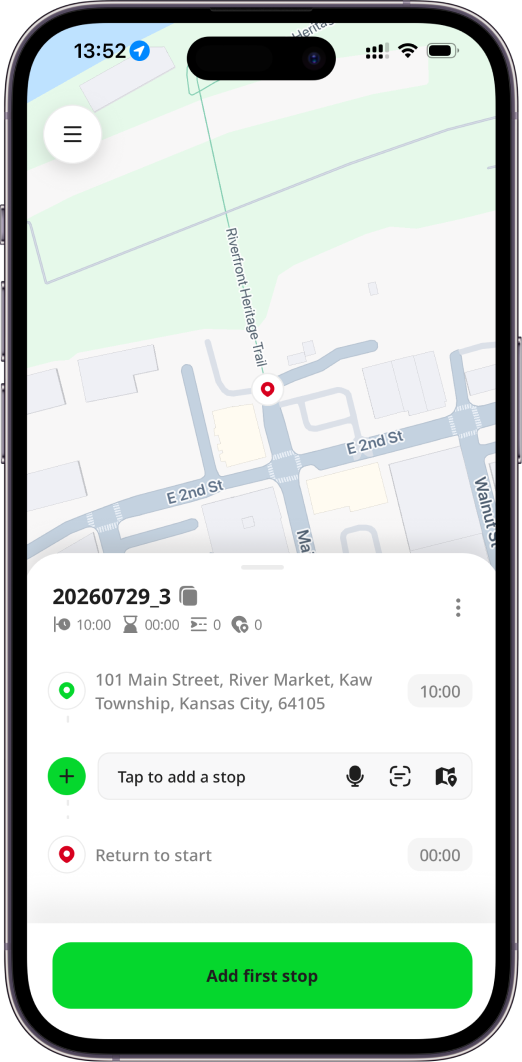
Depending on your permissions in the environment settings, you can create or add an existing order to a route in the mobile app or Geo2 Hub. Press the Add first stop button at the bottom or Tap to add a stop in the stop list on the Route view page. The Search dialog appears, allowing you to type a recipient address and select from the results, scan multiple addresses at once, use voice search, use bulk address paste, import from photos, screenshots, PDFs or add an existing order. All these features are included across every subscription level. The only restriction applies to the Free level, which allows a maximum of 15 stops per route.
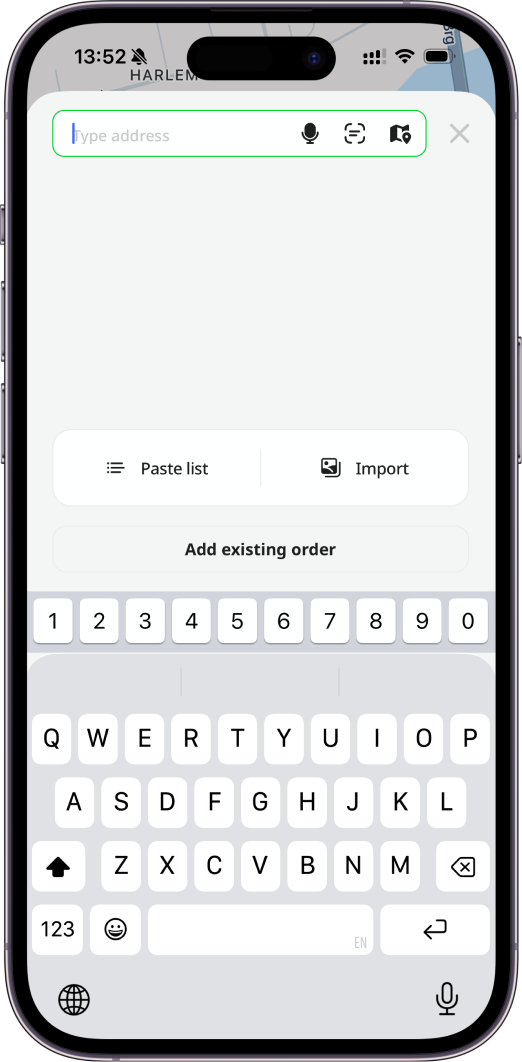
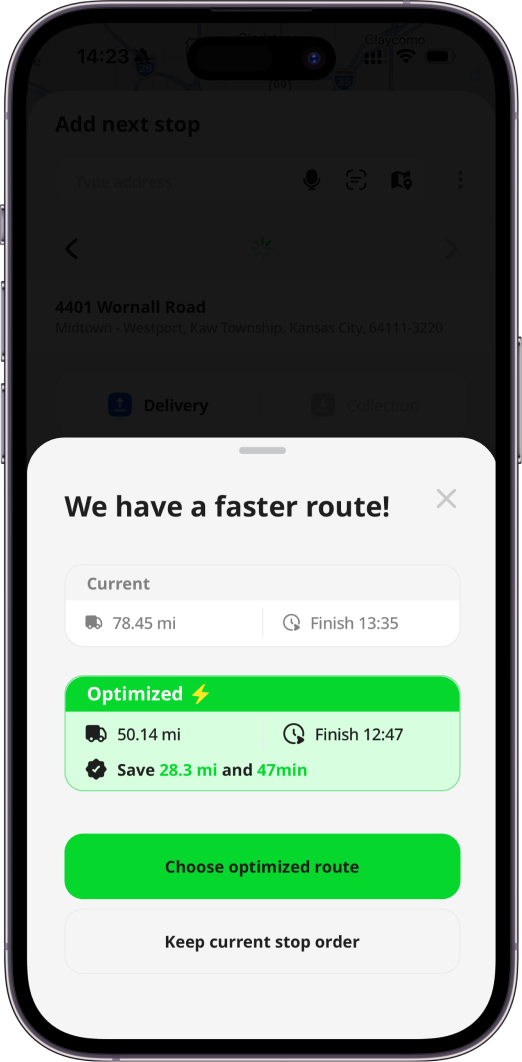
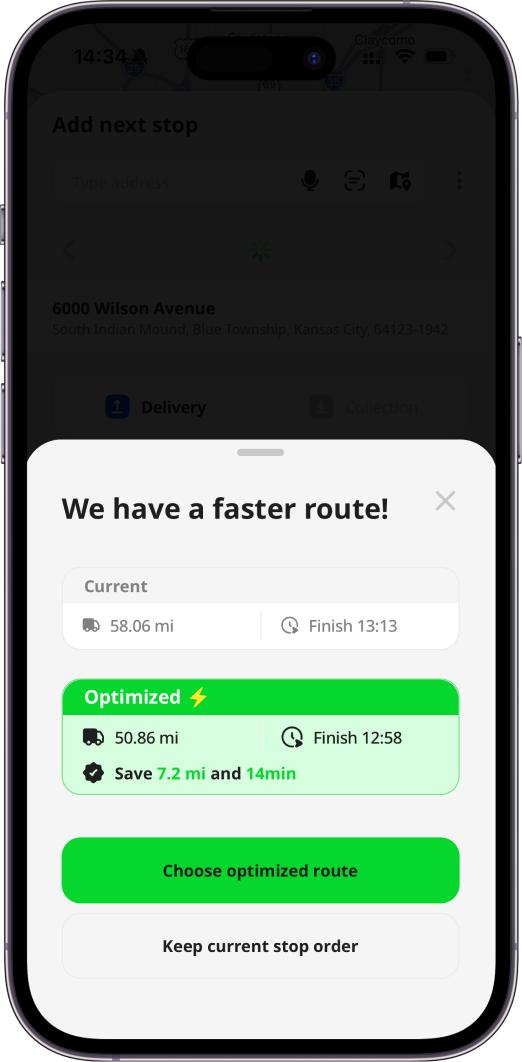
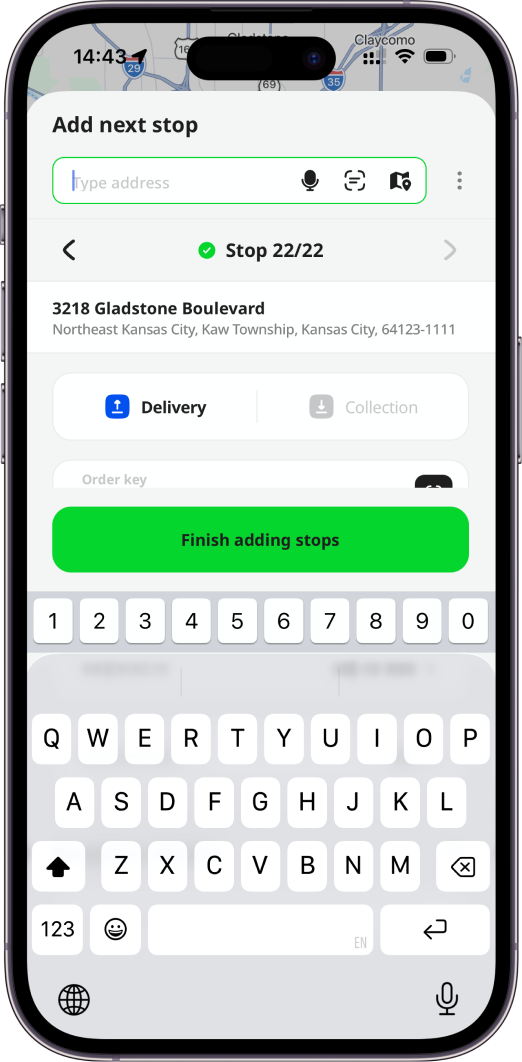
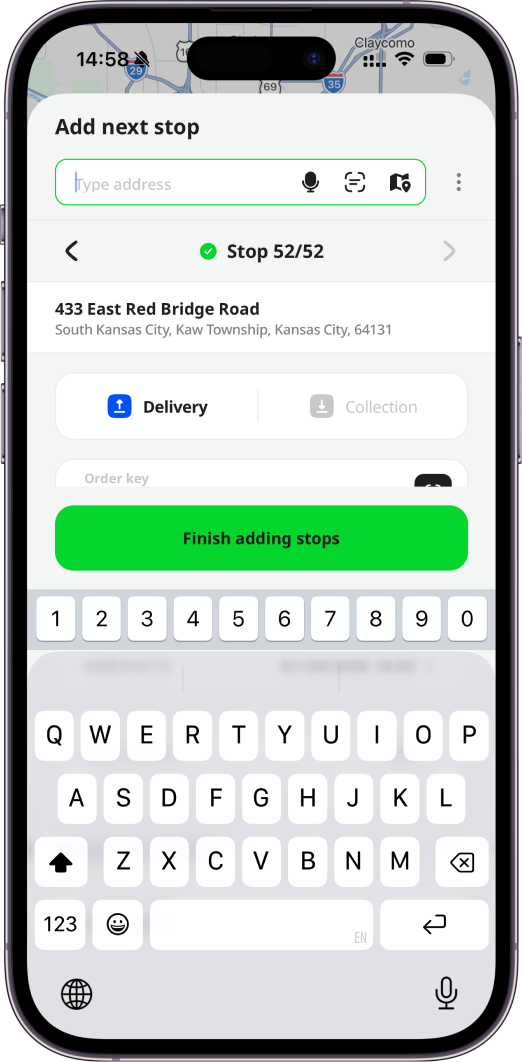
Once stops are added, press the Finish adding stops button to run automatic route optimization to save time and fuel.
Muti-Address Scanning
Multi-address scanning allows solo delivery drivers to quickly add multiple stops without manually entering each address. It’s especially helpful in the following scenarios:
- E-commerce deliveries: Scan multiple package labels for the same area and generate an optimized route instantly.
- Food delivery (batch orders): Capture several delivery addresses from one pickup and plan efficient drop-offs.
- Pharmacy deliveries: Ensure accurate address matching and reduce the risk of errors.
- Field service visits: Scan job sheets to create a clear schedule of stops for the day.
- Retail and grocery deliveries: Add multiple orders at once by scanning labeled bags or parcels.
- Office mail and documents: Quickly process a stack of envelopes and organize stops.
- Small business deliveries: Turn a group of packages into a ready-to-use route in seconds.
Benefits:
- Saves time on route setup
- Reduces manual entry errors
- Helps manage multiple deliveries more efficiently
To scan an address, press the scan icon on the Tap to add a stop (more stops) search bar or on the Search address dialog. The Scan address page will appear. Point your camera steadily at the address(es) and hold steady - automatic address detection will start. When the boarder fills green, they are all added. Continue moving the camera over the labels to scan more addresses. After scanning the address, you can click the red Delete icon to remove it and scan again.
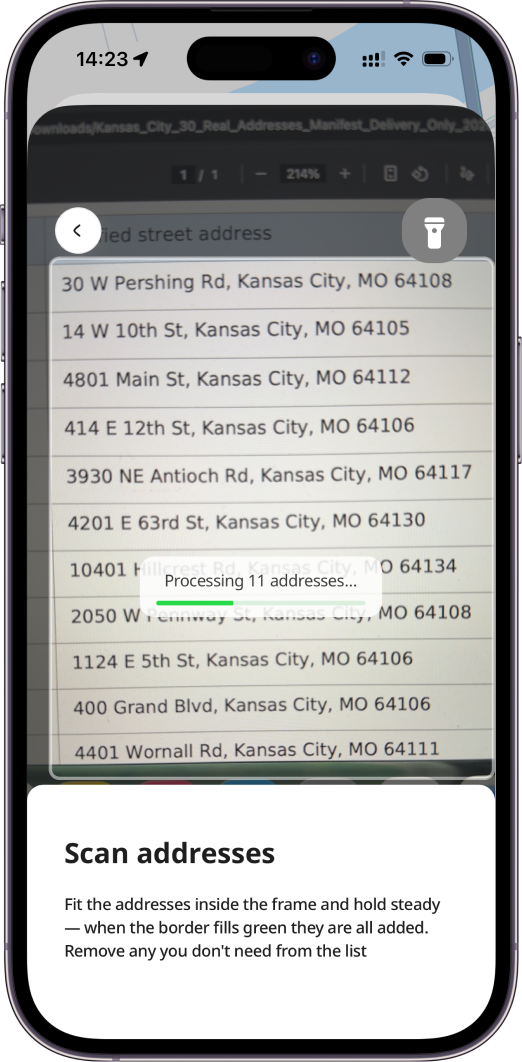
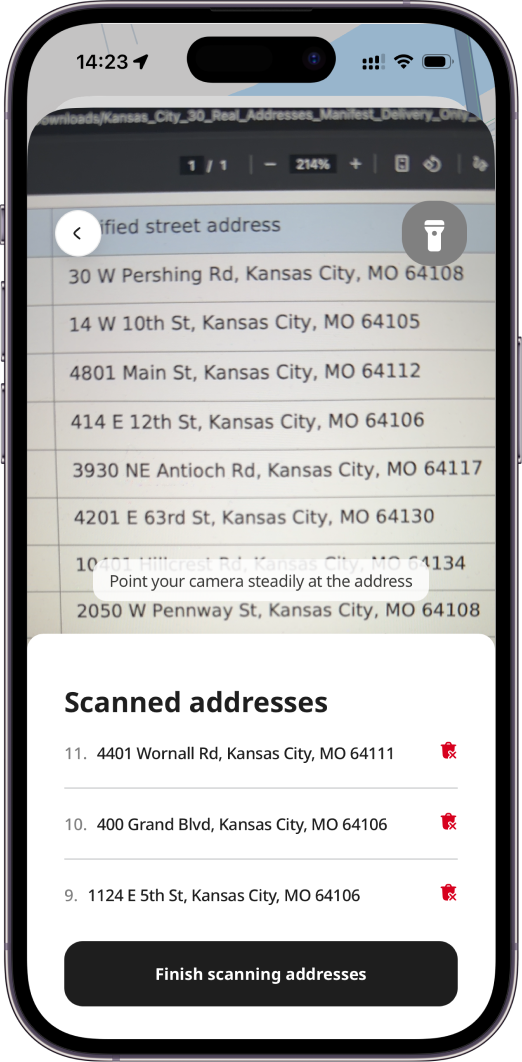
Multi-address scanning is available only when adding stops to the route. For route start/end points, driver location, or POD address, you can scan only one address at a time.
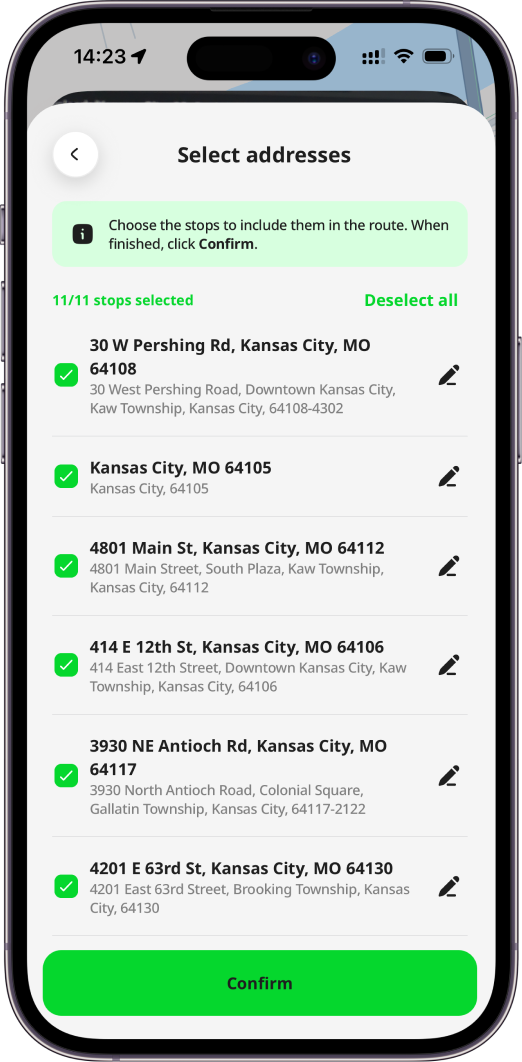
Once scanning is complete, click Finish scanning addresses to send the scanned addresses to find matching results. You will then be redirected to Select addresses page, where:
- The scanned address appears in bold black text
- The matched result is shown below in grey text
If needed, you can modify an address by clicking the Edit button. The app will display all available matches for each scanned address, so you can choose a different one if necessary. Use the checkboxes to decide which addresses to include in your route. All addresses are selected by default, but you can deselect any you do not need.
Finally, click Confirm to add the selected addresses as stops in your route.
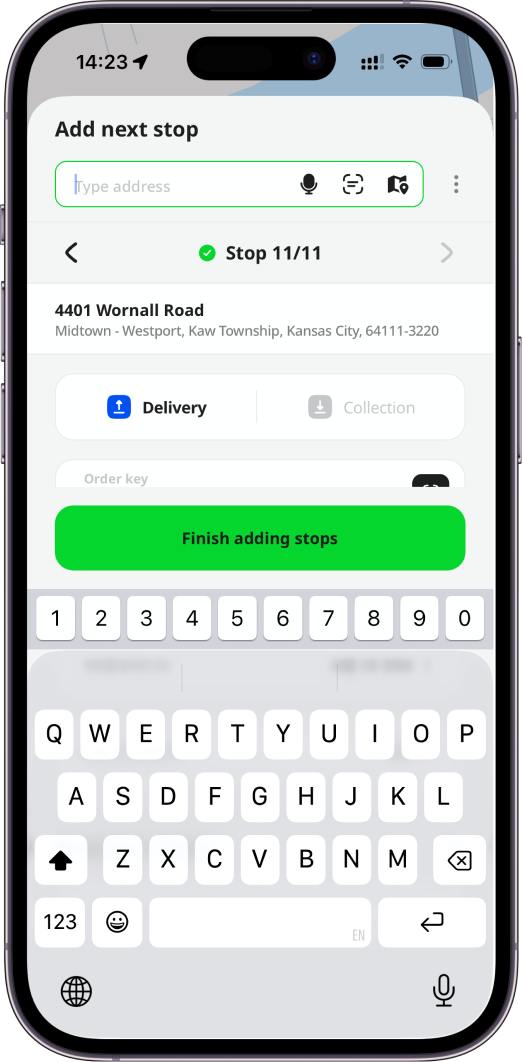
You can continue adding more stops using typing addresses, voice search, multi-address scanning, search locations on the map or import from photos, screenshots or PDFs. Once completed, press the Finish adding stops button to run route automatic optimization to save time and fuel.
Address Voice Search
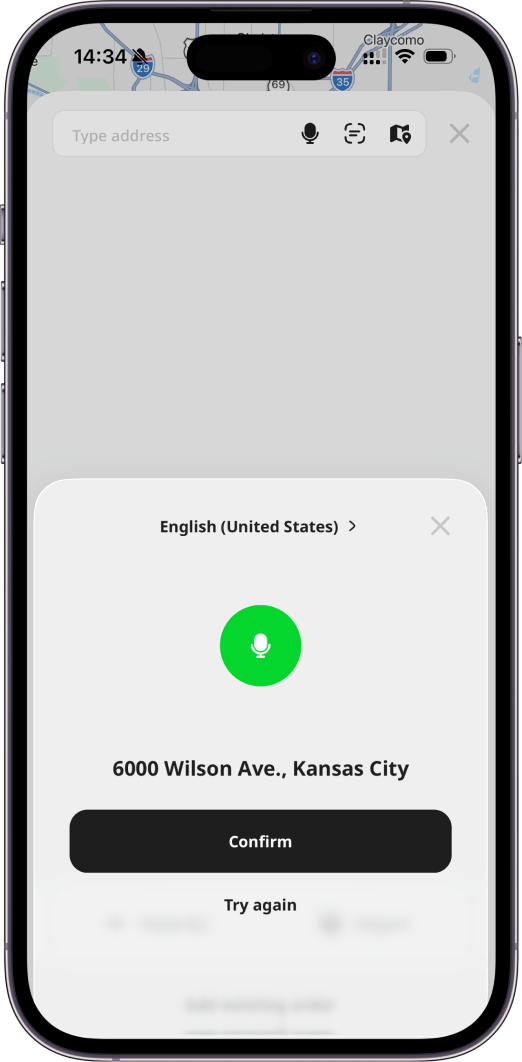
To use voice search for an address, press the mic icon on the Tap to add a stop (more stops) search bar or on the Search address dialog. The Voice search dialog appears. Your device language will be selected by default, but you can change it to any preferred language. Speak the address; the system will recognize it. If the detected address is correct, press Confirm to find matching results. Select an address from the results to add a stop to the route. If the detected address is incorrect, press Try again.
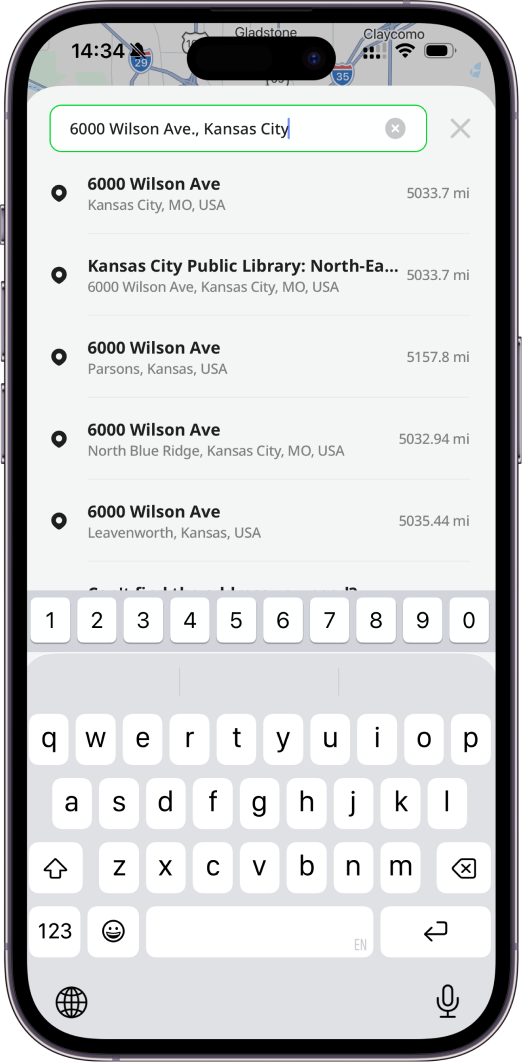
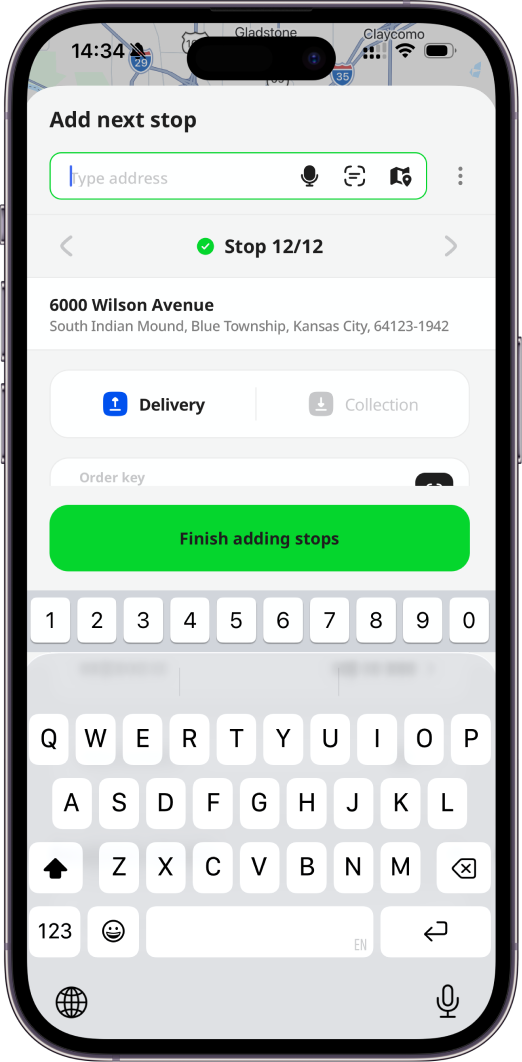
You can continue adding more stops using typing addresses, voice search, multi-address scanning, search locations on the map or import from photos, screenshots or PDFs. Once completed, press the Finish adding stops button to run route automatic optimization to save time and fuel.
Search Addresses on the Map
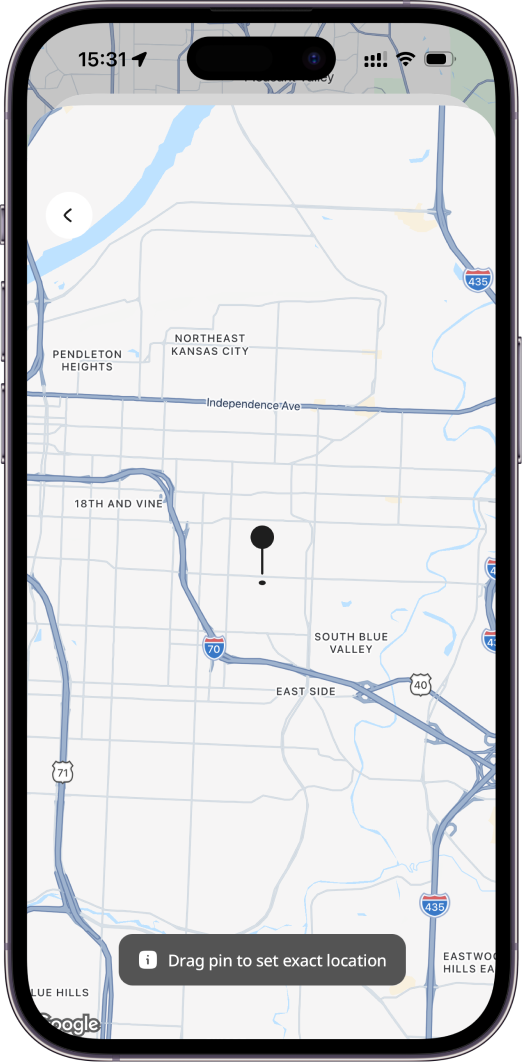
The Map search feature lets you select an exact location by placing a pin on the map instead of typing an address. It is available when adding route stops, setting route start/end points, adding or editing orders, and creating Proof of Delivery (POD).
Common use cases:
- Select the exact entrance of a building or warehouse.
- Choose delivery locations in areas without accurate postal addresses.
- Add precise pickup or delivery points for gig delivery platforms such as Amazon Flex, Walmart Spark, or Evri.
- Set accurate locations for local delivery and service businesses.
To open the map, tap the map icon next on on the Tap to add a stop (more stops) search bar or on the Search address dialog.
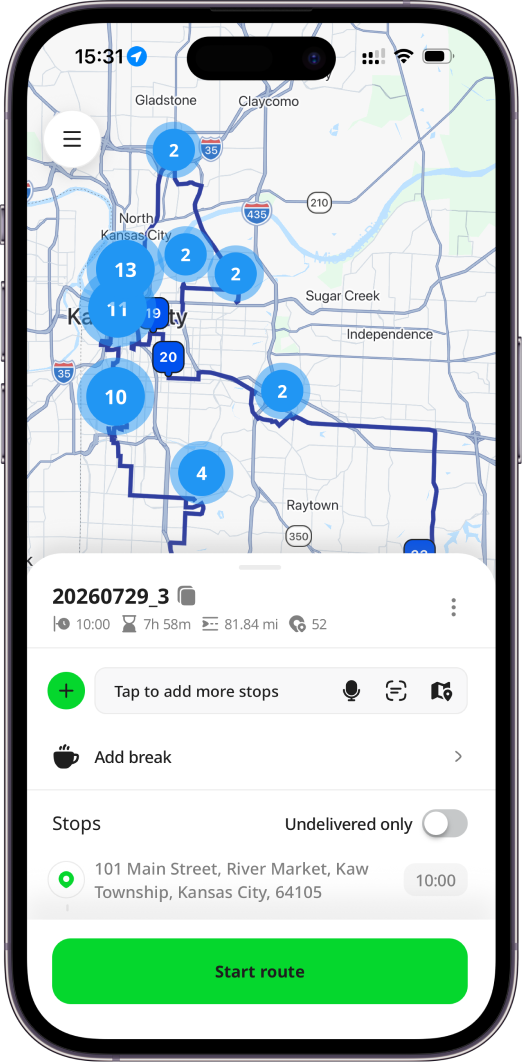
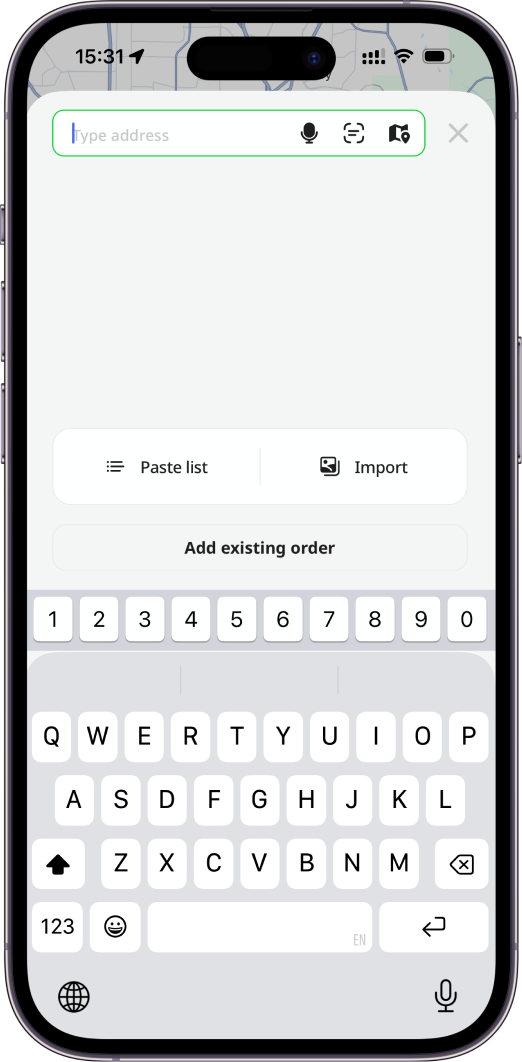
When the map opens, it centers on your current location if location permission has been granted. Drag the pin to the desired location to identify the address. After the address is found, it is displayed at the bottom of the screen. Tap Confirm to use the selected location.
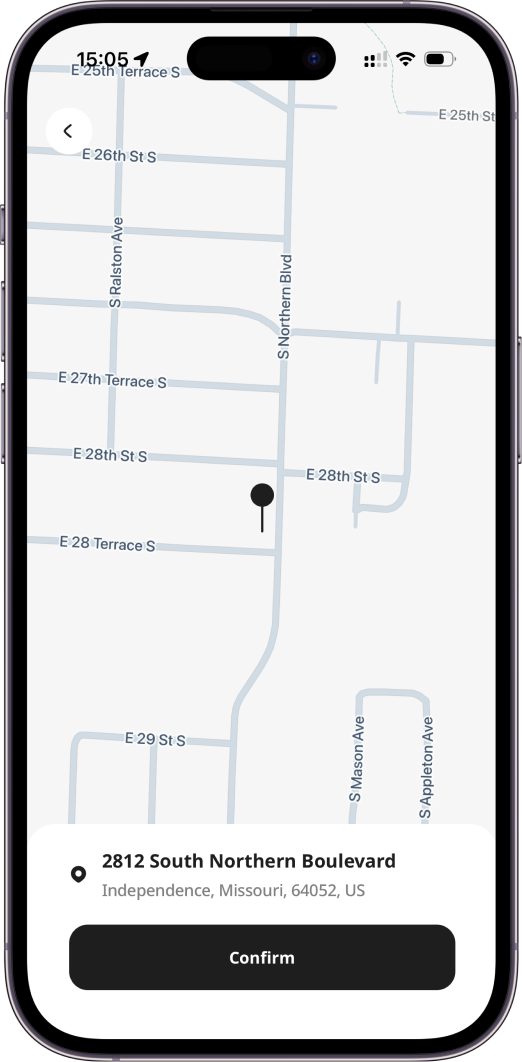
After confirmation, you are returned to the previous screen with the address automatically filled in. When adding multiple stops, you can immediately continue adding the next stop or reopen the map to select another location.
You can continue adding more stops using typing addresses, voice search, multi-address scanning, search locations on the map or import from photos, screenshots or PDFs. Once completed, press the Finish adding stops button to run route automatic optimization to save time and fuel.
Bulk Address Paste (Paste List)
The Paste list feature is especially useful for solo delivery drivers who need to quickly plan routes with multiple stops. Instead of entering addresses one by one, you can paste a full list from a dispatcher, spreadsheet, or notes and generate a route in seconds. This is particularly helpful for gig drivers using platforms like Amazon Flex, where multiple deliveries are assigned at once. It also supports drivers working across different apps, allowing them to combine addresses into a single optimized route. Overall, the feature saves time, reduces manual input, and makes it easy to adjust or reuse address lists for recurring or on-the-go deliveries.
To add up to 50 stops to a route at once, use the Paste list option in the Search address dialog when adding stops. Simply type or paste your addresses — one per line — and click Search to find matches.
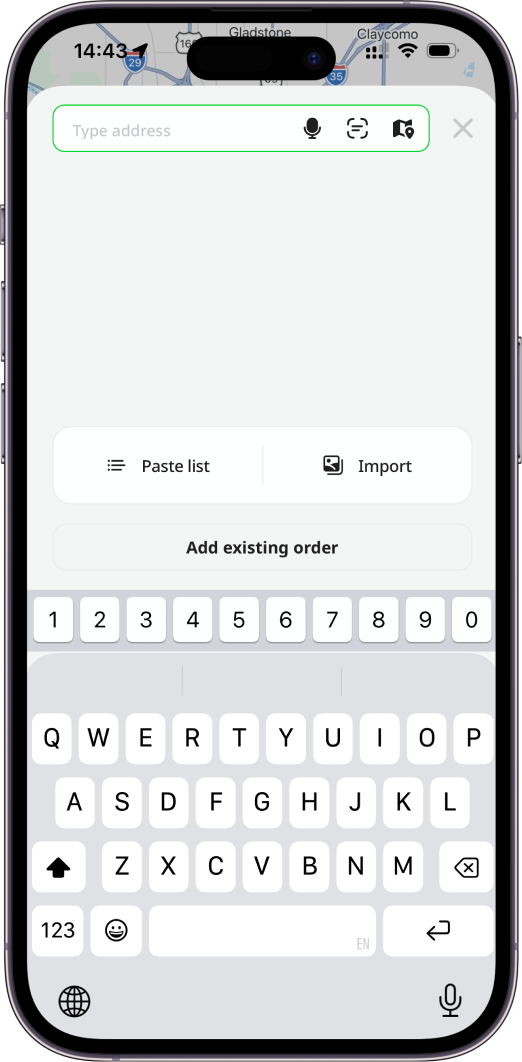
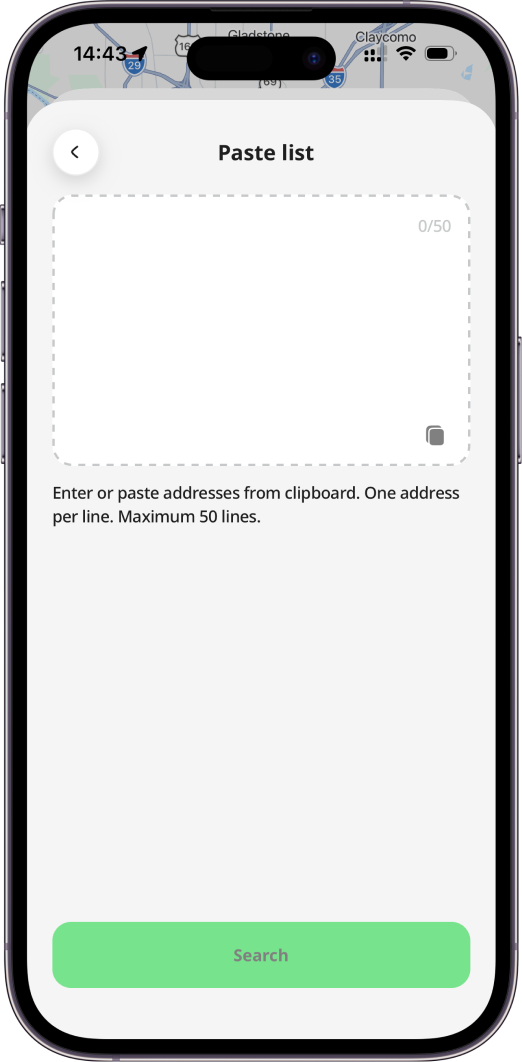
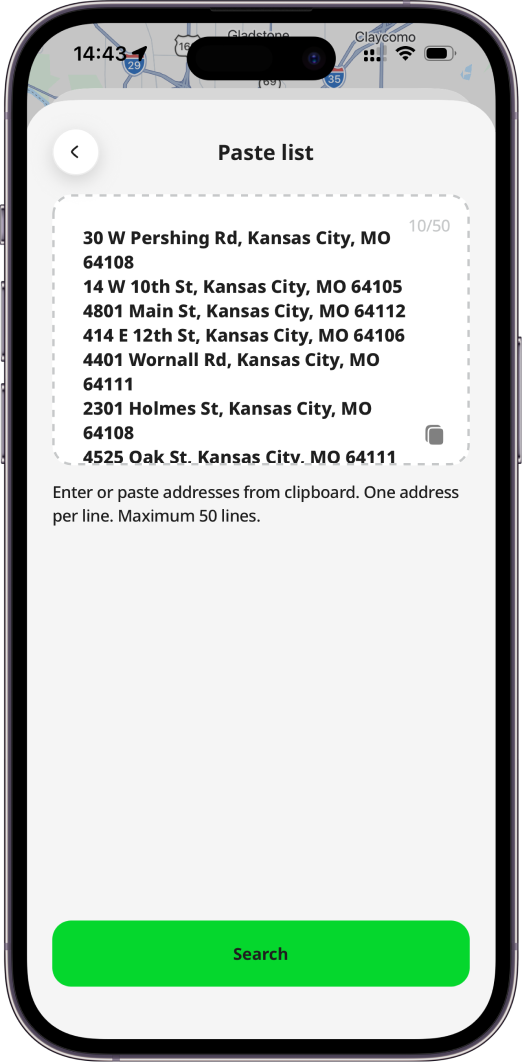
You will be then be taken to the Select addresses page, where:
- Your pasted addresses appear in bold black text
- Matching results are displayed below in grey
If needed, you can click Edit to adjust any address. The app will show all available matches for each entry, allowing you to choose a different option. Use the checkboxes to select which addresses to include — everything is selected by default, but you can deselect any you do not need.
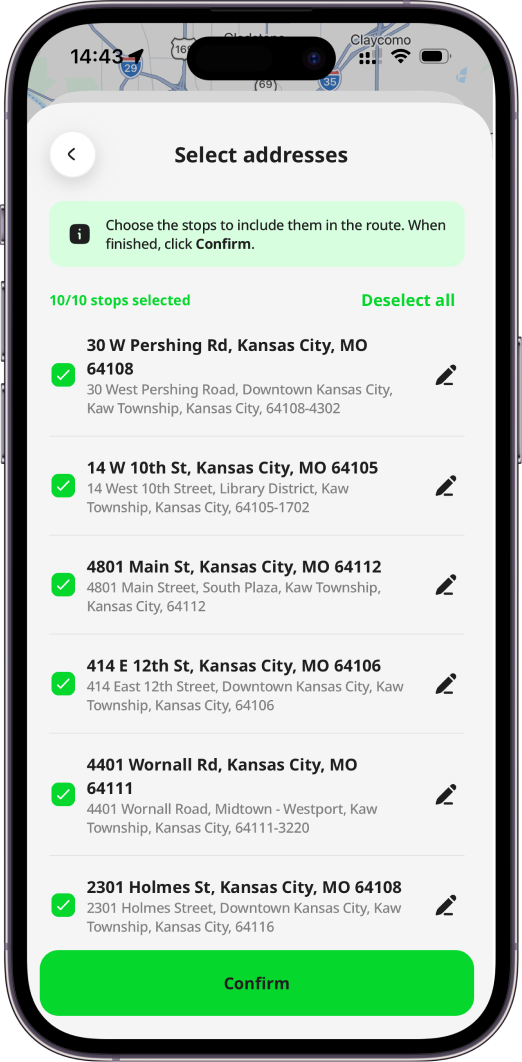
When ready, click Confirm to add the selected addresses as stops in your route.
Remember that Free level users can include up to 15 stops per route. If you exceed this limit, you will be redirected to the Subscriptions page, where you can start a trial of a higher plan (Pro or Advanced) to add all addresses. Alternatively, you can remove some stops to stay within the limit.
You can continue adding more stops using typing addresses, voice search, multi-address scanning, search locations on the map or import from photos, screenshots or PDFs. Once completed, press the Finish adding stops button to run route automatic optimization to save time and fuel.
Import Addresses from Photos, Screenshots and PDFs
The Import feature allows you to quickly add multiple stops to a route by importing PDF files or photos/screenshots of delivery lists. Geo2 uses AI to automatically detect addresses and other available delivery information, allowing you to review and edit the extracted data before adding the stops to the route.
The feature is particularly useful for drivers who receive delivery lists as PDFs or images, including:
- Amazon Flex drivers importing screenshots or PDF manifests.
- Walmart Spark drivers importing printed or shared delivery lists.
- Evri couriers scanning paper manifests before starting a route.
- Local courier and delivery businesses importing dispatch sheets received by email or messaging apps.
- Small businesses such as florists, bakeries, pharmacies, and catering companies importing daily delivery schedules without manually entering addresses.
By automatically converting delivery lists into route stops, the Import feature significantly reduces route planning time and minimizes manual data entry.
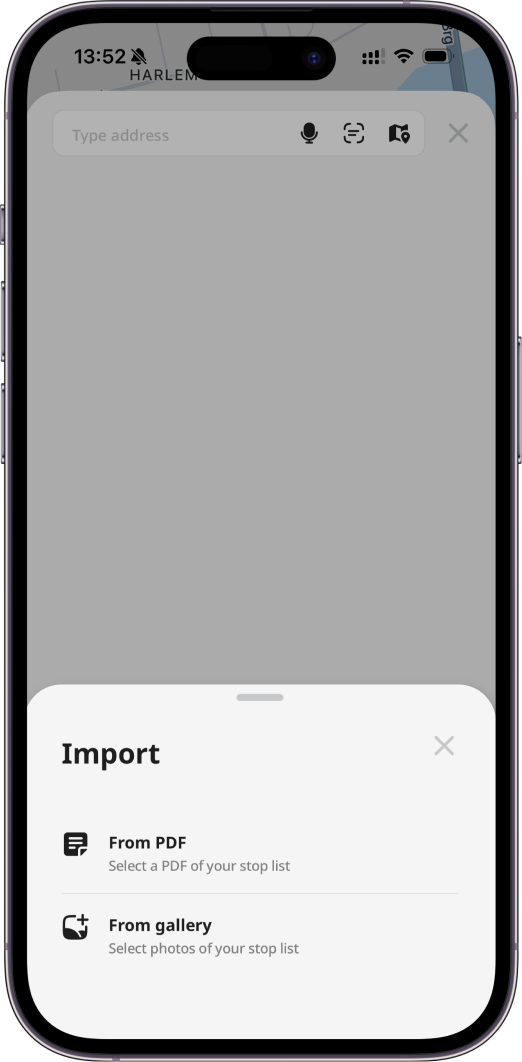
The feature is available from the Search address dialog when adding stops and can only be used for creating route stops. Press Import button to import either from PDF or gallery (select photos, screenshots). It is not available when selecting route start/end points, adding breaks, creating PODs, or editing existing stops.
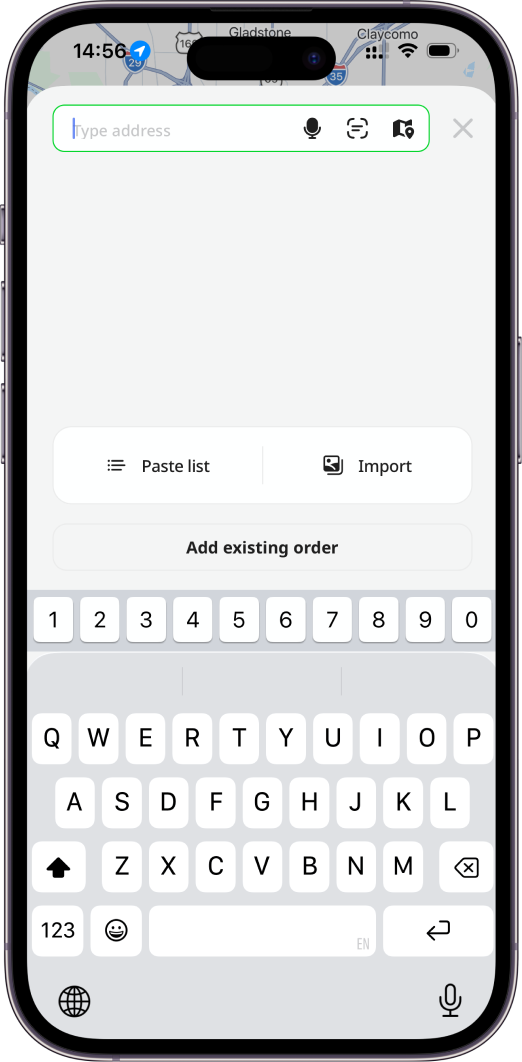
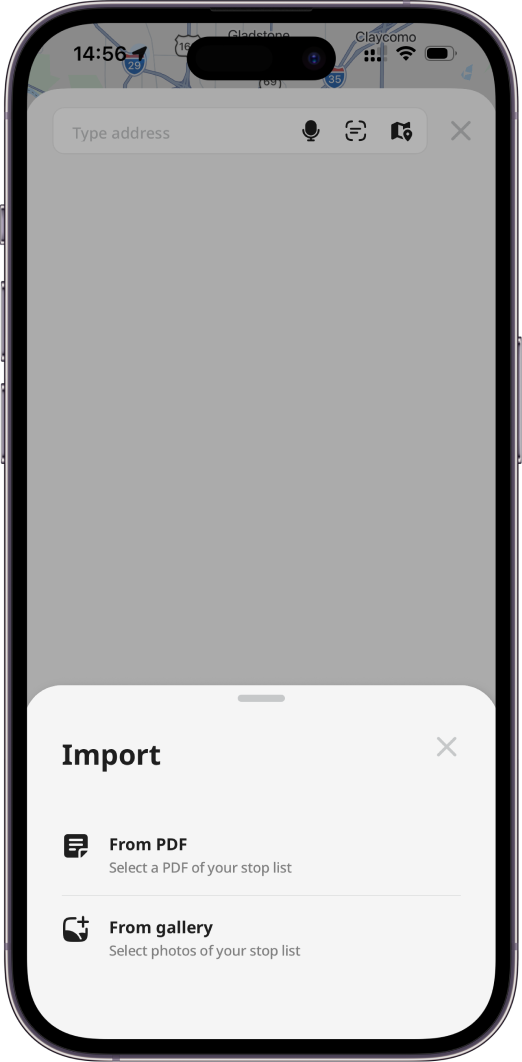
After uploading one or more files, the extracted stops are displayed on the Select stops screen. While processing is in progress, uploaded files show a preview with a loading indicator. Detected stops are automatically selected, and any uncertain information is marked as Need review until you open the stop for review. You can edit stop details by clicking the Edit button to review contact and delivery details. The Confirm button remains disabled until all uploaded files have finished processing.
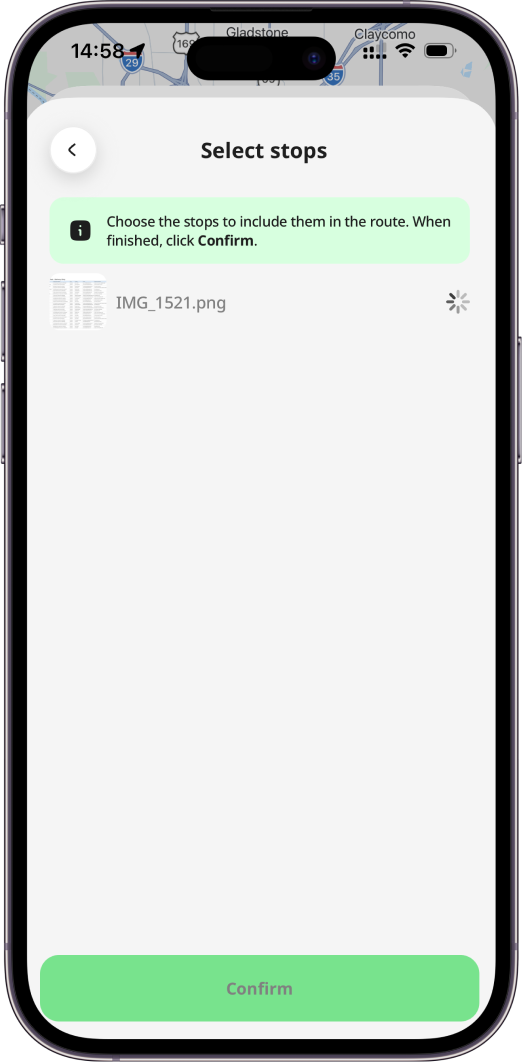
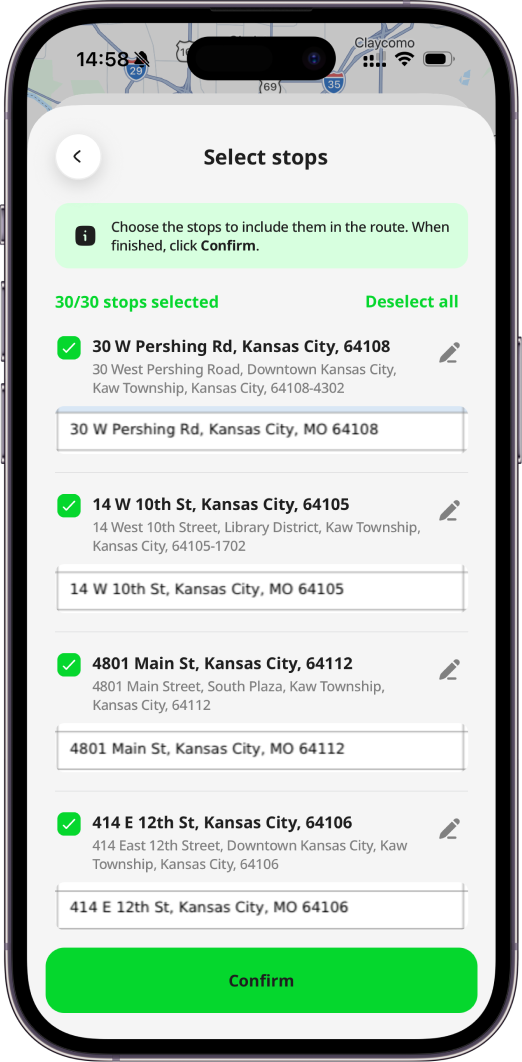
After confirmation, the selected stops are added to the route. You can import additional files later using ⋮ → Import.
You can continue adding more stops using typing addresses, voice search, multi-address scanning, search locations on the map or import from photos, screenshots or PDFs. Once completed, press the Finish adding stops button to run route automatic optimization to save time and fuel.
Subscription limitations:
- Free and Pro users can upload 1 PDF or image at a time.
- Advanced and Enterprise users can upload up to 5 files simultaneously.
The Free level's 15-stop-per-route limit also applies. If an import would exceed this limit, Geo2 displays a dialog allowing you to either upgrade (or start a free trial) and import all stops, or continue on the Free plan and import only the first 15 stops.
Stop details
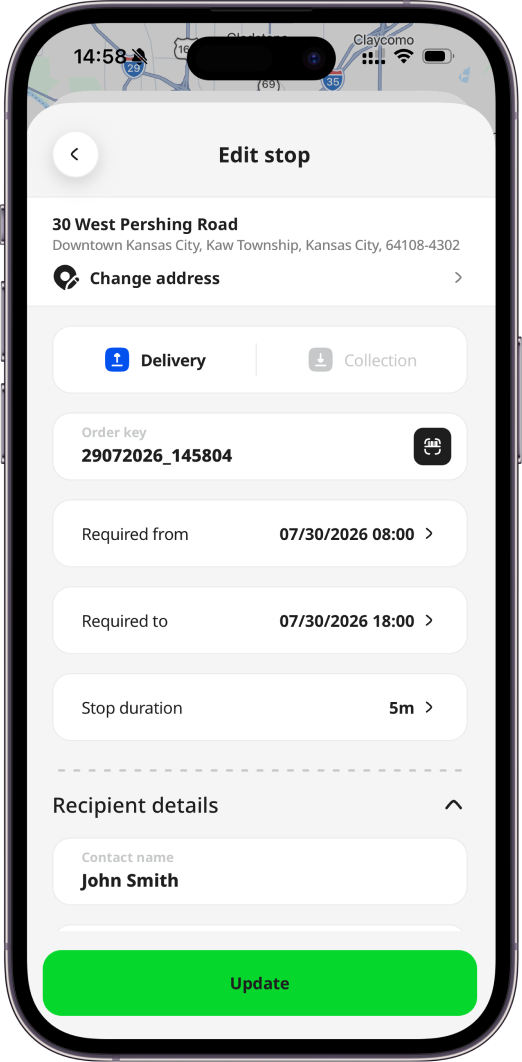
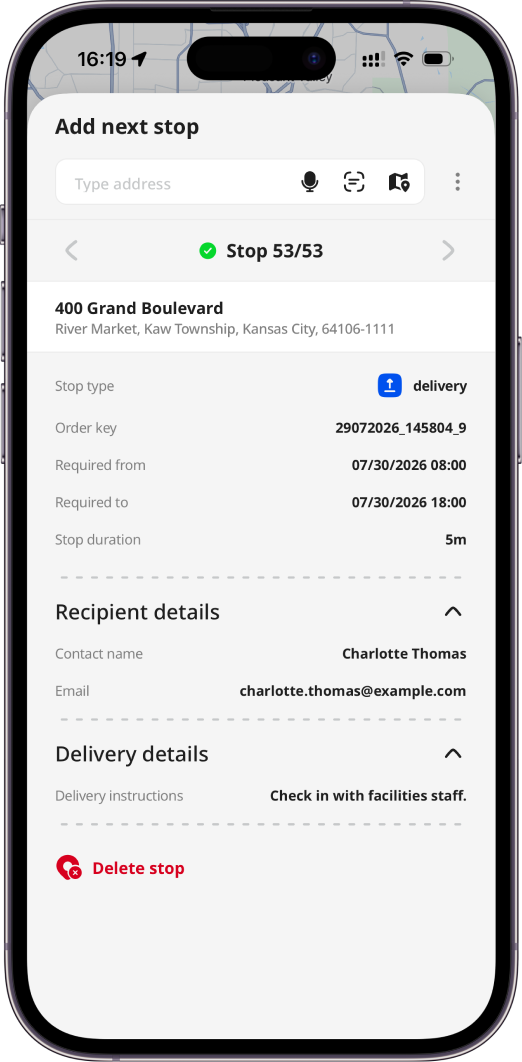
Once the stop is added to the route, you can adjust its details:
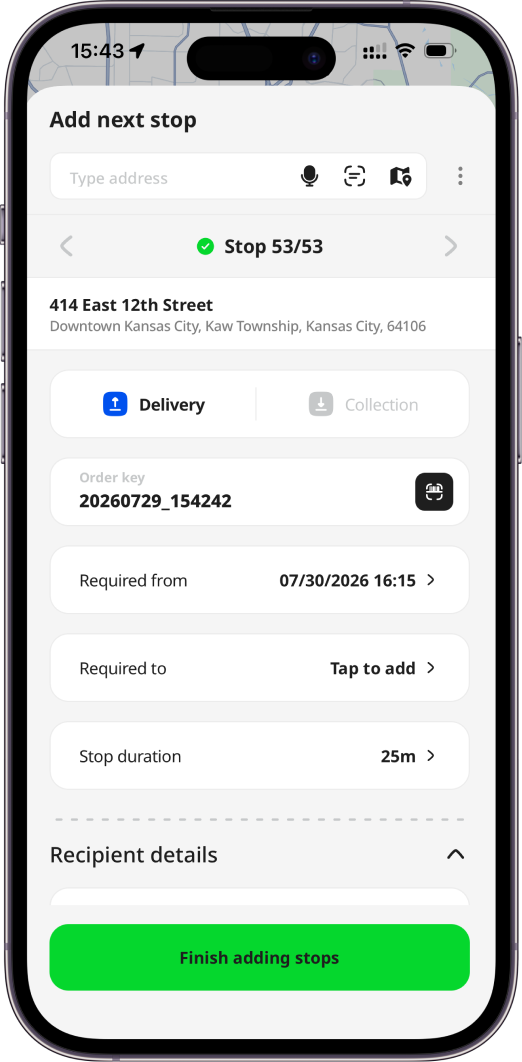
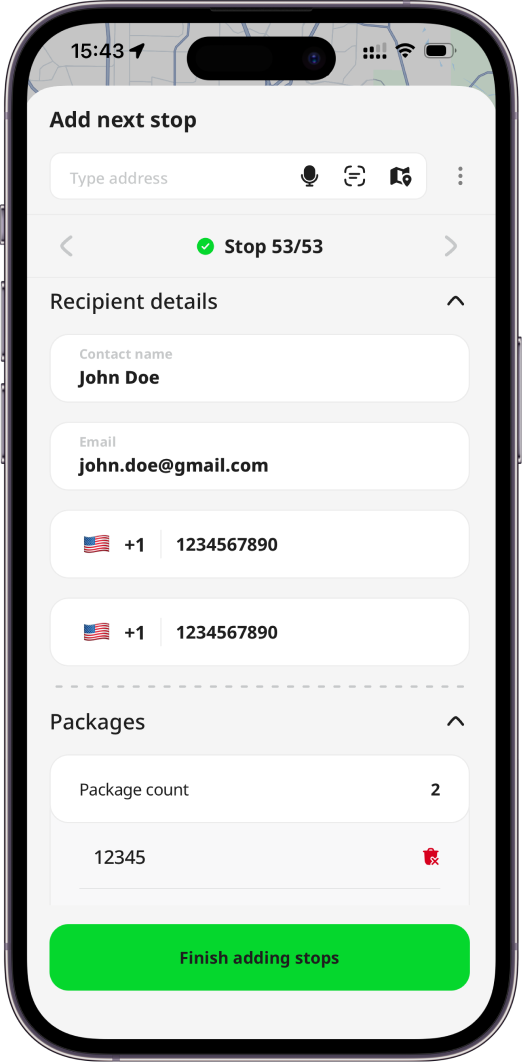
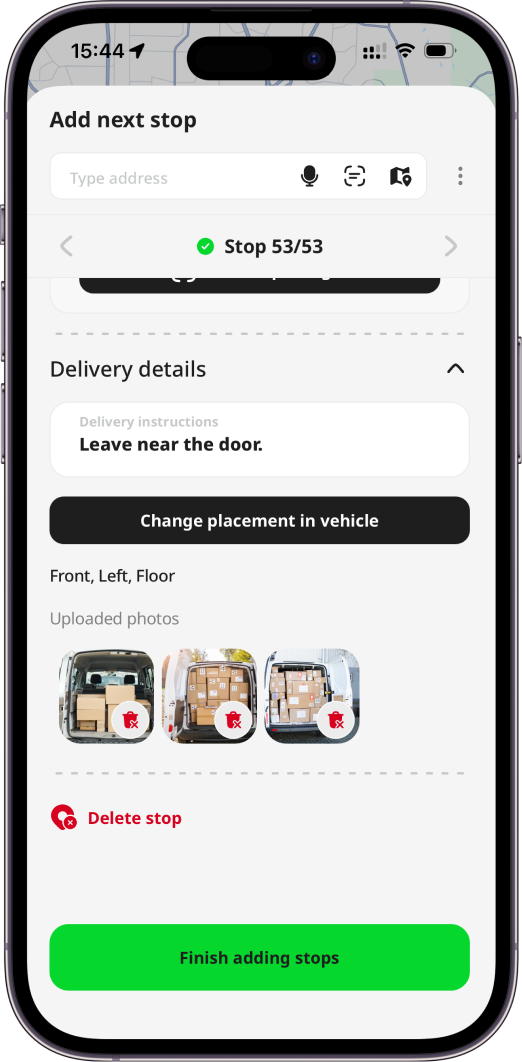
| Fields | Description | Required fields |
|---|---|---|
| Type | Delivery or Collection. | Yes |
| Order key | Order identifier unique within the environment, for example, an order number 1, 2, 3, 4, etc. By default, it will be autogenerated from the current date and time. You can click on the Scan icon to scan the key. | Yes |
| Committed | For information - date/time that has been agreed with the customer for delivery/collection. This field is available only for users with Enterprise subscription level. | No |
| Required from | For information - from when the customer requires the order to be delivered/collected. It can be used for route optimization with time windows. | No |
| Required to | For information - till when the customer requires the order to be delivered/collected. It can be used for route optimization with time windows. | No |
| Stop duration | The amount of time the delivery vehicle is expected to remain at a route stop. This is used when orders are first brought into a route and, together with drive times, stop durations are intended to lead to route durations that are more realistic than if only drive time was considered. | Yes |
| Tab - Recipient details | Optional recipient contact details like contact name, email, phone and mobile phone numbers. | Yes |
| Tab - Packages | Optional package barcodes. Barcodes can be either typed in manually or scanned. Adding package information is available only with Advanced and Enterprise subscription levels. | No |
| Delivery instructions | Optional notes for drivers that are shown in the mobile app. For example, "leave with reception". | No |
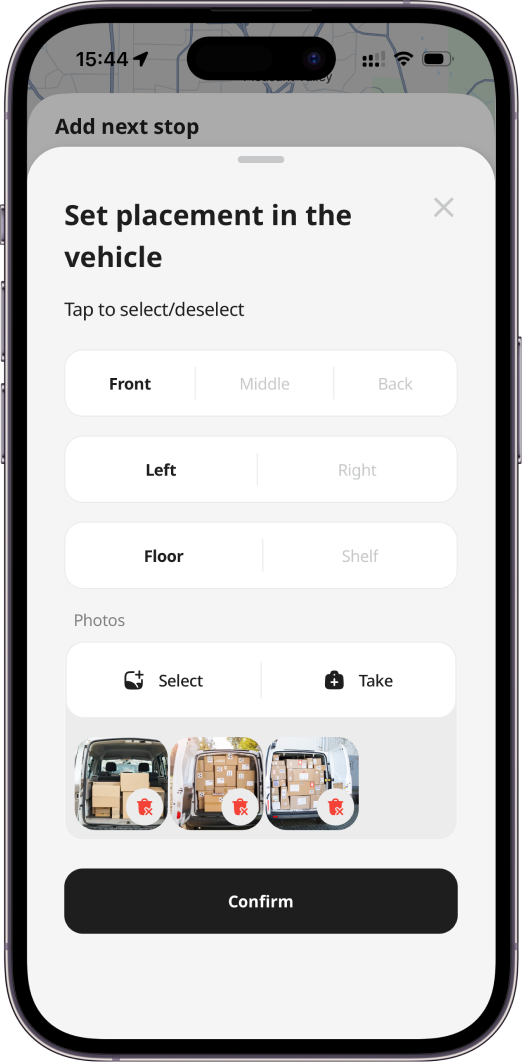
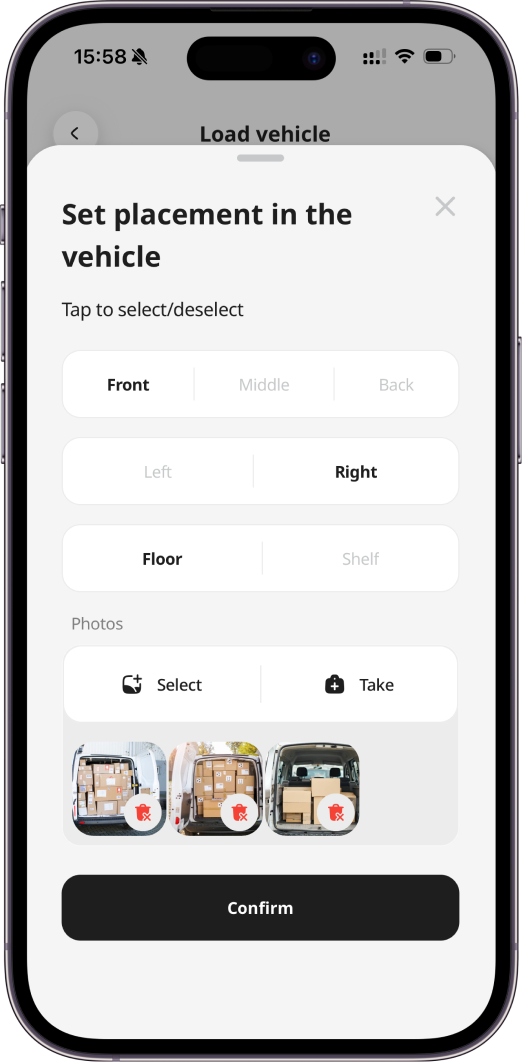
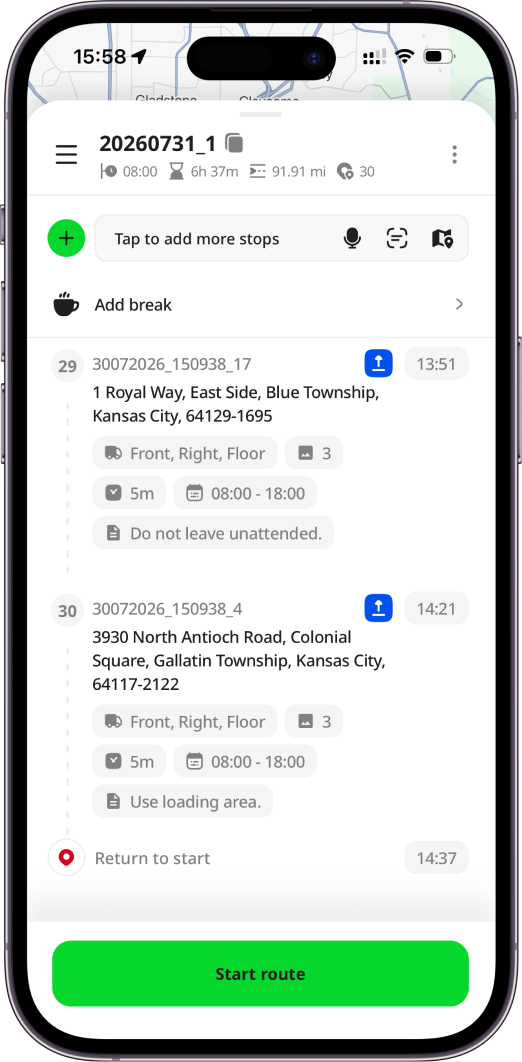
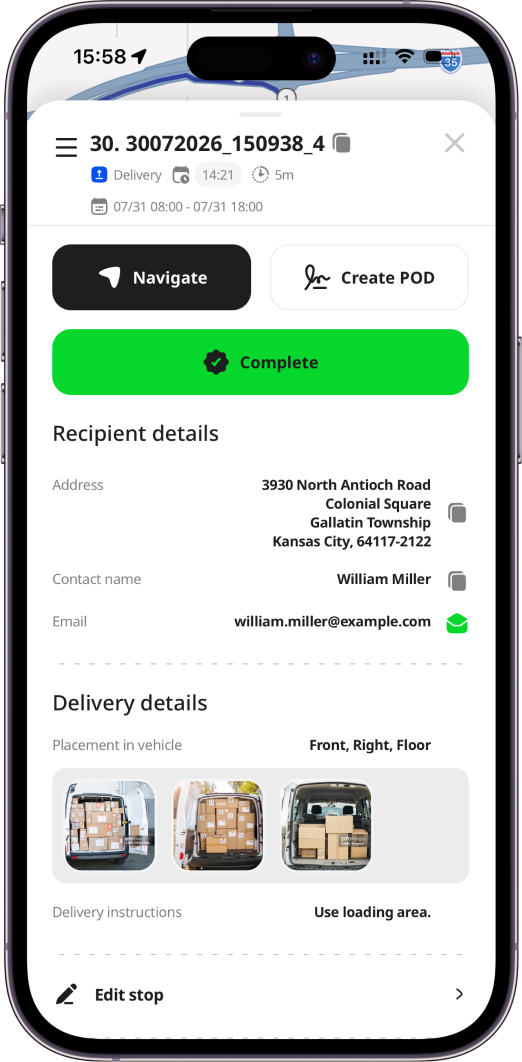
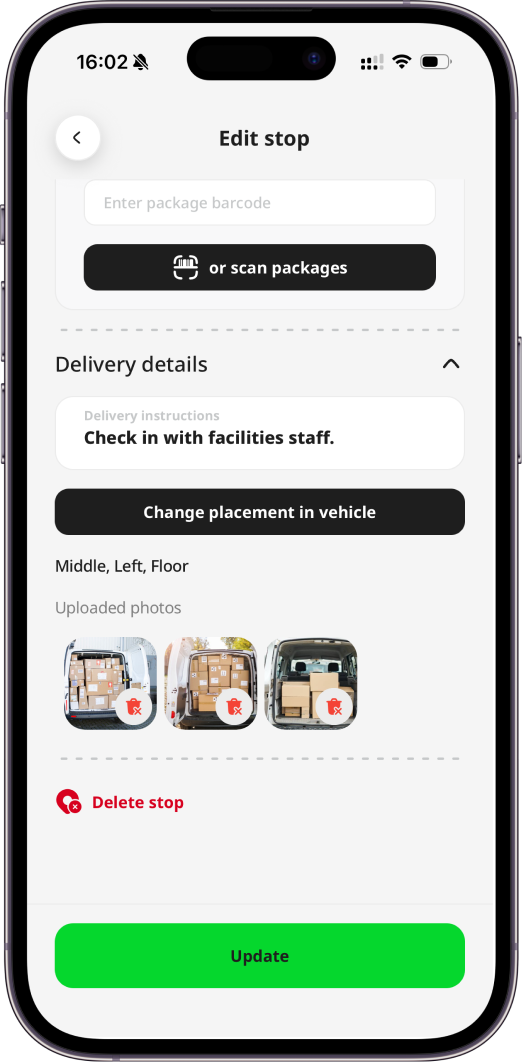
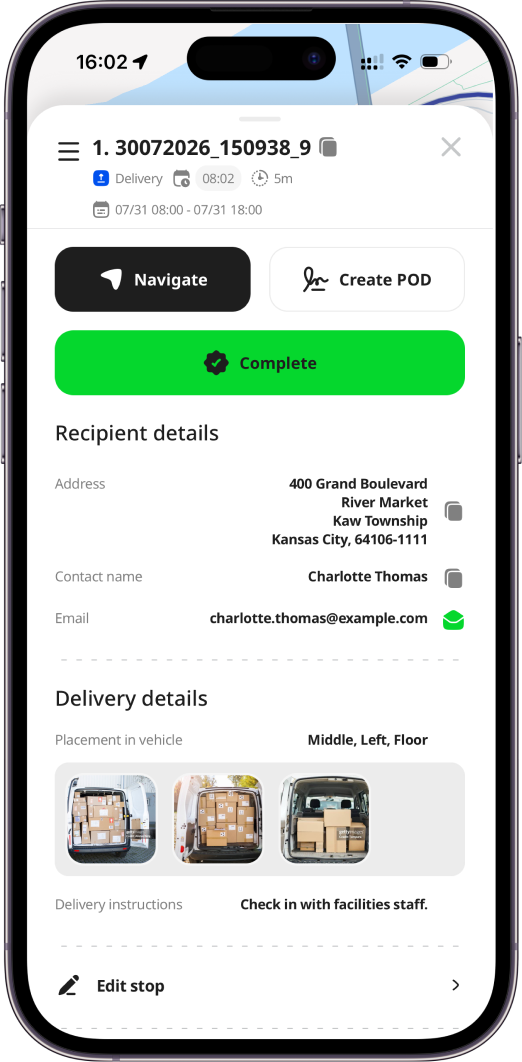
You can set parcel placement (e.g., "front right" or "left shelf") and optionally add photos for a delivery order by pressing the Set placement in the vehicle button at the bottom of the page. Press Confirm to save the placement, which can be updated later. The placement and photo count appear on the stop card, and full-size photos can be viewed in Stop details page.
If a route starts or ends at a depot, it will be used as a stop depot: the route start depot will be populated to the delivery stop, and the route end depot will be populated to the collection stop. If a route does not use a depot as its start or end point but there is a default depot selected in Hub: Environment Settings, it will be used as a stop depot. If there is no default depot, the Depot field inside a stop will be blank.
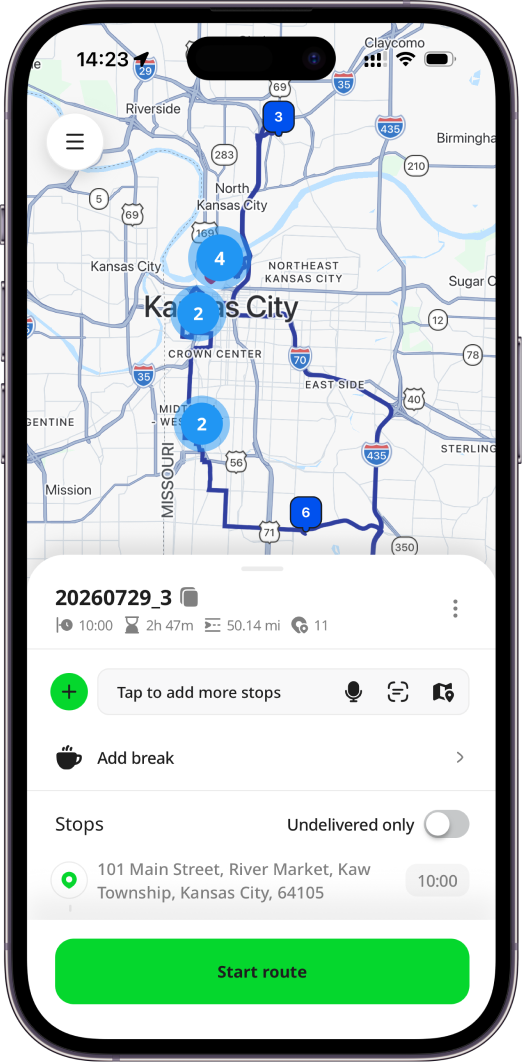
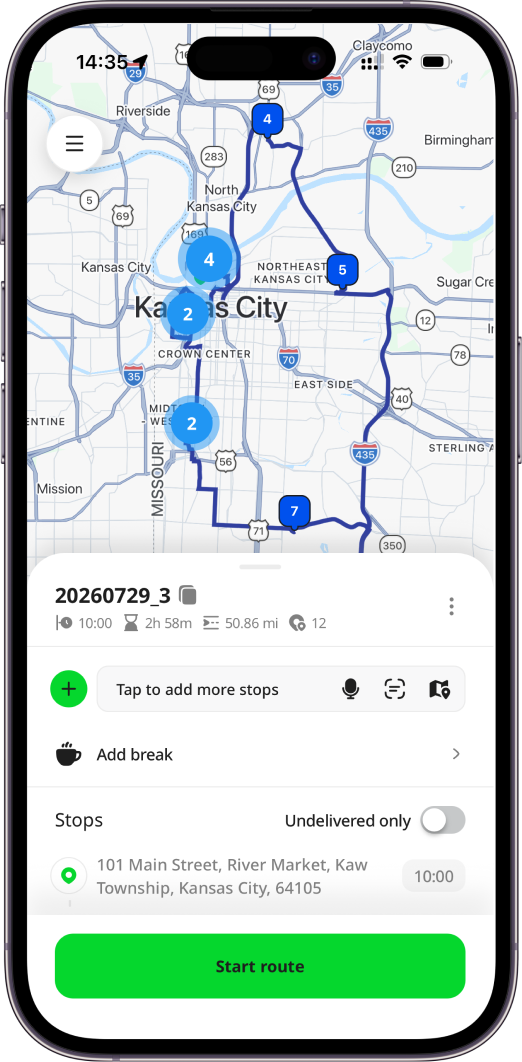
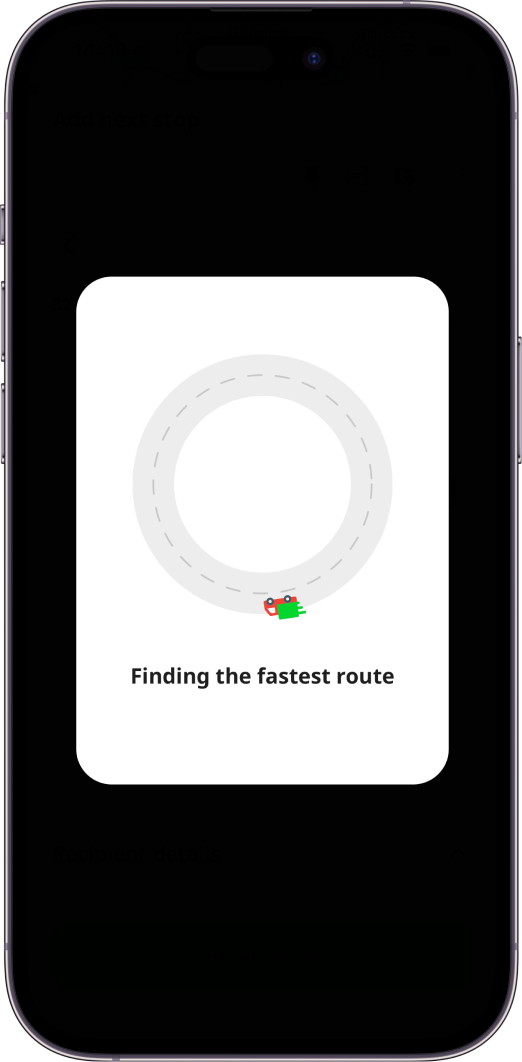
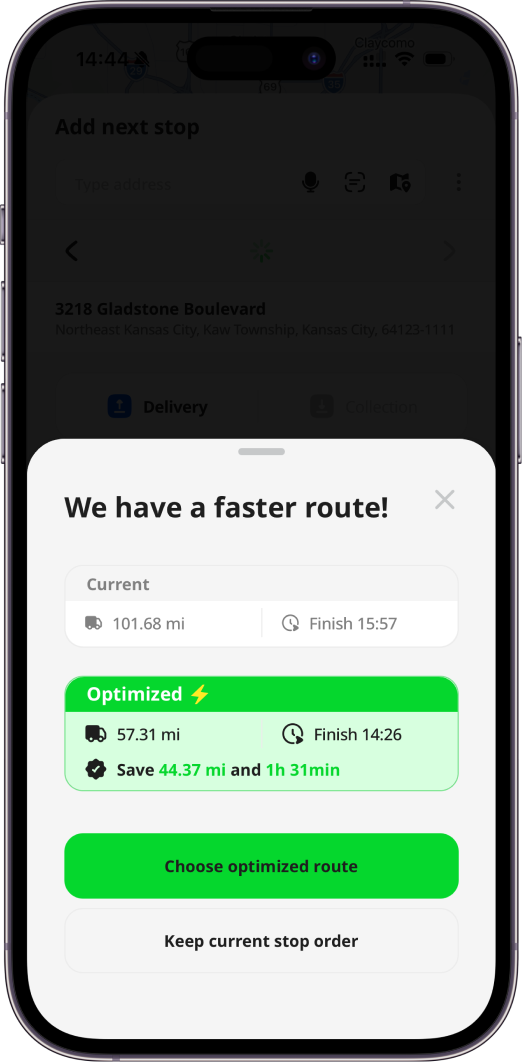
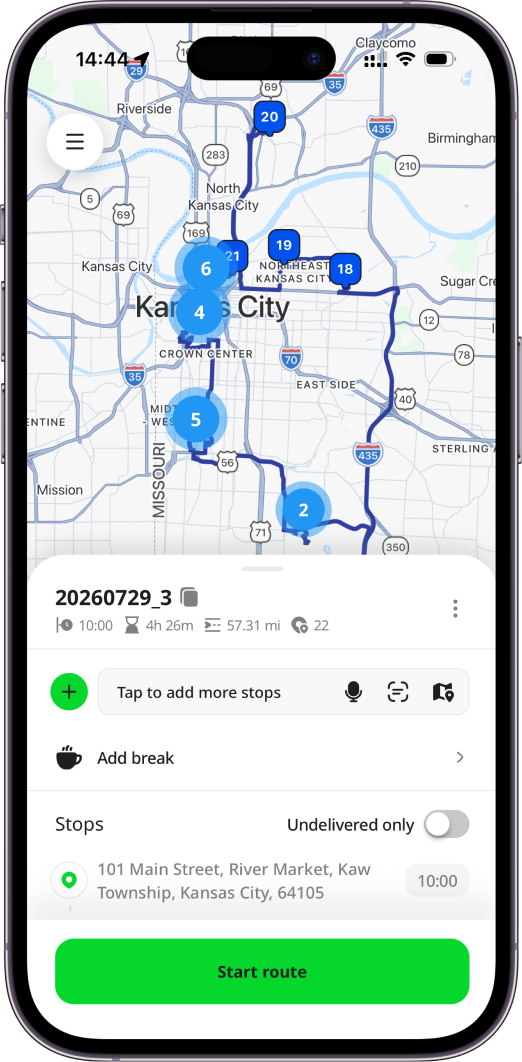
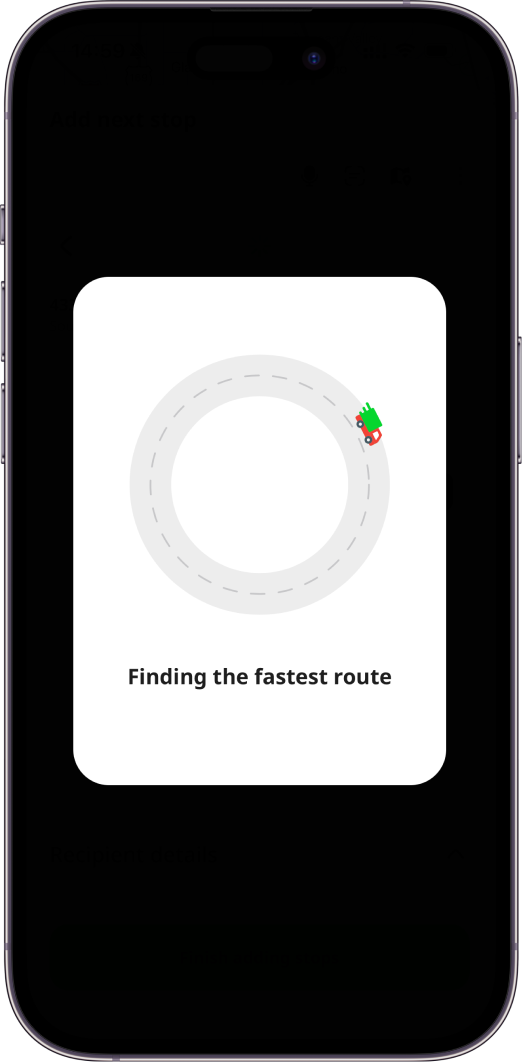
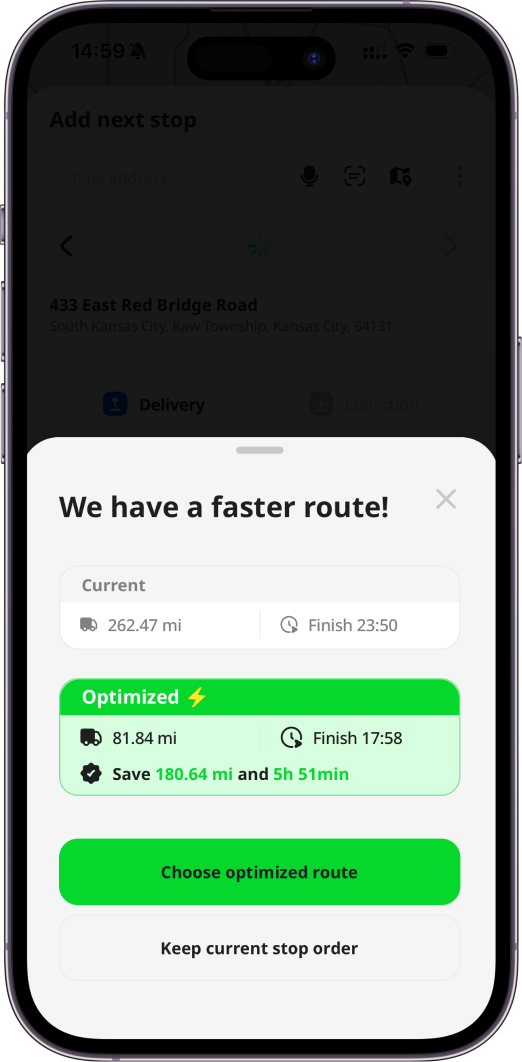
After adding all stops to the route, you need to press the Finish adding stops button at the bottom of the dialog to run automatic route optimization find the fastest route. You can proceed with your current or optimized stop order. Once selected, you will be redirected back to Route view page where you can see the added stop cards. It will be shown on the map when you slide down the bottom sheet. You can press the Start route button to start the route or add more orders.
Add Existing Order
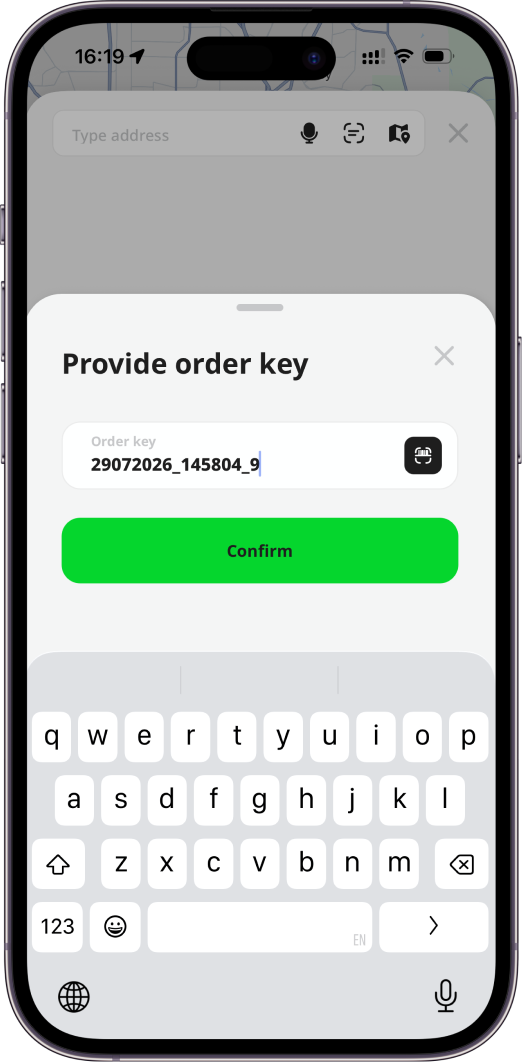
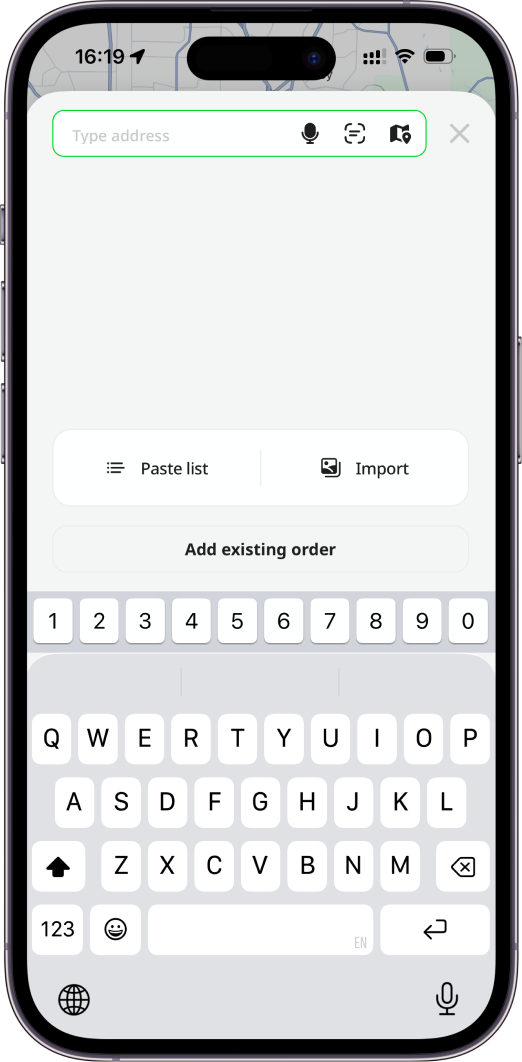
To add an existing order to a route, press the Add existing order button on Search address dialog. You need to type in the order key or scan it and all the information from this order will be automatically pre-populated to the fields. You cannot edit the order information on this page. Fields will be disabled for editing. To edit the order, you need to add it to the route, then you can go inside the order and press the Edit stop button.
If a route starts or ends at a depot, orders with depots must match: the delivery depot must align with the start, and the collection depot with the end. Orders without assigned depots can be added to any route, and if a route does not use a depot as its start or end point, any order, with or without a depot, can be added.
If this order is already assigned to another route, you will be asked to confirm whether you want to move it from one route to another.
After adding all stops to the route, you need to press the Finish adding stops button at the bottom of the dialog to run automatic route optimization find the fastest route. You can proceed with your current or optimized stop order. Once selected, you will be redirected back to Route view page where you can see the added stop cards. It will be shown on the map when you slide down the bottom sheet. You can press the Start route button to start the route or add more orders.
Adding/Displaying Breaks
For drivers — especially solo drivers managing long routes — planned breaks are essential. They provide a structured way to refuel or recharge the vehicle, take a rest, or pause safely between deliveries without disrupting the overall schedule. By integrating breaks directly into the route, you can maintain efficiency while also supporting your well-being and compliance with driving regulations. The route view displays breaks alongside order stops, making them a natural part of the journey rather than an afterthought. With the appropriate permissions enabled in your environment, breaks can be added both in the mobile app and in Geo2 Hub. Adding breaks is available with all subscription levels, starting from Free level.
To add a break, tap the Add break button at the top of the stop list on Route view page. This option becomes available once at least one stop has been added to the route. You will be prompted to define the break duration (in minutes) and optionally assign a location. Locations can be added by typing an address, scanning, using voice search or searching location on the map.
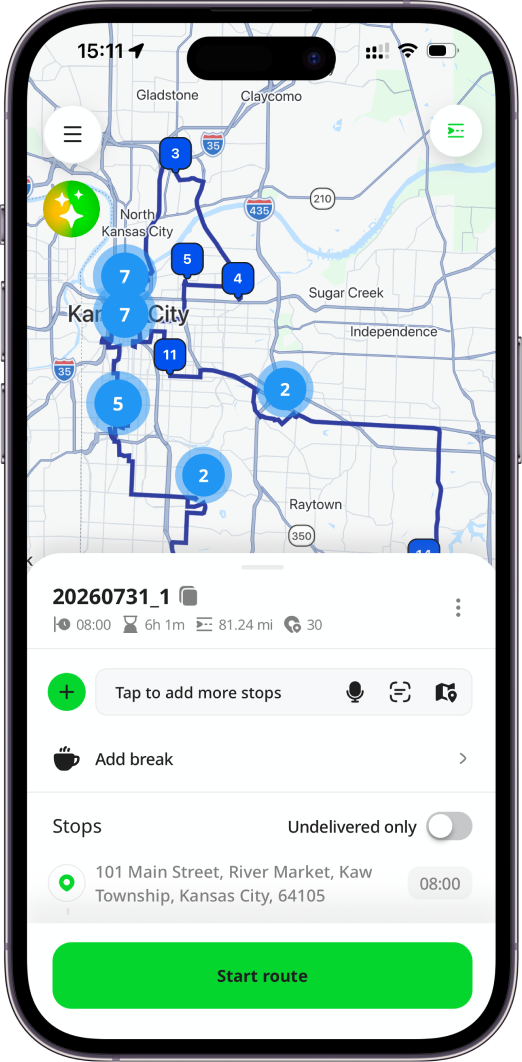
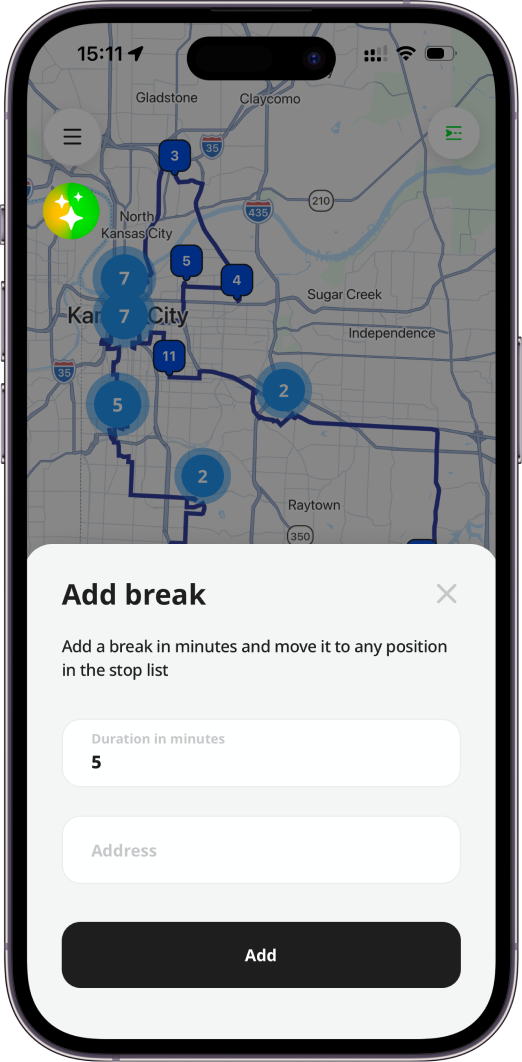
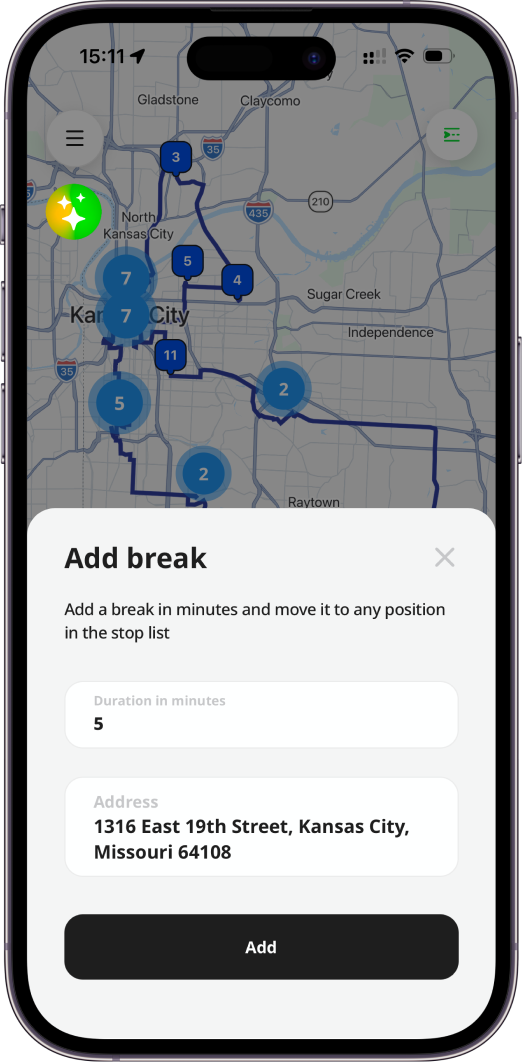
Once confirmed, the break is added to the end of the stop list, but it can be easily repositioned using drag-and-drop to fit your preferred sequence. The route is automatically recalculated to include the new break, ensuring accurate timing and navigation.
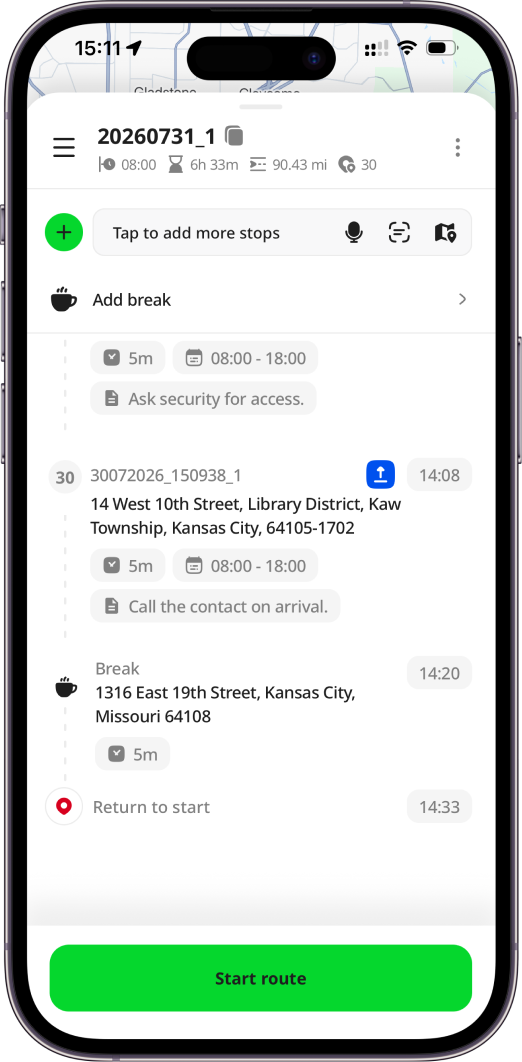
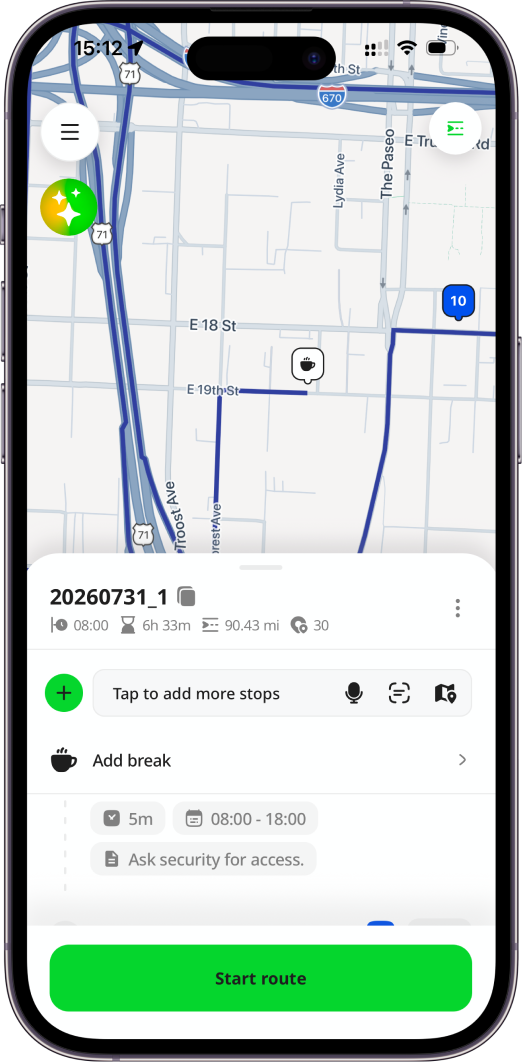
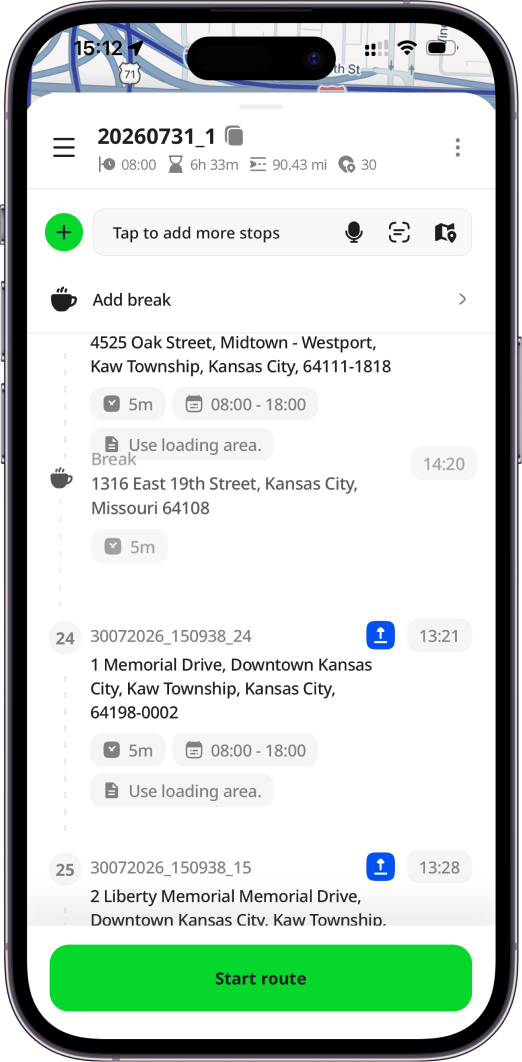
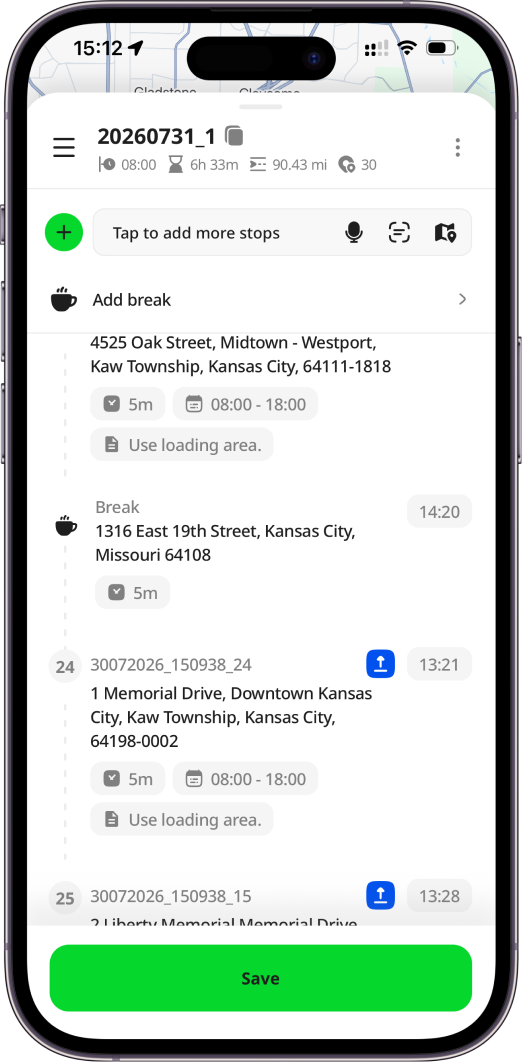
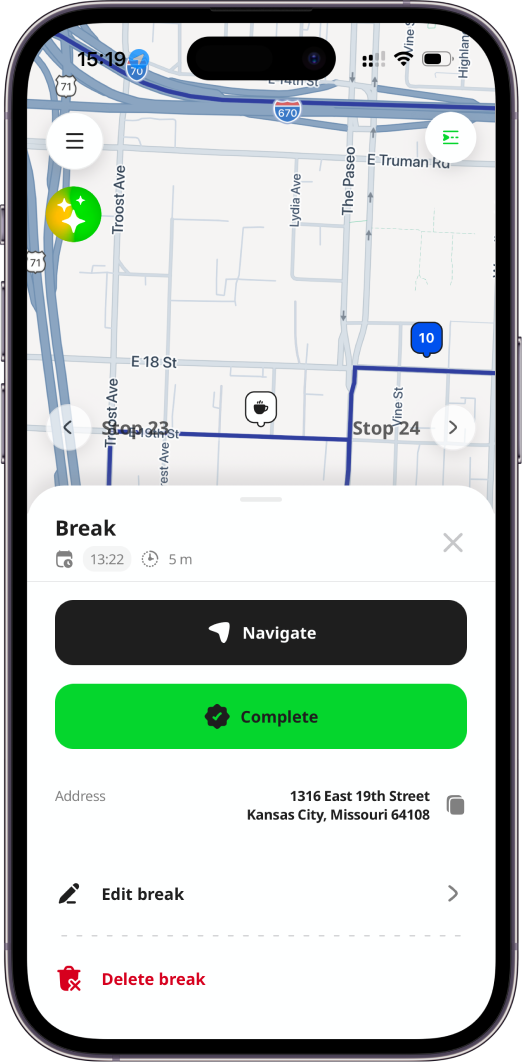
If a break includes a location, it will also appear on the map. Selecting either the break card in the stop list or its map marker opens the Break details page. From there, you can start navigation using your preferred app, such as Waze, Google Maps, or Apple Maps, and mark the break as completed once finished. You can also edit or remove the break from the route at any time.
Drag-and-Drop Stops
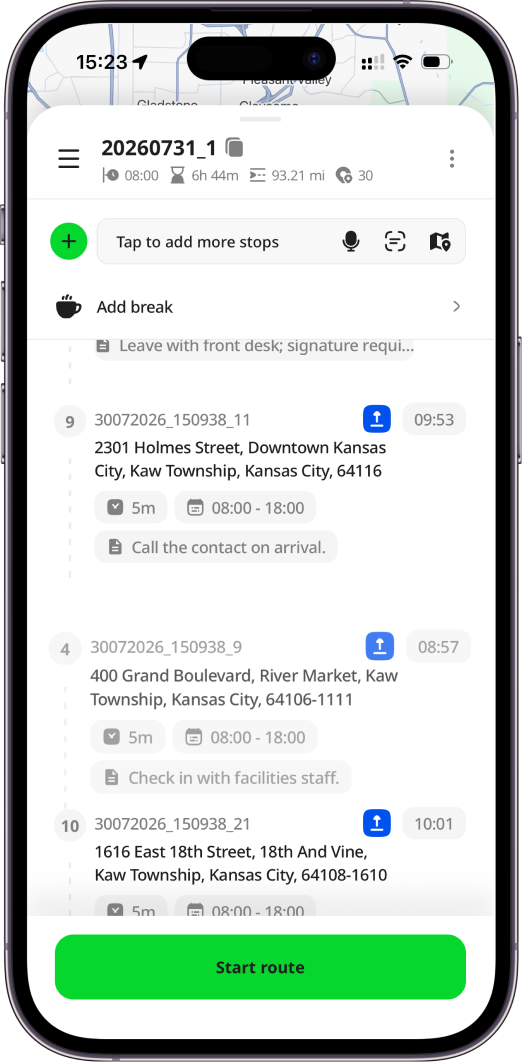
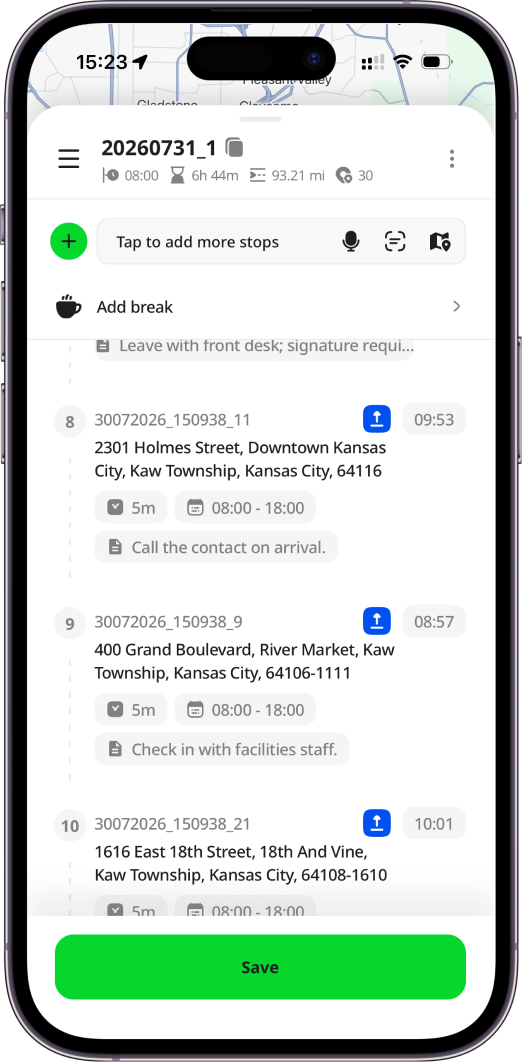
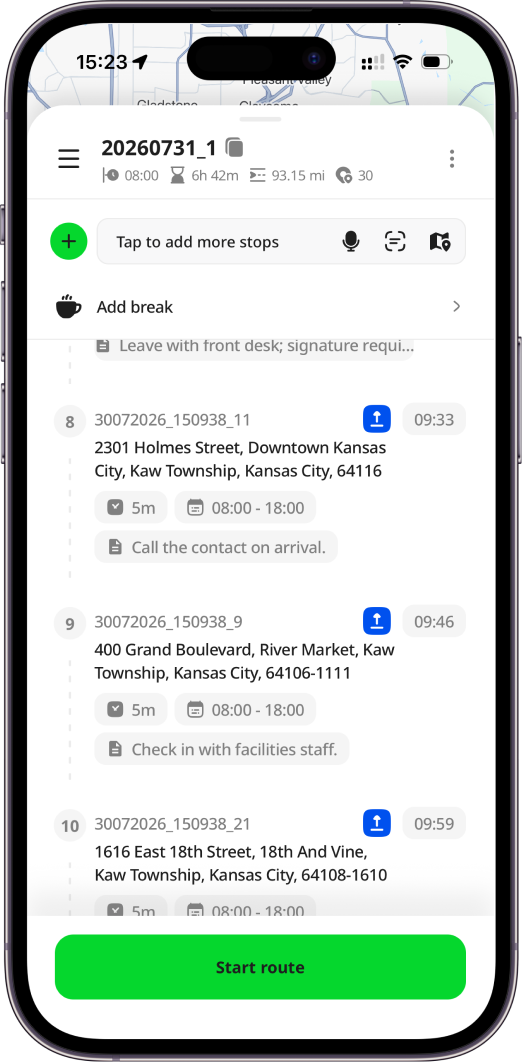
Stop cards could be drag-and-dropped to any position of the route. For it, you need to press on the stop card and move it. Remember to press the Save button to save your changes. Once saved, a route will be automatically calibrated updating timings and distance.
Route start and end cards cannot be moved.
Calibrating Route
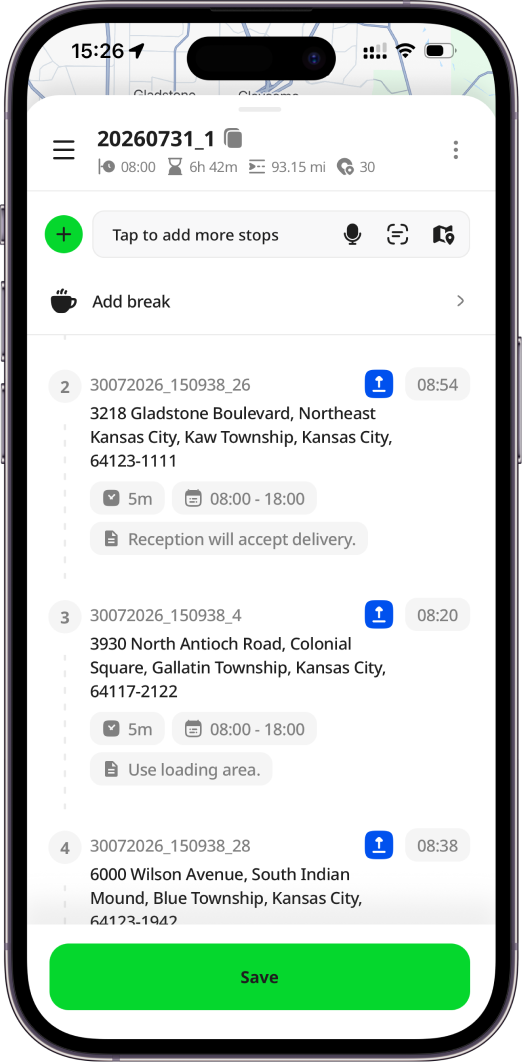
Once stops are added to a route, we run automatic route optimization and calibration so you can choose the fastest and/or shortest route. You can also press the : (three dots) icon on Route view page and select Calibrate option to update the planned timings and distance of the route without modifying the order list. Example: You created 4 stops one by one, didn't change their position, and clicked on the Calibrate button. The route didn't change but the planned time changed. Changes are saved automatically.
The Calibrate option is available if a route has at least 1 order.
Before route calibration:
After route calibration:
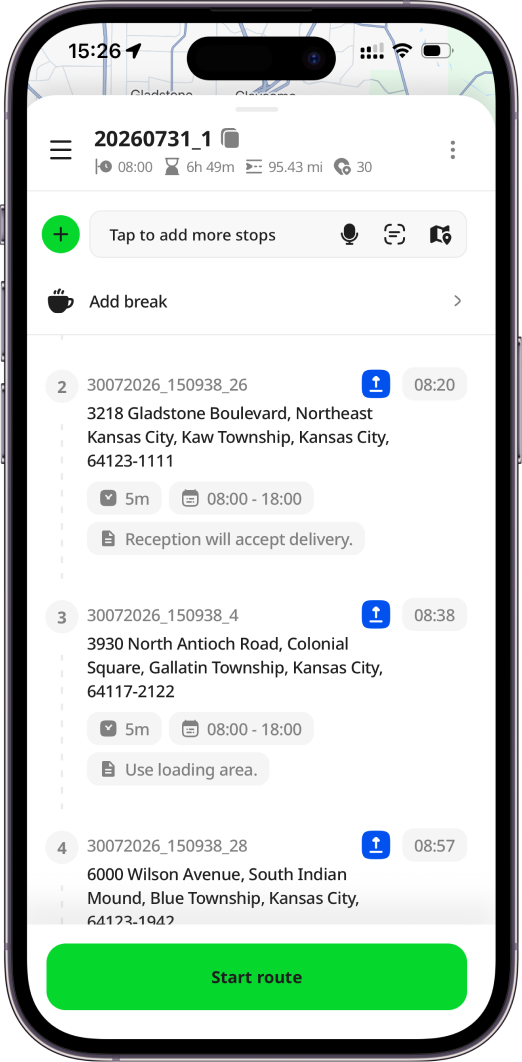
We apply automatic calibration in most cases so you don't need to press Calibrate:
- removing stops from a route and pressing
Save - adding, changing, deleting a break inside a route
- changing (shuffling) stop order inside a route and pressing on
Save - changing start and end points in a route if there is at least 1 stop
- changing route planned start time if there is at least 1 stop
- changing vehicle in a route if there is at least 1 stop
- changing time-at-stop inside order or route stops
- deleting a stop on Stop details page
Exceptions when we don't apply automatic calibration:
- editing a stop (editing recipient address inside stops)
- manually set up a route inside a stop (done from Hub)
- making changes in a depot address or vehicle speed factor
If the route already calibrated, the Calibrate button will be disabled.
Optimizing Route with Time Windows
After adding stops to a route and pressing Finish adding stops button, we run automatic route optimization and calibration so you can select the fastest or shortest route. If the route includes at least one stop with specified Required from and/or Required to fields and you have an Advanced or Enterprise subscription, the system optimizes the route with time windows. To use the Optimize with time windows option separately, press the : (3 dots) icon on Route view page and select the Optimize with time windows option. Route optimization requires at least two stops, with at least one stop having specified required time slots (either “Required from”, “Required to”, or both).
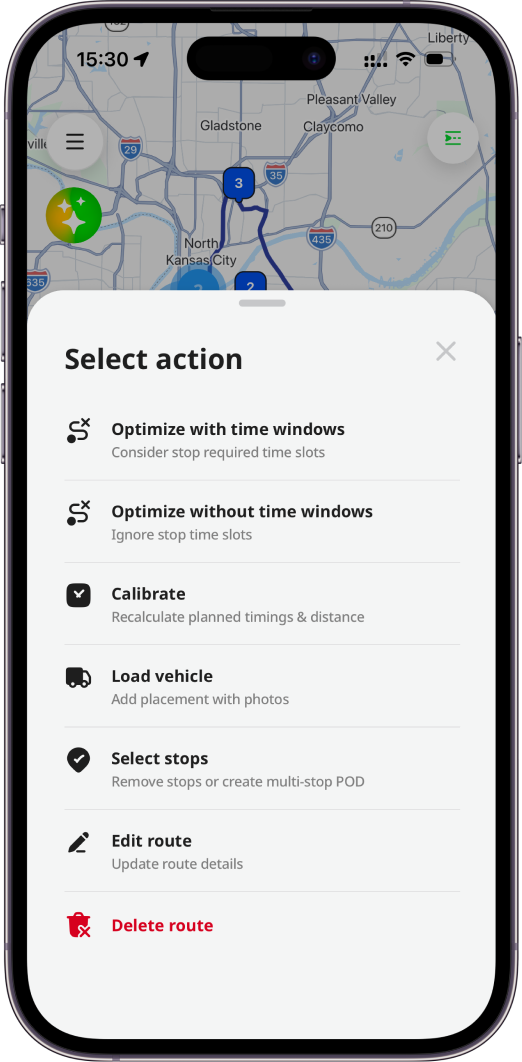
When you press Optimize with time windows, the geo-locations of the assigned route start point and the stops will be used to suggest an optimum driving route as well as to match the required time windows for each stop. The time window specified using the Required from and Required to fields inside a stop is not considered a hard constraint by the system. That is, the system doesn't fail if the stop cannot be visited during the time window; instead, the system tries to find a route that visits the stop during its time window, but if time-window violations are inevitable, the system tries to find a solution that minimizes the time-window violation time for all stops in the problem.
If you have provided vehicle dimensions (“Gross weight”, “Height”, “Width”, and “Length” fields) for the vehicle assigned to the route, it will be used for optimization with vehicle restrictions. The system will factor these dimensions into route building to generate the most efficient outcomes, for example, to avoid bridges with height restrictions, narrow roads unsuitable for wider vehicles, or areas with weight limits that could affect the selected route.
Changes are saved automatically.
Before route optimization:
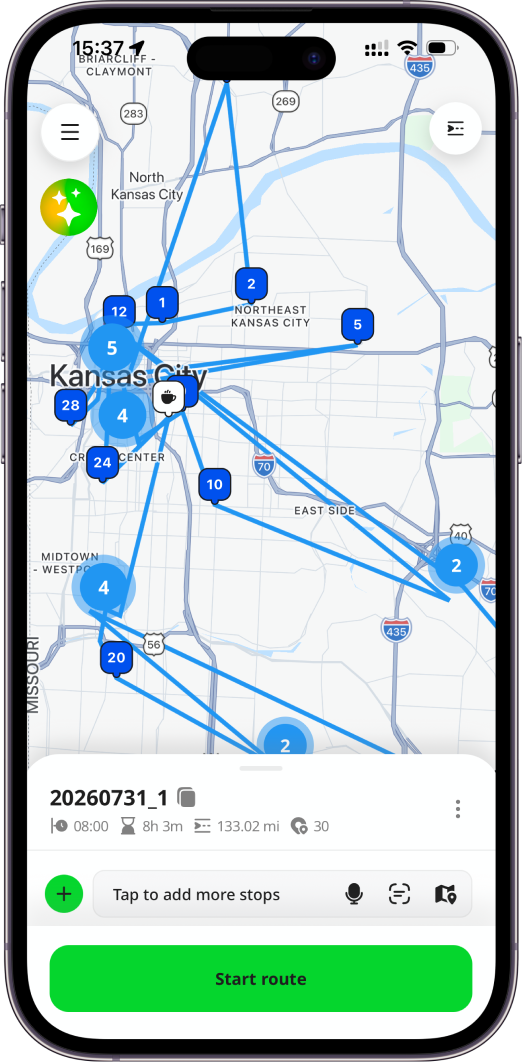
After route optimization with time windows:
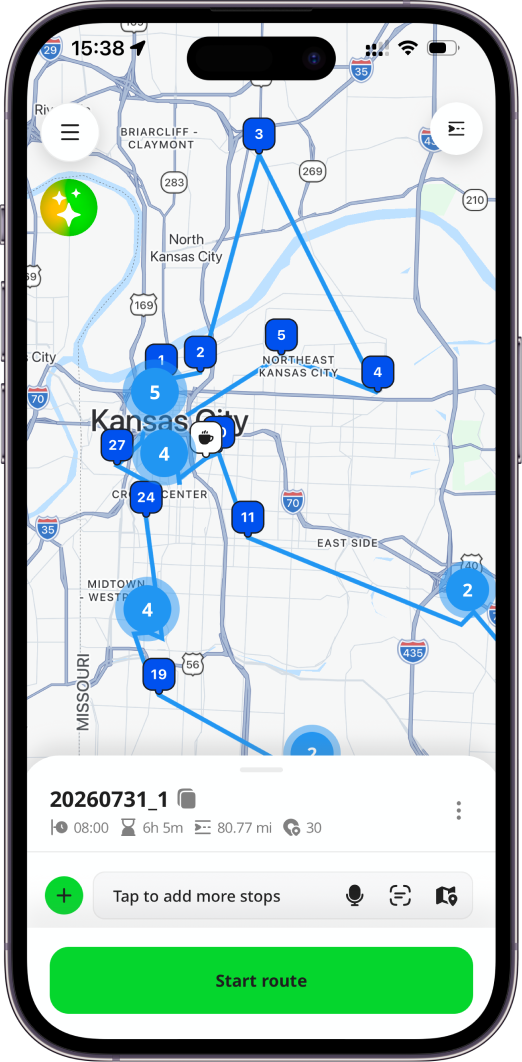
If the route is already optimized with time windows, the Optimize button will be disabled however, you can still optimize the route without time windows and compare the difference.
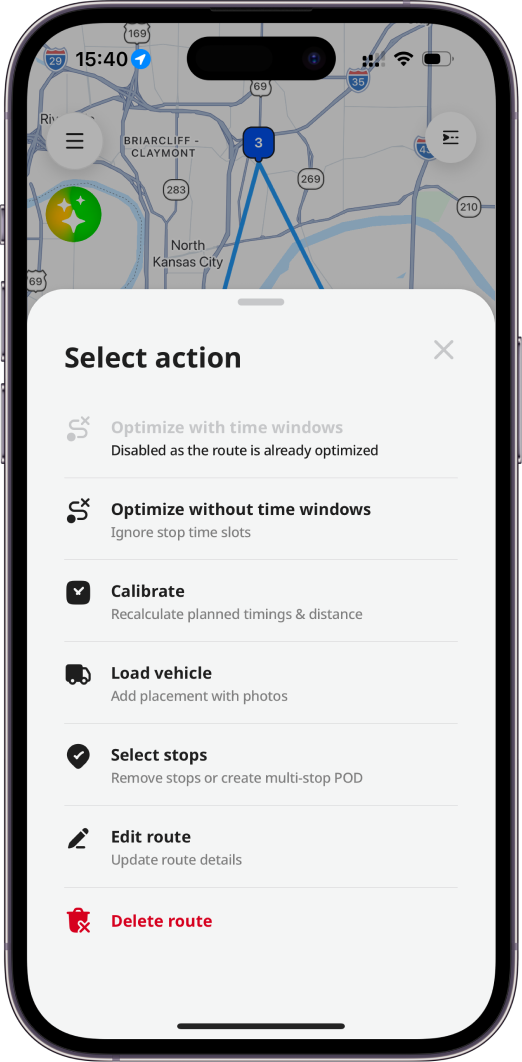
Optimizing Route without Time Windows
After adding stops to a route, we run automatic route optimization and calibration so you can select the fastest or shortest route. If stops lack required time windows ("Required from" and/or "Required to" fields), the system optimizes without time windows. To use the Optimize without time windows option separately, press the : (3 dots) icon on Route view page and select the Optimize without time windows option. Optimization without time windows is available on all subscription levels, starting from Free level.
Route optimization is available when a route has at least two orders.
When you press Optimize without time windows, the geo-locations of the assigned route start location and the stops will be used to suggest an optimum driving route. The order of the stops may be changed and the planned timings and distance of the route updated. If you have provided vehicle dimensions (“Gross weight”, “Height”, “Width”, and “Length” fields) for the vehicle assigned to the route, it will be used for optimization with vehicle restrictions. The system will factor these dimensions into route building to generate the most efficient outcomes, for example, to avoid bridges with height restrictions, narrow roads unsuitable for wider vehicles, or areas with weight limits that could affect the selected route.
Changes will be saved automatically.
Before optimization without time windows:
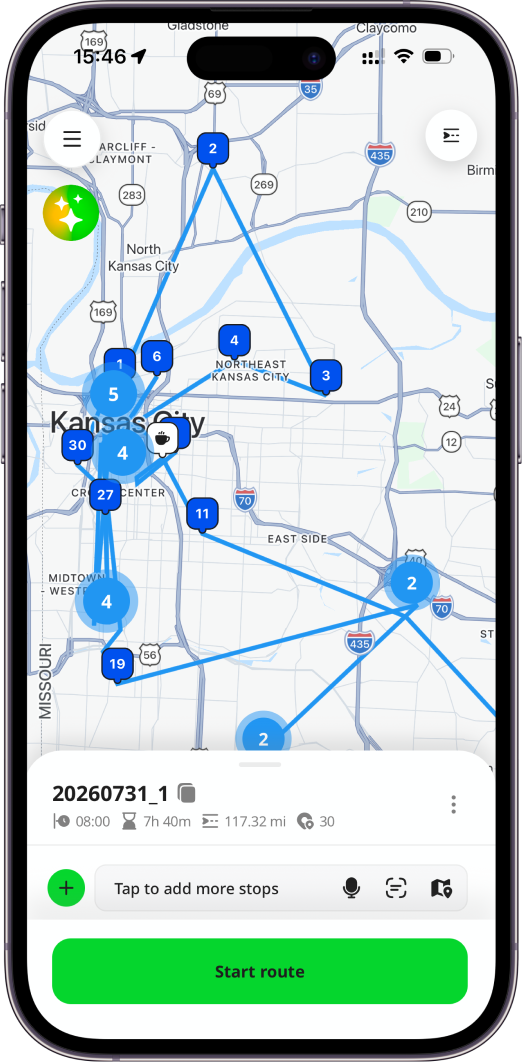
After optimization without time windows:
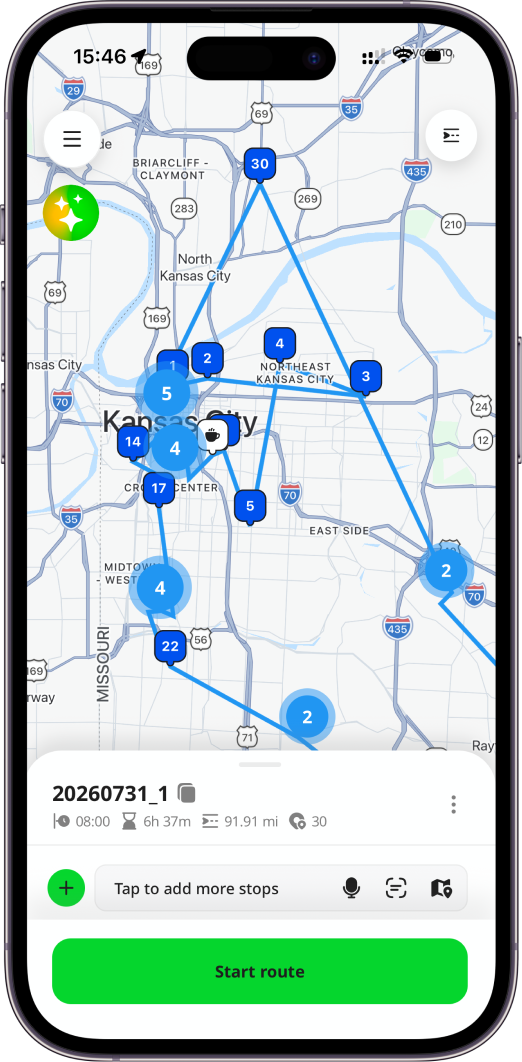
If the route is already optimized without time windows, the Optimize button will be disabled however, you can still optimize the route with time windows and compare the difference.
Editing and Deleting Route
By pressing 3 dots icon on a route card on Routes page, the dialog will be opened with the following options: Edit, Delete, and Select routes for bulk route deletion. You can create, edit, and delete routes only if you have permission to do it - Manager or Admin role in the current environment.
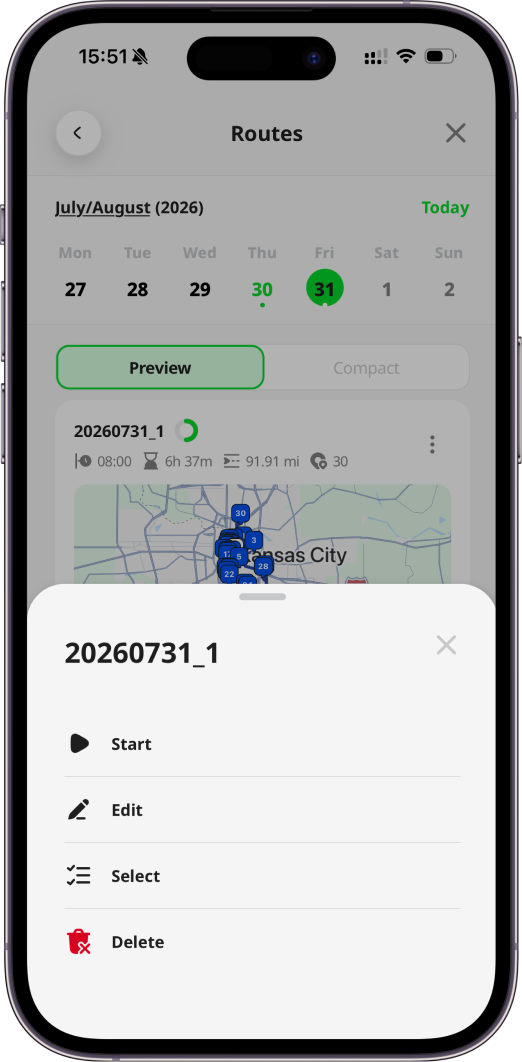
You can also click on the 3 dots icon on the Route view page and select the Edit route or Delete route option.
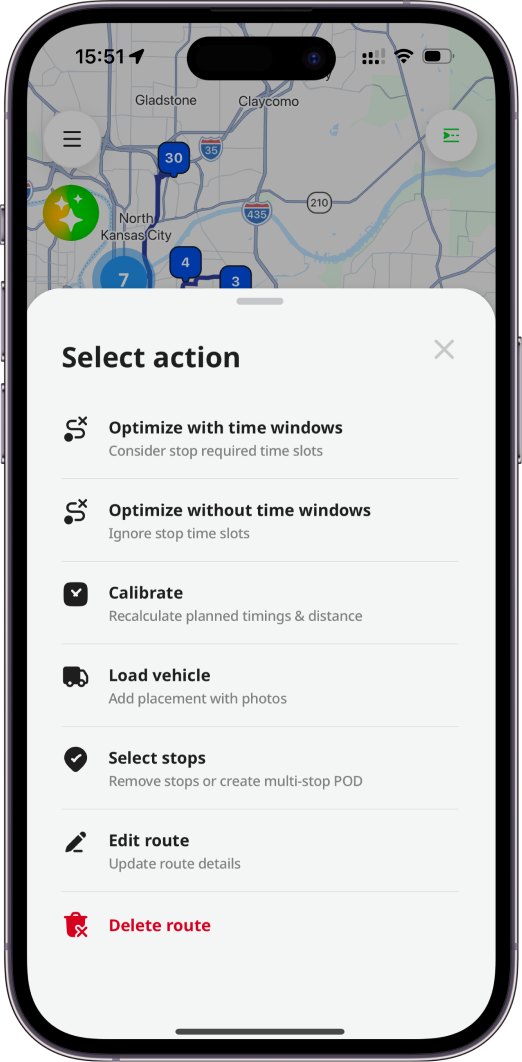
After clicking on the Edit button, you will be redirected to Edit route page where you can change some route details and save changes.
After clicking on the Delete button, the confirmation dialog will be displayed where you need to confirm the deletion of the route. It's not possible to delete the route that has the Started or Completed status.
Editing and Deleting Stop
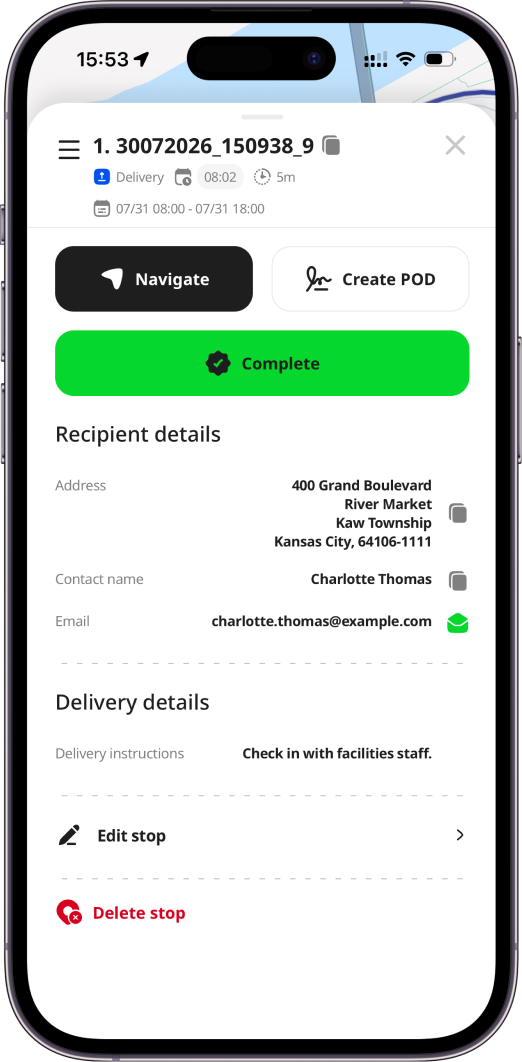
To edit or permanently delete a stop, you need to go to the Route view page and click on the stop card. You will be redirected to Details page. At the bottom of the page, you will see the Edit and Delete stop buttons. After clicking on the Edit button, you will be redirected to Edit stop page where you can make some changes and save them. After clicking on the Delete button, the confirmation dialog will be displayed where you need to confirm the deletion of the stop.
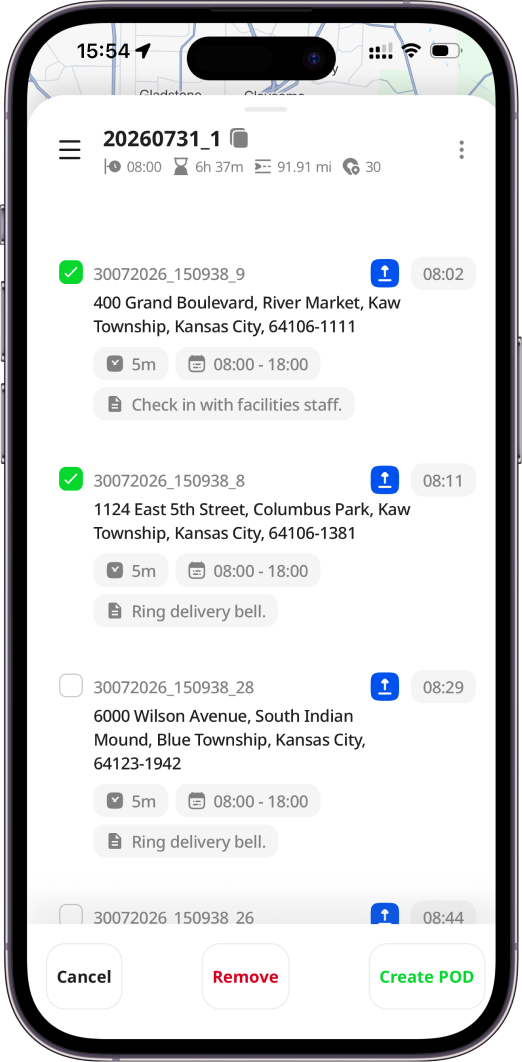
To select multiple stops, press the : (3 dots) icon on the Route view page and choose the Select stops option. You can remove stops from a route (stops remain available to add to another route) or create one POD for multiple stops. If your environment settings disallow multiple PODs per order per route, you cannot select stops with existing PODs because you cannot create a new POD.
Vehicle Loading with Photos
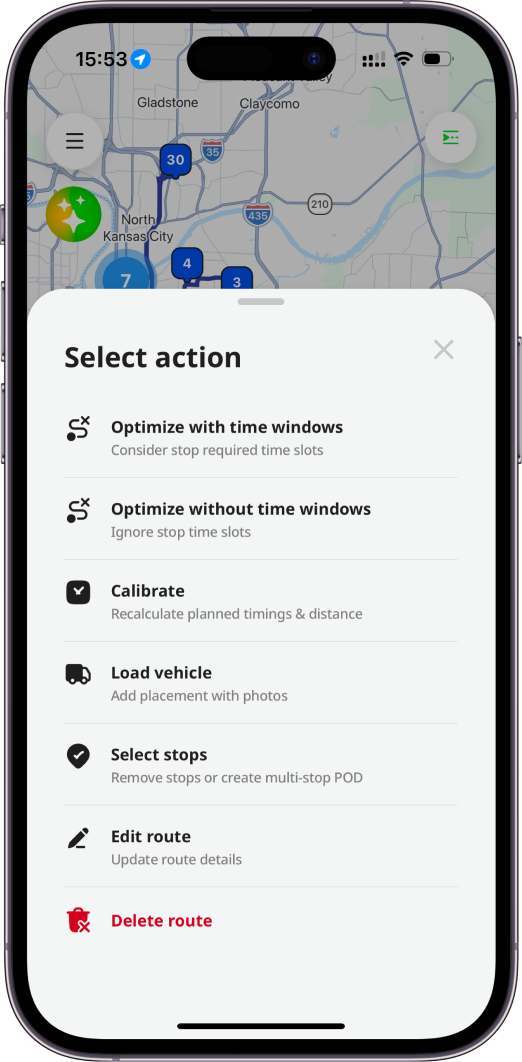
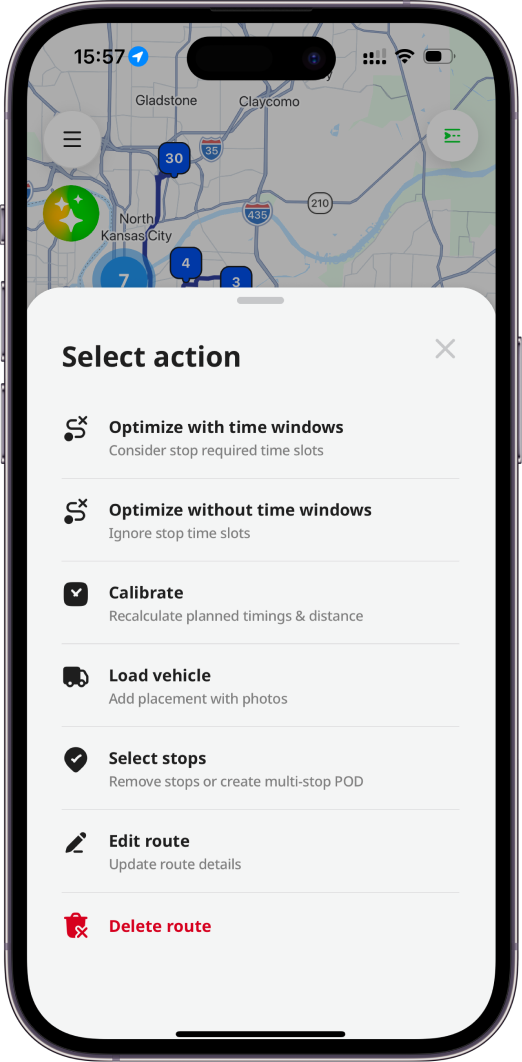
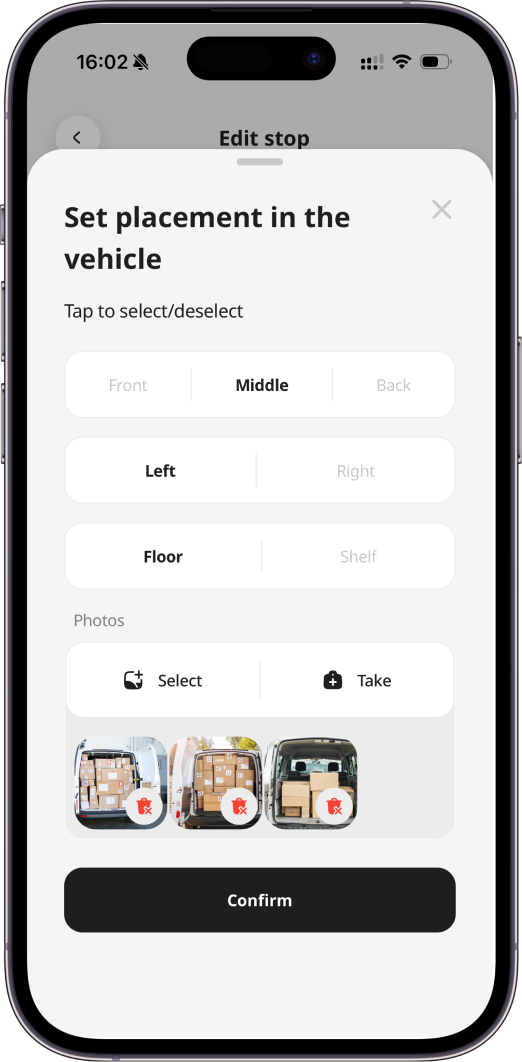
Once a route is optimized and ready-to-go, you can load your vehicle with the assigned delivery stops by selecting Load vehicle from the : (3 dots) icon on Route view page. Stops appear in reverse order to help you load items that will be delivered last first, with collection orders excluded. For each stop, you can set parcel placement (e.g., "front right" or "left shelf") and optionally add photos. Press Confirm to save the placement, which can be updated later. Note that new photos will replace the old ones. Once your orders are loaded to the vehicle, press Finish loading to return to Route view page.
Vehicle loading (setting placement in the vehicle) with photos is available on all subscriptions levels, including Free level.
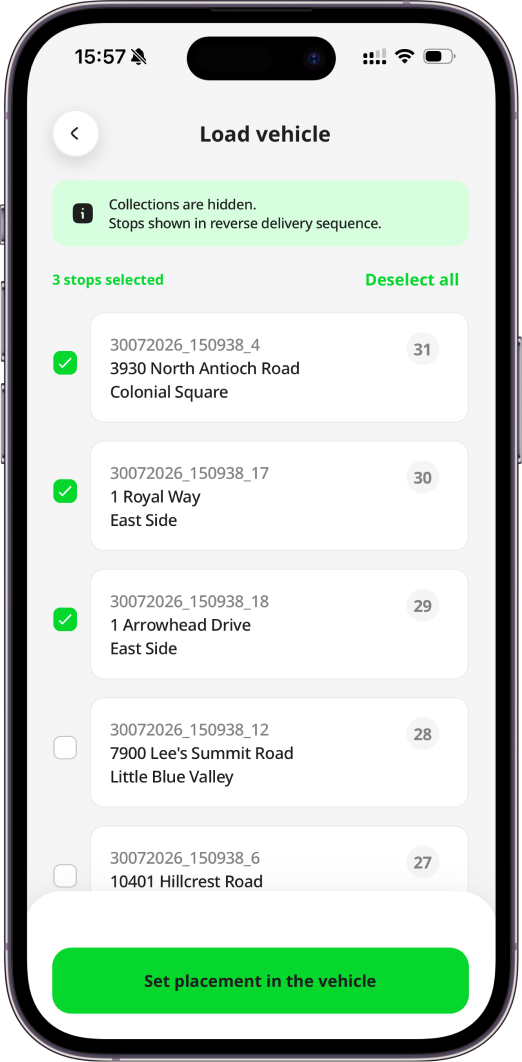
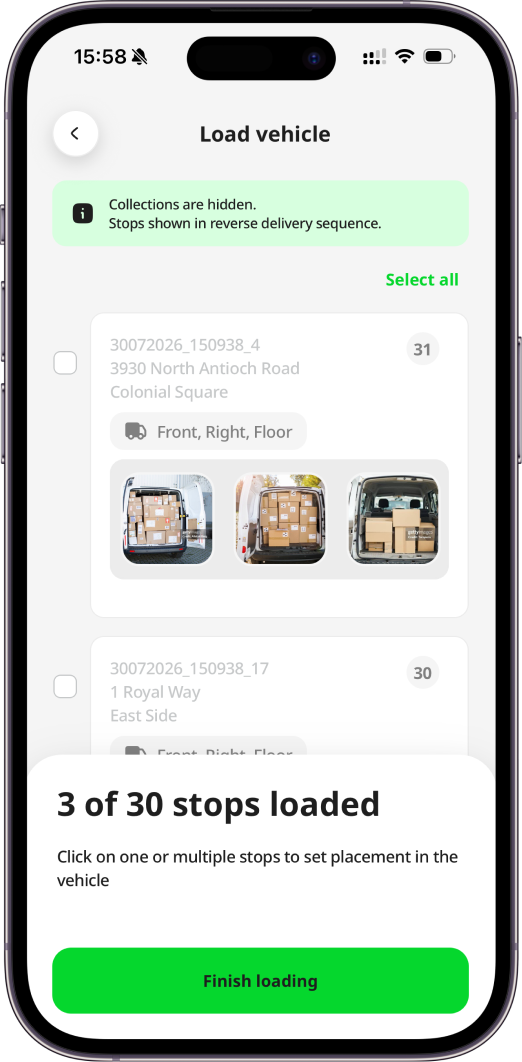
The placement and photo count appear on the stop card, and full-size photos can be viewed in the Order details page.
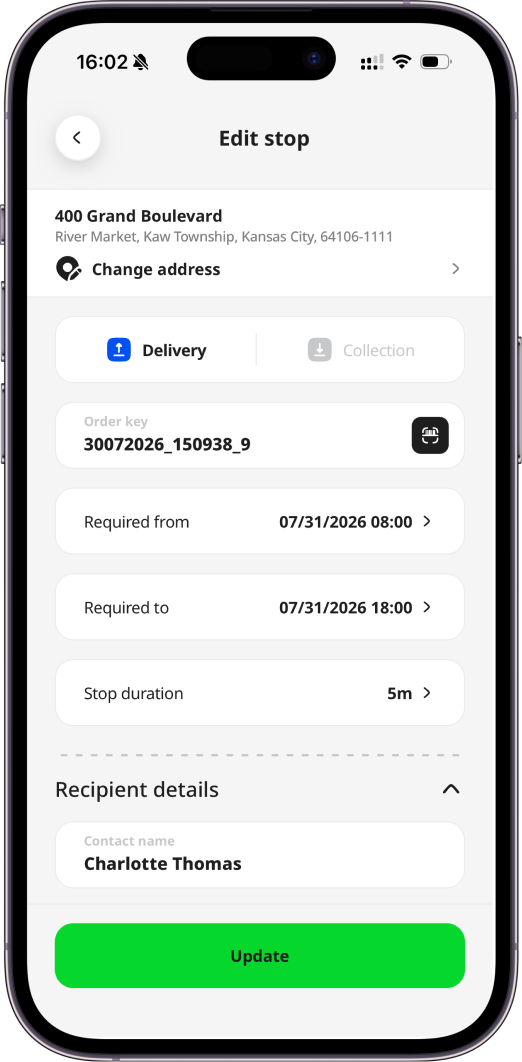
You can also set placement and upload photos when adding or editing an order.
Navigation
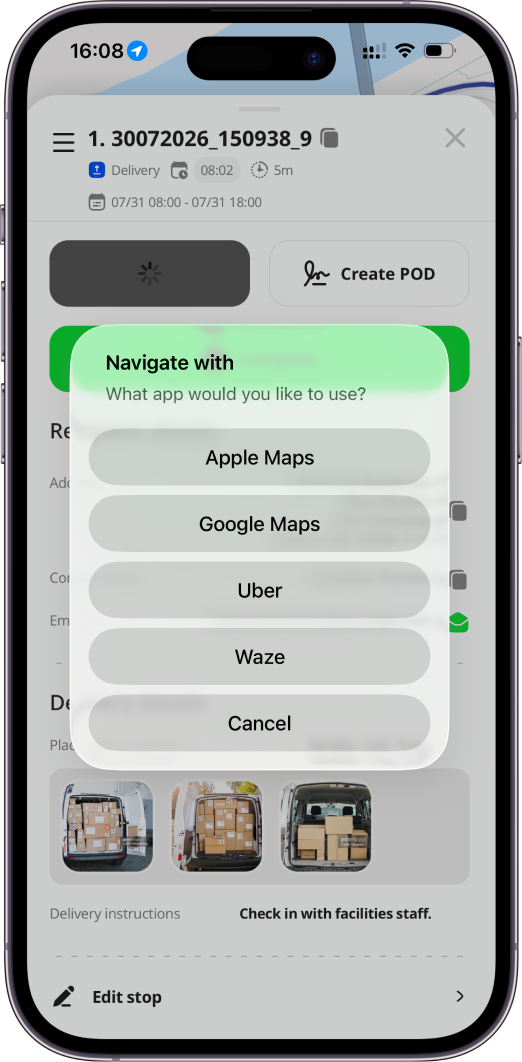
The navigation icon in the top right of Details (of a certain stop) page panel lets you jump out to a navigation app (Google Maps, Apple Maps, Waze, etc.) to help you navigate in an unfamiliar area.
Switching Between Stops
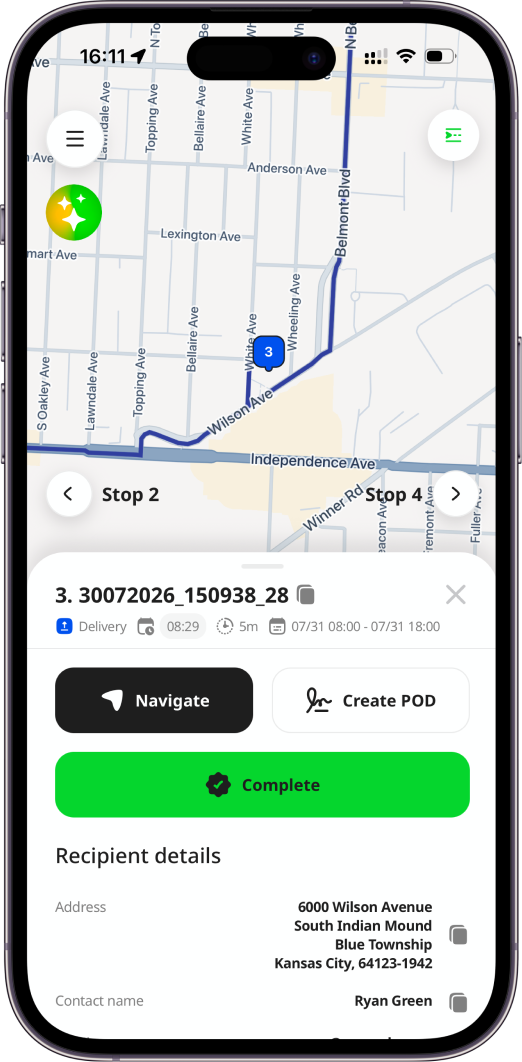
You can see navigation arrows on Stop details page above the bottom-screen dialog to quickly switch between route stops. These arrows move dynamically with the bottom sheet as it changes height during scrolling. Next to the arrows, the stop numbers of the previous and next stops are displayed, helping you know which stops you can navigate to. The left arrow is hidden on the first stop, and the right arrow is hidden on the last stop, ensuring navigation options are only shown when applicable. If there is only one stop in the route, no arrows are displayed at all.
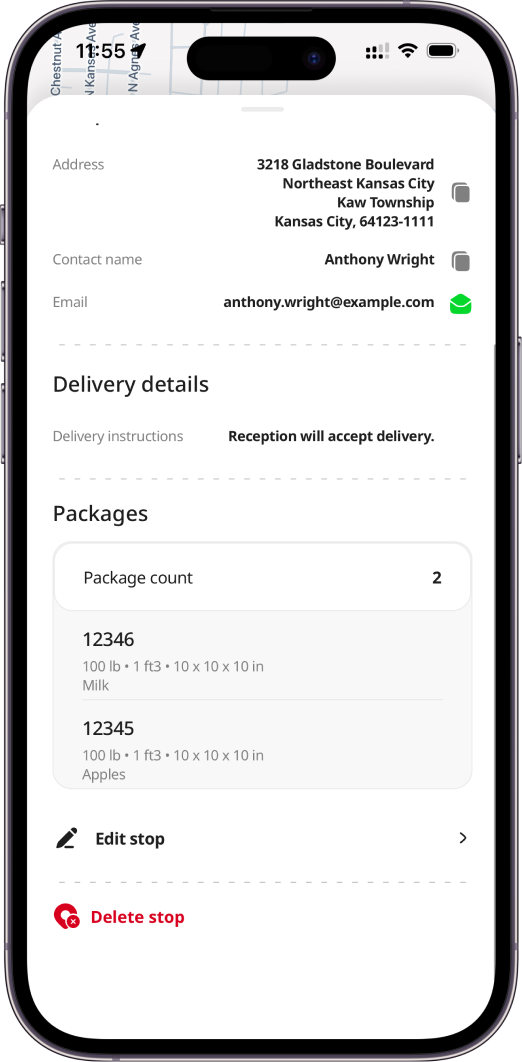
Stop Packages
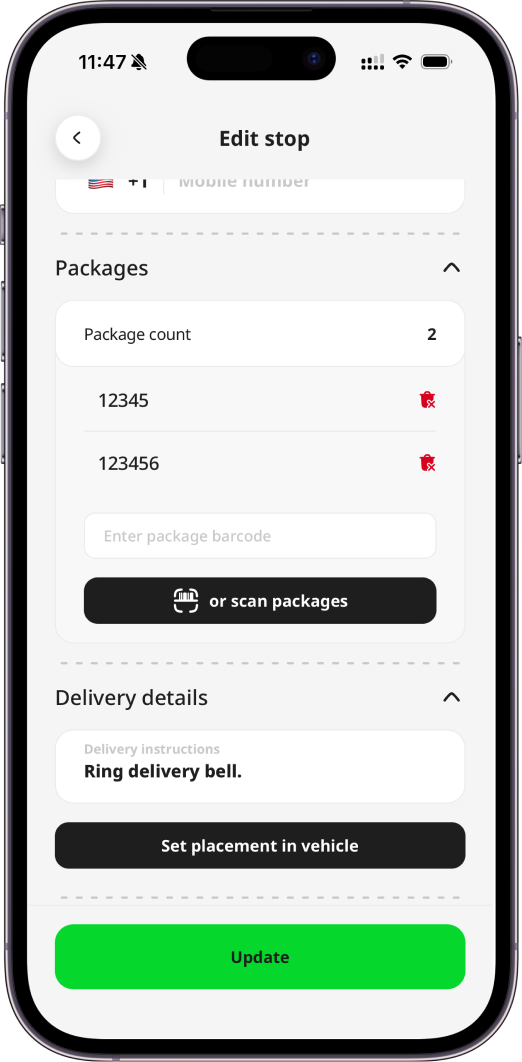
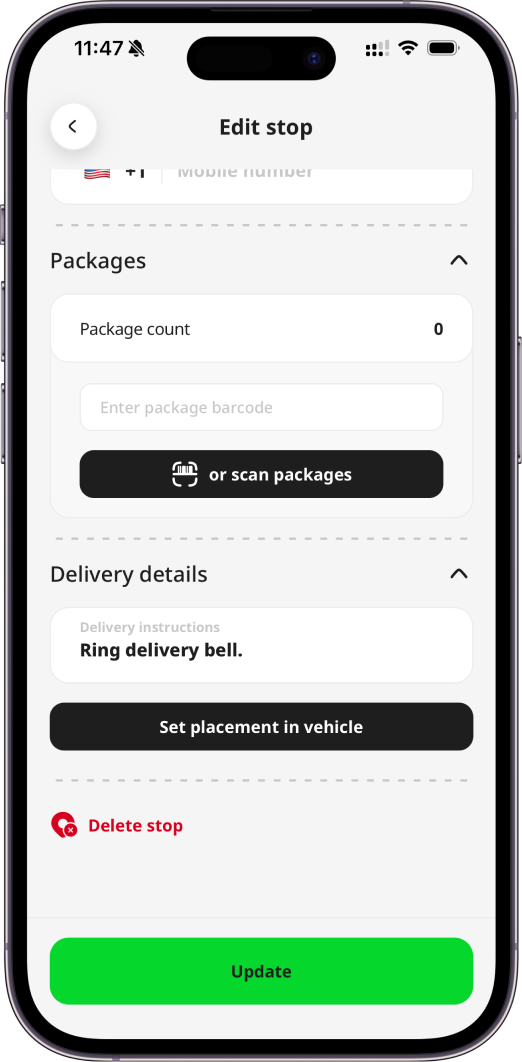
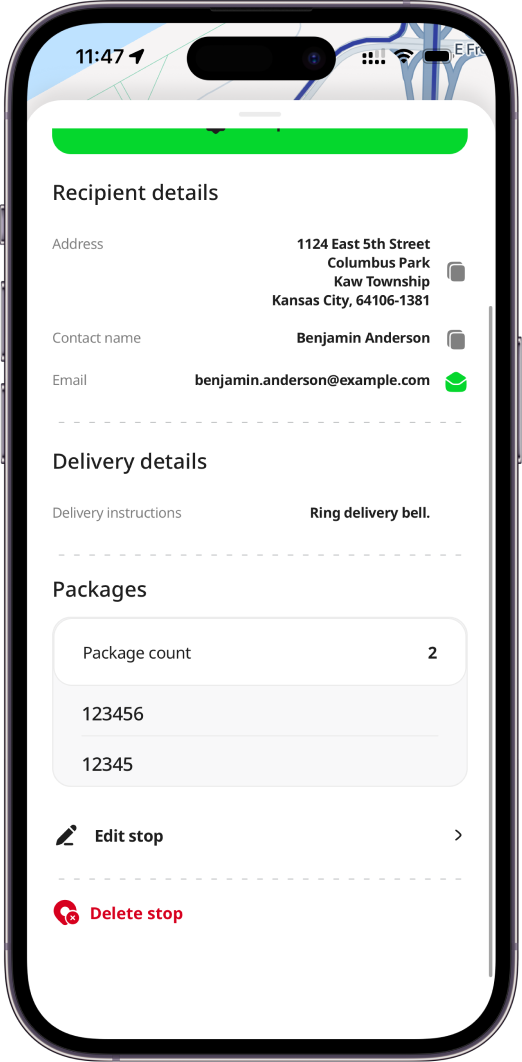
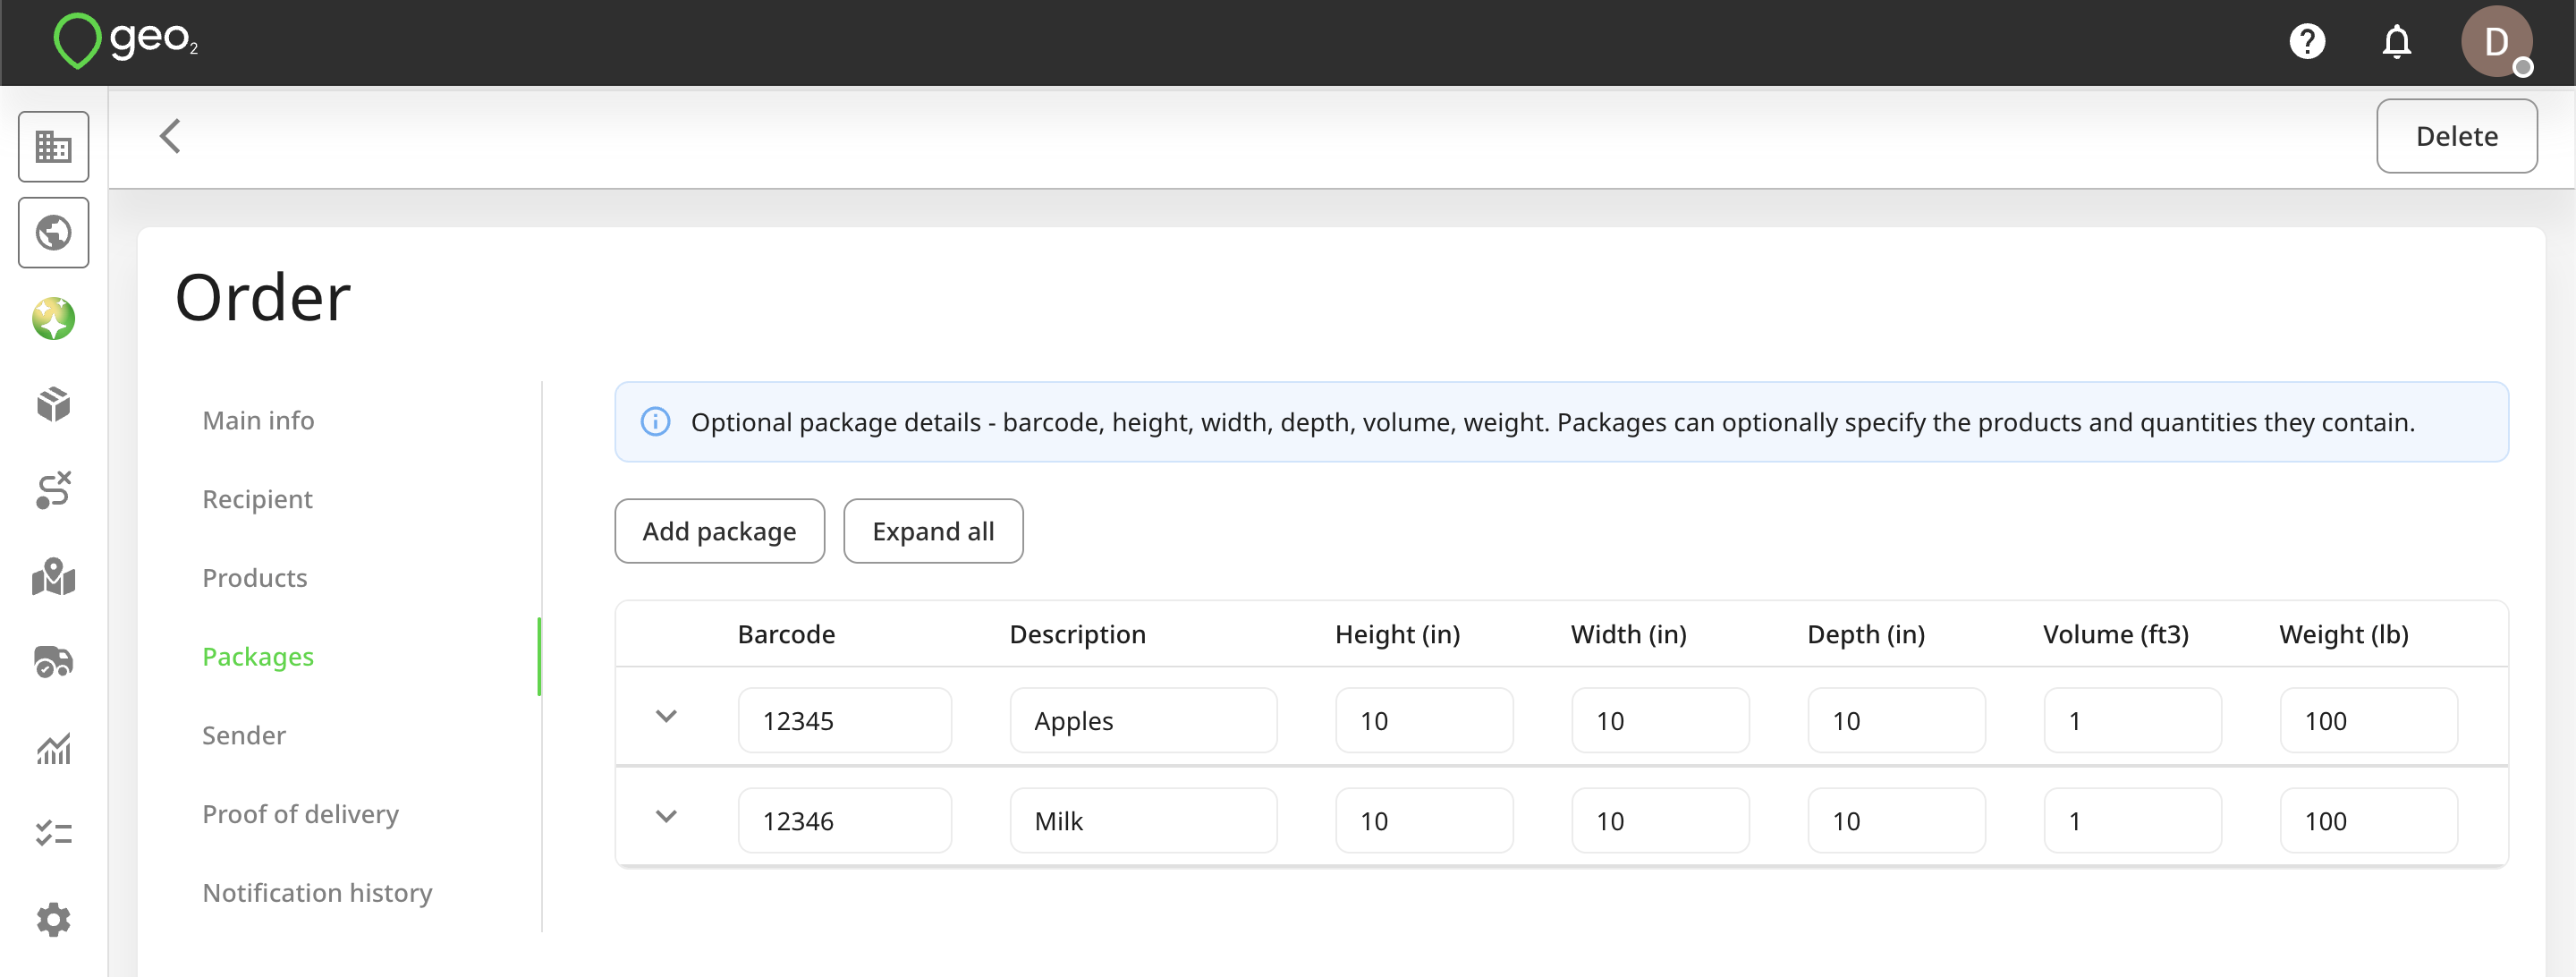
You can add packages to a stop either in Hub: Ordersor in the mobile app during adding or editing of a stop. Packages will be then displayed on the Stop details page in the mobile app with a barcode, description, height, width, depth, volume, and weight depending on the data provided in Web-Based Hubor in the mobile app.
Adding package information is available only with Advanced and Enterprise subscription levels.
Example when adding packages from the mobile app:
Example when adding packages from Hub:
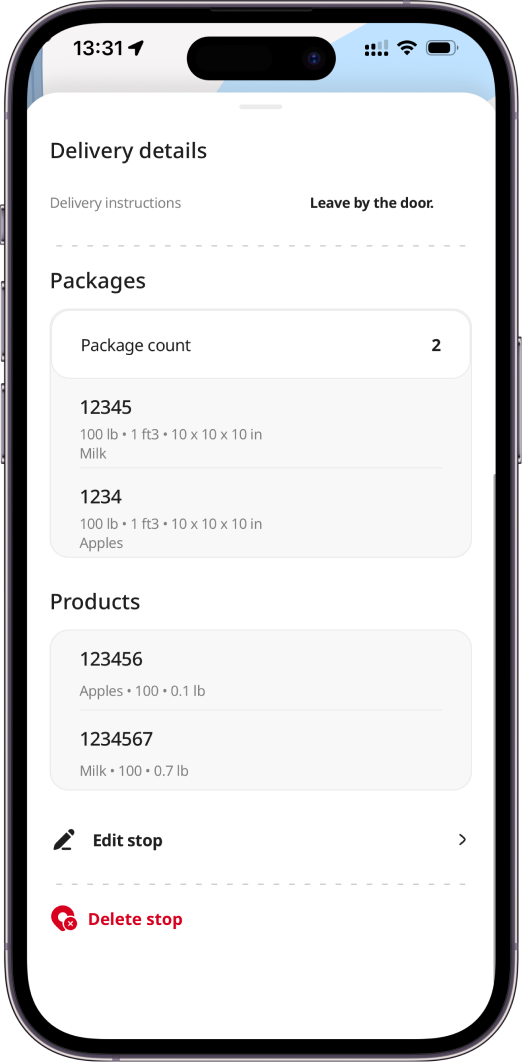
Stop Products
You can add products to a stop in Hub: Orders. Pre-defined products will be then displayed on the Stop details page in the mobile app with a product code, description, quantity, and weight depending on the data provided in Web-Based Hub.
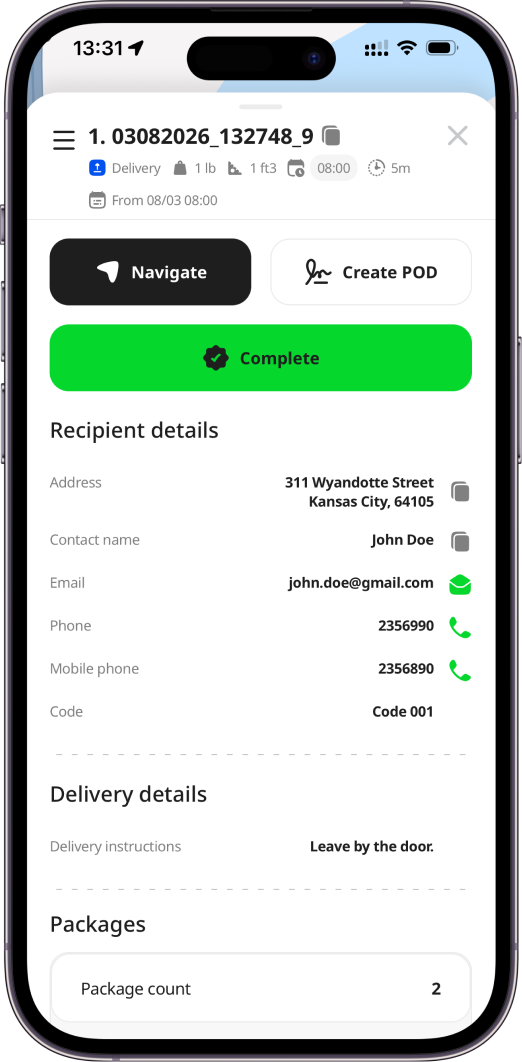
Stop Packages with Products
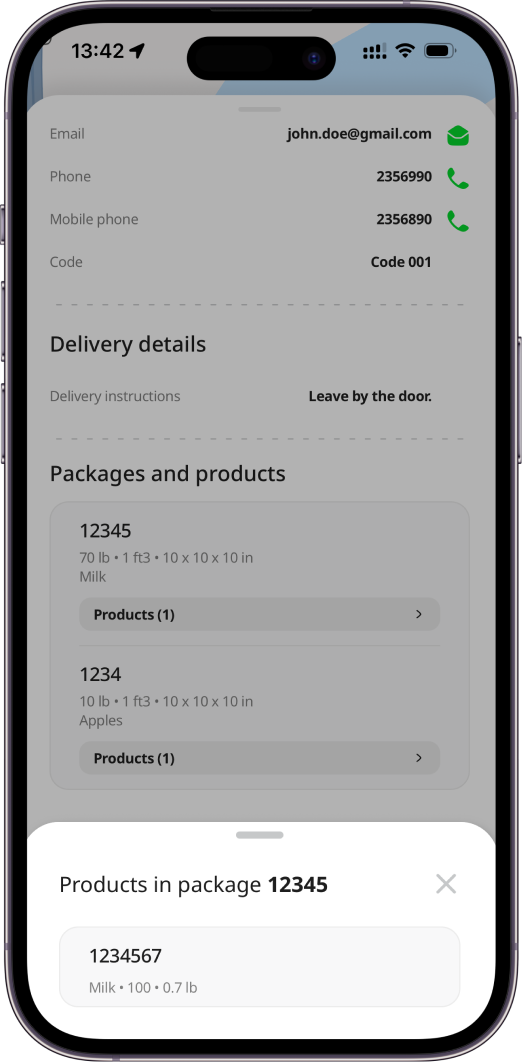
You can add packages and products to a stop and link them in Hub: Orders. Pre-defined packages with products will be then displayed on the Stop details page in the mobile app. For a package, a barcode, height, width, depth, volume, and weight can be displayed depending on the data provided in Geo2 Hub. For a product, a product code, description, quantity, and weight can be displayed depending on the data provided in Geo2 Hub. To check products added to a package, press the Products button on a package. The list of products added to the package will be displayed. Press Cross on the dialog to close it.
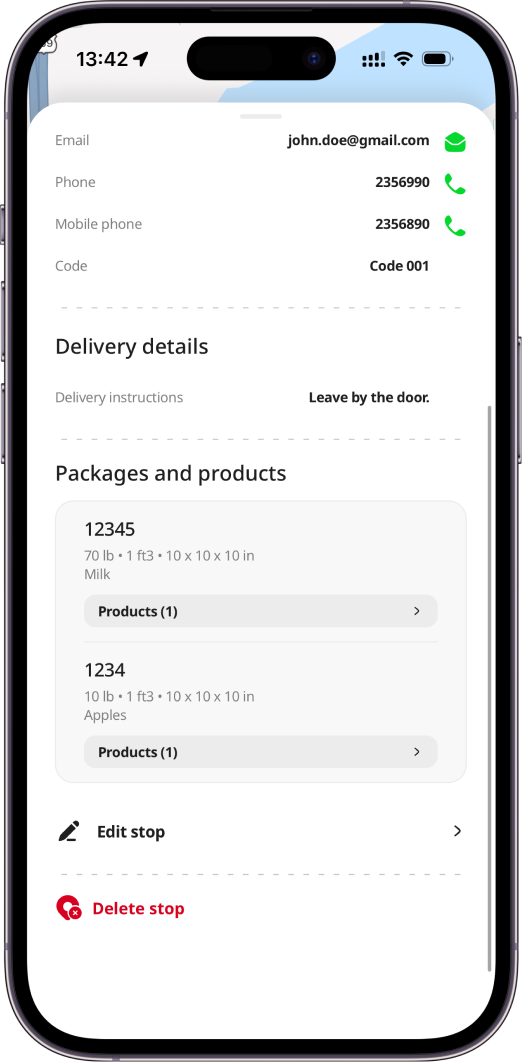
Recording Stop Duration
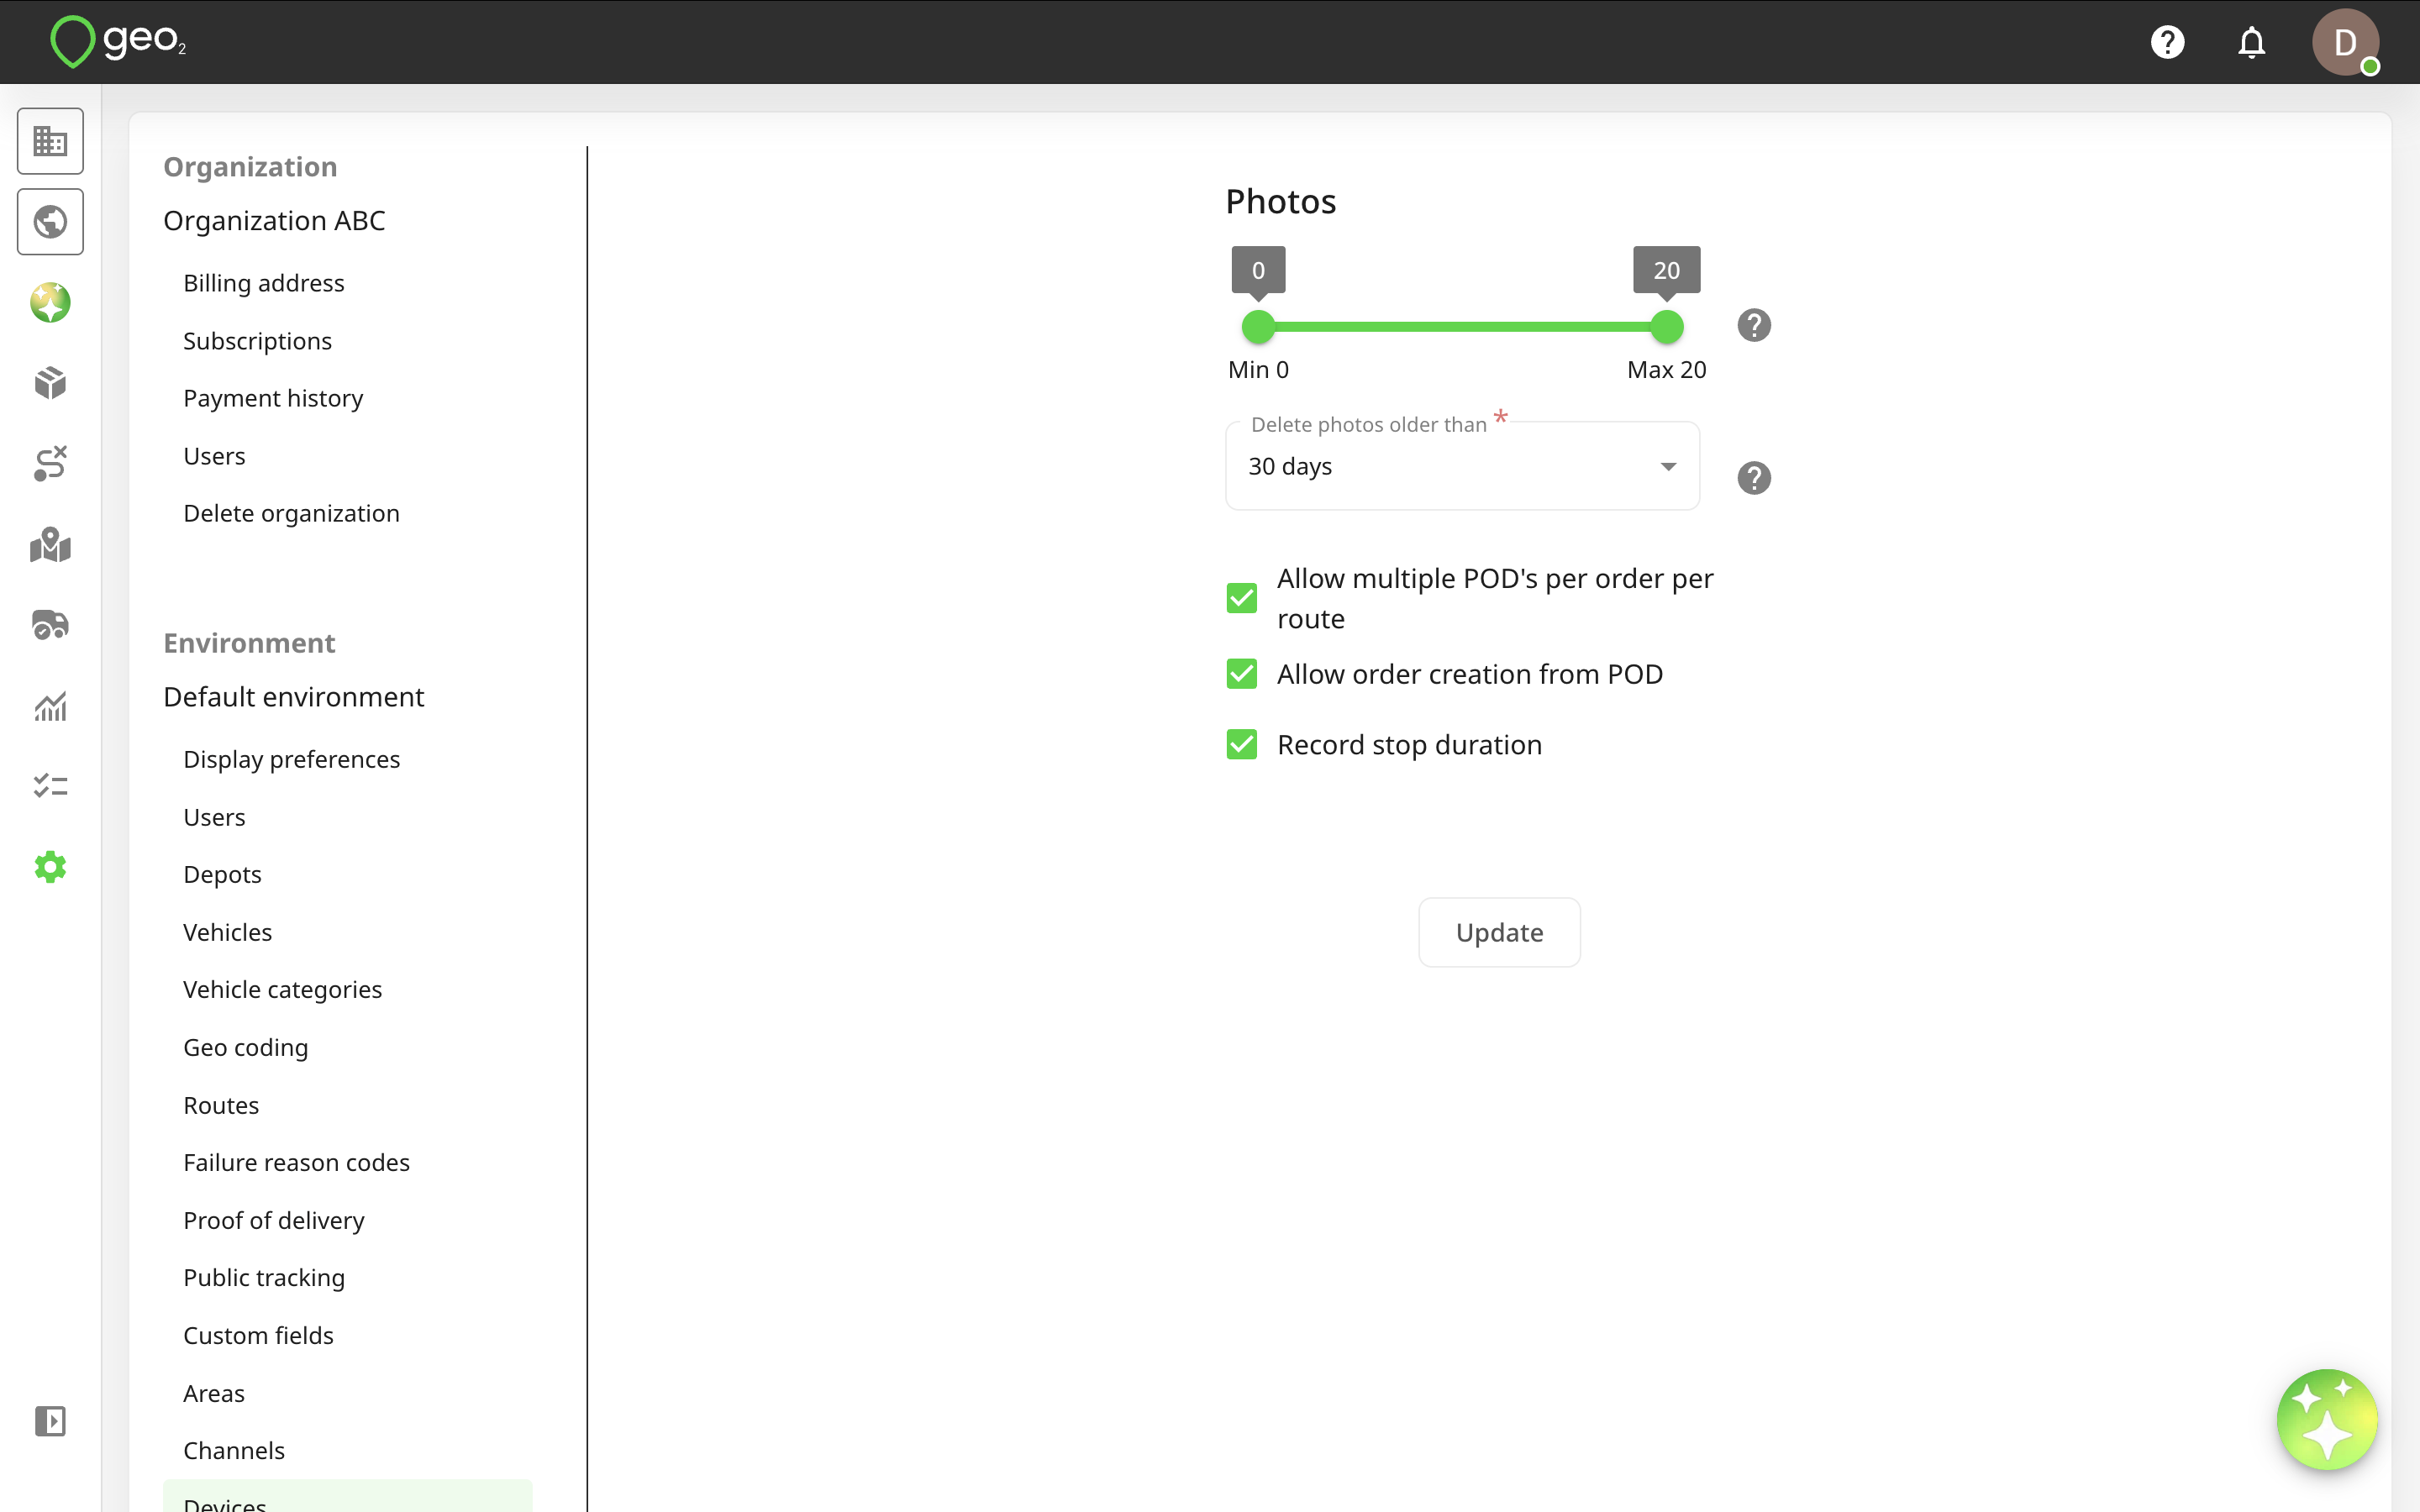
Record stop duration setting in Hub: Environment Settingsin Geo2 Hub enables the mobile app’s feature to record the actual time spent at a stop by a driver. Recording actual stop duration feature is available only with Enterprise subscription level.
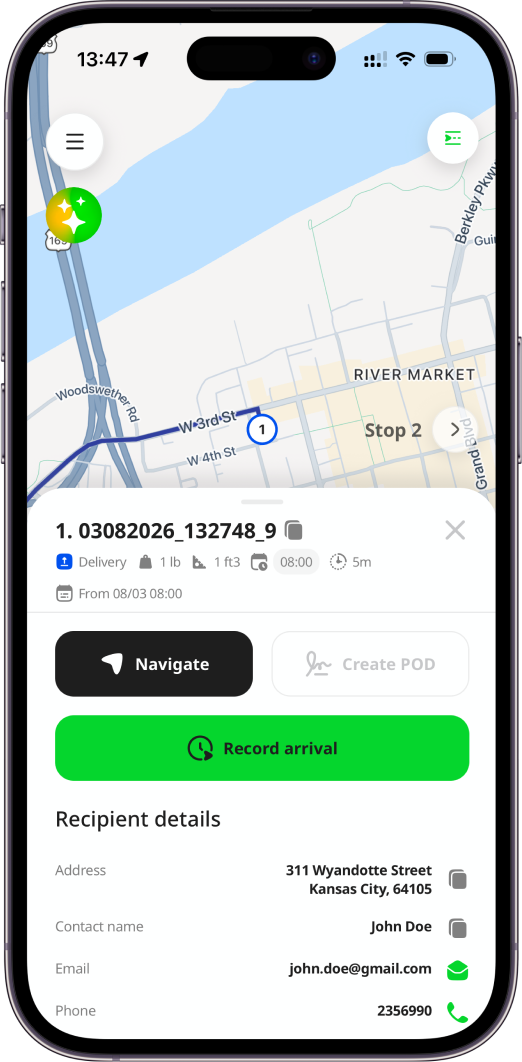
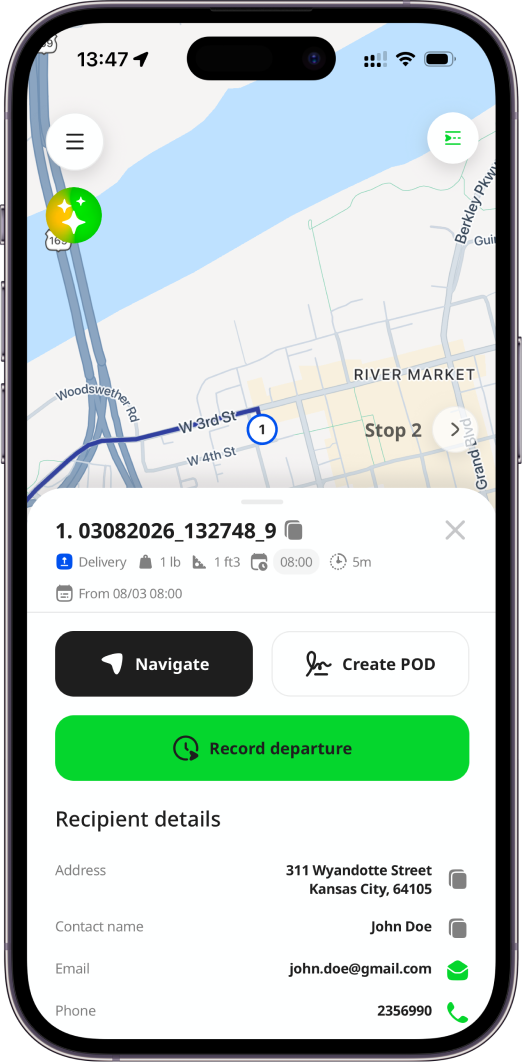
Once enabled, the Record arrival button will appear on Stop details page within a route in the mobile app. Tapping it records the arrival time for that stop. The button will then be replaced by Record departure option. The Create POD option becomes available once you record arrival. You can either generate a proof of delivery (POD) before recording the departure or simply log the departure time without a POD.
If you press Record arrival and then tap the close icon to return to Route view page, you will be prompted to confirm whether you want to record the departure time for this stop.
- Selecting
Yeswill record the departure time. - Selecting
Nowill keep the stop duration counting, and you will be redirected to Route view page.
If you pause or complete a route, the departure time for the stop where you pressed Record arrival will be recorded automatically. The same applies if you fully close the app.
If you press Record arrival at a stop and return to Route view page while the stop duration is still counting, you can select multiple stops and press Record arrival again.
- If one of the selected stops has an ongoing stop duration, you will be asked whether you want to overwrite the arrival time.
- If none of the selected stops have an ongoing stop duration, you will be asked to confirm whether the departure time for the previous stop should be recorded automatically.
- If selected stops have an ongoing stop duration and you try to select more stops, you will be asked to confirm whether the departure time for the previous stops should be recorded automatically.
We allow overwriting arrival and departure times for stops when necessary. Once both arrival and departure times are recorded, the actual stop duration is calculated based on the time difference. This duration appears on the stop card on Route view page in Hub, allowing you to compare the planned and actual stop duration and take action when necessary.