FAQ
Introduction
Here you can find answers to the most common questions to help you get the information you need quickly and easily. Whether you are just getting started or troubleshooting an issue, this section is designed to guide you through.
If you do not find the answer you are looking for, feel free to reach out to our Support — we are always here to help!
What is Geo2?
Geo2 is a cloud-based transport management system (TMS) and all-in-one delivery route planner designed to help businesses and independent drivers plan, execute, and optimize the movement of goods. Using modern technology, Geo2 reduces delivery costs, shortens driving time, and simplifies day-to-day delivery operations. Whether you’re a solo driver or a growing logistics team, Geo2 provides everything you need to plan, optimize, and manage routes efficiently and stress-free. It gives you the tools to:
- Reduce transport costs with automated route optimization
- Reduce the time spent planning routes with AI route building
- Reduce delivery address errors via built-in address geo-coding
- Enable fully electronic proof-of-delivery (POD) records
- Send automatic recipient emails and tracking SMS
- Track vehicles and drivers in real time
- Analyze your team performance with analytics charts
What are the main features of Geo2?
Geo2 main features include:
Route planning & optimization
- AI-powered route building
- Optimization with time windows
- Multi-route management on a single map
Order & delivery management
- CSV and Excel imports
- Proof of delivery (POD) capture
- Package- and product-level failure tracking
Driver & vehicle management
- Driver break planning
- Live GPS tracking
- Vehicle checks
Reporting and analytics
Automated recipient email and SMS notifications (POD and Public tracking)
Platforms & integrations
- iOS and Android mobile app
- Web-based Geo2 Hub
- REST API
Additional features
- AI assistant
- Address import from photos, screenshots and PDFs
- Address voice search
- Multi-address scanning
- Map address search
- Vehicle loading with optional photos
- Package scanning and validation
Does Geo2 fit my business?
Geo2 supports businesses of any size and industry, from gig drivers to enterprise logistics teams. It’s built for couriers, parcel services, food delivery, and local logistics. Whether you deliver with Uber Eats, Amazon Flex, or run your own operation, Geo2 adapts to your workflow.
- For solo drivers, Geo2 helps plan smart routes in seconds using fast address input, voice search, mutli-address scanning, map address search and import from photos, screenshots and PDFs. It automatically builds optimized routes that avoid traffic, roadblocks, and restricted zones — saving time and fuel. Add breaks as needed, navigate to stops with your preferred navigation app, and organize your van with package locations and photos for faster stops.
- For smaller businesses, Geo2 provides essential tools like ePOD (electronic proof of delivery), route planning, and order and delivery management. Upload orders quickly via CSV, Excel, PDF or photos, optimize routes with time windows, traffic, and vehicle restrictions, and schedule driver breaks. Track routes in real time, access team performance insights, and automate customer delivery updates — without micromanaging your team.
- For larger organizations, Geo2 offers advanced capabilities such as custom API integrations, AI-powered route optimization, and detailed analytics. Import orders via CSV, Excel, PDF or API, manage all routes on a single map, reassign stops, and re-optimize on demand. Support multi-user routes, monitor progress in real time, and automate customer notifications with tracking links, ETAs, and PODs.
- For food delivery businesses, Geo2 also supports product-level failures during POD creation, ensuring accurate tracking and accountability for every delivery.
No matter your size or industry, Geo2 is flexible and scalable — designed to support your operations today and grow with your business.
How do I know whether the Geo2 web-based Hub or the mobile app is right for me?
You can use both the Geo2 web-based Hub and the mobile app, depending on your role and workflow. Both platforms support route planning and optimization, as well as order management. The mobile app is best suited for solo drivers, couriers, gig drivers, and drivers working for companies where route planning is done by a transport manager/dispatcher in Hub. Additionally, the mobile app includes Proof of Delivery (POD) and vehicle check features to capture delivery confirmations and vehicle status at route start and completion. While the mobile app allows drivers to create and optimize routes and manage stops (orders), the Hub offers advanced features for larger-scale operations, such as bulk order import via Excel (CSV), managing multiple routes on a single map, analytics and reporting, and AI-powered route building.
Can I use Geo2 only for recording ePOD's?
Yes, Geo2 can be used exclusively for recording proofs of delivery (PODs).
You can capture signatures and photos, as well as record failed or partially successful deliveries/collections using package- and product-level failure tracking. Drivers can select predefined failure reasons directly in the mobile app when creating a POD. Also, you can add failure reason codes in Settings → Failure reason codes in Hub or in the mobile app. They let you classify reasons for failed deliveries/collections and are available to drivers in the mobile app when recording a POD.
If a POD is recorded for an order that doesn’t yet exist, Geo2 will automatically create the order based on the submitted information.
All PODs and their history can be viewed in both the mobile app and the Geo2 Hub. In Hub, you can filter orders by POD status for easier tracking.
Do I need to install anything (mobile/PC)?
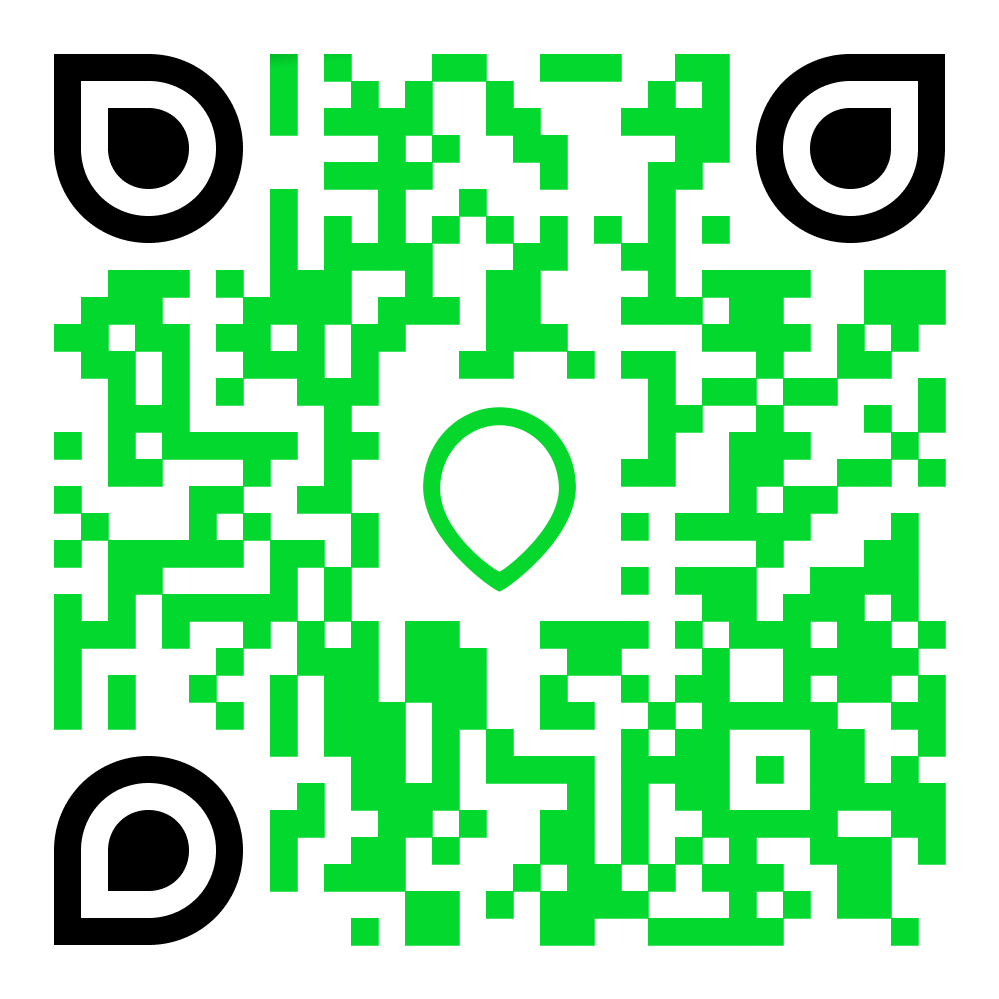
There is no need to install anything on your PC. All you need is to register your account on Geo2 Hub or the mobile app. For mobile phone, you just need to find Geo2 on Google Play or App Store and install it. Alternatively, you can scan this QR code to install the app for iOS or Android:
Do I need to integrate Geo2 with my system before I use it?
No, integration isn’t required to get started.
Geo2 works out of the box, so you can start planning, managing, and analyzing routes right away — without setting up any integrations.
You can add orders manually in the web-based Hub, upload them via CSV or Excel, or manage everything directly in the mobile app if you’re a solo driver. You can also export orders and assigned routes as a CSV to update your system manually.
If you need more automation later, Geo2 offers API integrations to connect with your existing systems when you’re ready.
How can I set up my workspace?
Getting started with Geo2 is fast and doesn’t require any integrations. You can start using Geo2 in the web-based Hub, the mobile app, or both — depending on your workflow.
Get started in the Geo2 Hub (web)
- Create your account and verify your email (if signing up with email and password)
- Enter your organization details
- Add your first depot to use as the default start and end point for routes
- Create orders manually or import them via CSV, Excel, or PDF
- Plan and optimize routes
- Invite team members, assign routes to drivers, and change route statuses to Released
- Ask drivers to download the Geo2 app on iOS or Android and log in using the email address or phone number they were invited with to view routes assigned to them
Get started in the Geo2 mobile app
- Download the Geo2 app on iOS or Android
- Create your account and verify your email (if signing up with email and password)
- Create your first route
- Add stops by typing an address, using voice search, or scanning addresses
- Tap Finish adding stops to run automatic route optimization
- Start the route and navigate using your preferred navigation app
- Record proofs of delivery (signatures, photos, or failures) when needed
You can use the Hub and mobile app together for full route planning and delivery management, or rely on the mobile app alone.
Get started in the Geo2 mobile app if you are invited to the organization as a driver
- Download the Geo2 app on iOS or Android
- Log in to your account using the same email/mobile phone number used for the invitation
- Accept the invitation to the organization
- Open Menu → Routes to view the routes assigned for you for today
- Start the route and navigate using your preferred navigation app
- Record proofs of delivery (signatures, photos, or failures) when needed
What is the difference between organizations and environments?
Hub: Organization Settings is a group of users who share a subscription and collaborate on data in one or more environments. Hub: Environment Settings let you represent teams within a single company or provide separate spaces for testing and productive use. Creating orders, planning routes, recording vehicle checks and PODs (proof of delivery) are all tasks associated with a specific environment. You can configure multiple environments for various purposes, each with its own settings for depots, vehicles, route configurations, display preferences, and more.
Examples:
- A large company (organization) with smaller teams (environments) working on different projects.
- A holding company (organization) with smaller companies (environments) working in different spheres.
- A middle-size company (organization) with several depots (environments).
When you create an account and are not invited to an existing organization, Geo2 automatically creates a default organization with its first environment. You can later add more environments within the organization through the Hub if needed. Please note that multiple environments per organization are available only with the Enterprise subscription.
What is the difference between orders and routes?
Orders are records of deliveries or collections to be handled by a driver, typically as part of a route, which is a group of orders. Each order has a unique key that can represent an order number (for example, 001, 002, 003). Orders can be created manually in Hub or in the mobile app, imported via a CSV, Excel file in Hub, or created through integration with the Geo2 API. Once an order is added to a route, it is referred to as a “stop”.
Orders can optionally be grouped into routes. A route represents a set of orders usually completed in a single vehicle trip and also has a unique key, which can be used as a route identifier, such as the current date with a trip number (for example, 20260121__1).
With Geo2, you can add orders to routes and optimize them to find the most efficient paths, helping reduce time and costs. In the mobile app, you or your drivers can work on released routes, complete vehicle checks, and create PODs (proof of delivery) for the orders included in the route.
How can I import my orders?
You can import order through Geo2 web-based Hub or the mobile app.
How to import your orders through Geo2 Hub:
- Orders are imported from the Orders page by clicking the Import button.
- Orders can be uploaded either from a spreadsheet or PDFs/photos.
- If selecting “Import spreadsheet”, orders can be added either by uploading a file or by typing or pasting data directly into the import table. Supported file formats include CSV, TSV, Excel (.xls/.xlsx), XML, and TXT. After uploading a file, columns must be mapped to Hub order fields; all required fields must be mapped to continue. Unmatched columns can be skipped, and mappings can be adjusted before applying them. Once mapping is applied, all orders are shown in the import table for review and editing before import. Mandatory fields such as order key, order type, and full address details must be filled in for successful import and geocoding. Import options define how the system behaves, including route generation and updating existing orders. When Import is clicked, the data is validated and any errors are displayed so they can be corrected. Orders that pass validation are imported and appear in the Orders page.
- If selecting “Import image/pdf”, orders can be added either by uploading a PDF file or photos/screenshots. Geo2 uses AI to automatically detect addresses and other available delivery information, allowing you to review and edit the extracted data before adding the stops to the route. When Create orders is clicked, the data is validated and any errors are displayed so they can be corrected. Orders that pass validation are imported and appear in the Orders page.
Order import from spreadsheet (Excel, CSV) is supported on Advanced and Enterprise subscription levels while order import from image/PDF is supported with all subscription levels.
Press Hub: Order Import to learn more about order imports.
How can I add vehicles?
Once you register your account and a new environment is created, default vehicles are created: van, truck, car, motorbike and bicycle.
You can add more vehicles either through Hub or the mobile app:
- To add vehicles through Hub, go to the Hub: Environment Settings and use the
Addbutton to create vehicles one by one. A dialog will appear where you can provide required information including a unique Key, the Type of vehicle, and set a Speed factor; other details like registration number, vehicle categories, capacity, dimensions, emission factor and availability for route building can be filled optionally. Hover over the question mark icons for help on each field. After entering the details, pressCreateto save the vehicle. Besides adding individually, you can import multiple vehicles at once via the Import button and uploading a spreadsheet with mapped columns or pasting data directly into the import interface, then finalize to add all vehicles to the environment. - To add vehicles through the mobile app, open Mobile App: Settings where you’ll see a list of vehicles. Tap Add vehicle to open a form where the Key and Type fields are required and other details like Registration, Gross weight, Height, Width, and Length can be entered if needed; pressing the Measures button shows additional optional fields for physical dimensions and capacities. After entering the information, tap Add to save the vehicle. You can also add your first vehicle while planning a route by tapping the
Vehiclefield, which opens the same vehicle creation form.
Does Geo2 support multiple depots?
Yes, you can add as many depots as needed in Hub under Hub: Environment Settings.
When you create an account through Geo2 Hub, your first depot is added automatically. You can add additional depots later in Settings in Geo2 Hub — either individually using the Add button or in bulk using the Import option. The default depot is used as the start and end point for routes, but you can change it to any other location. Each route and order can be assigned to only one depot, and the route depot must match the depot assigned to its orders for correct route planning.
It is possible to create route automatically based on order volume and weight? What is AI route building?
AI route building is the automated process of generating routes for a set of orders using AI-powered optimization. It takes all selected orders and fits them across available vehicles from one or more depots, creating efficient routes that minimize travel time and geographic overlap. You are not required to accept the results — once routes are generated, you can still edit or fine-tune them manually by visualizing them on Map view page.
AI route building feature is available with Enterprise subscription level only.
How does AI Route Building work?
-
Select Orders on Orders page
Choose the batch of orders you want to deliver (e.g., all orders planned for a certain day). -
Run AI route building
Click the AI route building button on Orders page. The system evaluates:- which vehicles are available,
- vehicle capacities and constraints,
- any time windows,
- start times and maximum driving hours,
- geographic distribution of stops.
-
Optimization process
The AI builds routes across all applicable vehicles, attempting to:- fit orders into routes logically,
- reduce duplication of travel paths,
- honor constraints like time windows and vehicle limits.
If there are too many orders for the available vehicles or time limits, the system can offload some orders based on configurable preferences (e.g., distance or order size).
-
Review results
Once complete, you see the generated routes and logs:- routes,
- order counts,
- depot and vehicle assignments,
- messages about any issues (like overcapacity).
-
Manual adjustments (optional)
You can open any generated route and edit the order of stops, change assignments, or further adapt the plan.
Can I work with multiple routes simultaneously on the same page?
Yes. The Hub Map view allows you to work with multiple routes simultaneously on a single page. You can open the map with several routes selected, and they will be displayed together on the same map. Each route is shown separately and can be individually shown or hidden using the visibility (eye) control, making it easy to focus on specific routes while keeping others available. Up to 40 routes can be displayed on the map at the same time, and you can interact with them directly — view stops, inspect details, and make route-related changes without leaving the map view. Additionally, you can create routes and orders (stops) directly on this page, and they will be visualized on the map accordingly.
Press Hub: Map View to learn more about the possibilities of multiple route planning and optimization on Map view page.
How can I invite more users to my organization?
You can invite more users either through Hub or the mobile app:
- To invite more users to your organization/environment through Hub, go to Hub: Organization Settings. These settings are displayed only if you have Organization Admin role. From there, you can invite a user by providing either an email address or a mobile phone number along with the user’s full name. When an email address is used, the user receives an email invitation with a link and instructions to join the organization. Alternatively, it is possible to accept invitation by signing in to Hub or the mobile app using the email address or mobile phone number used for the invitation. Hub also allows inviting multiple users at once by importing a file with user information such as email addresses and names; once the file is uploaded and the fields are mapped correctly, invitations are sent automatically. During the invitation process, you can to assign the user’s organization role, assign subscription and grant access to one or more environments with the appropriate permissions. Until the invitation is accepted, the user appears in the list with a pending status, and after accepting the invitation, the user becomes an active member of the organization.
- In the Geo2 mobile app, you can manage users of your organization directly from the Mobile App: Settings screen in the app. When you open the Users section, you can either invite users one-by-one by tapping the
Invite userbutton. TappingInvite userbrings up a form where you enter the user’s email address, full name, and assign their role (User or Admin) as well as the subscription level to apply. It’s important that the email address provided is valid so the invitation instructions can be sent and received. After sending the invitation from the mobile app, the invited person will receive an email with details on how to accept and join your organization. Alternatively, it is possible to accept invitation by signing in to Hub or the mobile app using the email address used for the invitation. Once the invitation is accepted, the new user appears in your organization list with the role and subscription you assigned.
Adding extra users to your organization is available with the Advanced (up to 10 users per organization) or Enterprise subscription (unlimited users). During the FREE 7-day trial of the Advanced or Enterprise plan, you can add up to 4 additional users to your organization, with the option to add more users later if required.
Can I send a tracking link to a recipient (customer)?
Yes. You can send a tracking link to a recipient via automated email or SMS notifications using Public tracking settings either in Geo2 Hub or the mobile app. When this feature is enabled on the selected order or route status, Geo2 automatically sends notifications that include a public tracking link to the recipient’s email address or phone number, allowing them to follow the delivery status in real time without logging in. Geo2 provides default email and SMS templates for public tracking, so notifications work out of the box and can be customized if needed. To send SMS notifications, you do not need to have a valid organization phone number, as we send SMS messages to customers using our own system. The only requirement is that a valid recipient mobile phone number is provided on the order. Public tracking notification can also be enabled or disabled per individual order in Geo2 Hub, and notification activity, such as whether a message was sent or opened, is recorded for visibility.
Public tracking emails are included in the Advanced subscription level, while SMS notifications are available with the Enterprise subscription level only. Press Hub: Environment Settings to learn more about public tracking notifications.
Can I and a recipient (customer) be notified about a successful and failed delivery?
Yes. Geo2 supports POD (proof of delivery) notifications for successful, partially successful and failed deliveries/collections. When POD notifications are enabled in the Settings in Hub or the mobile app, emails can be sent to you and to the recipient (customer) based on the delivery result. Successful, partially successful, and failed deliveries can trigger notifications, provided a recipient email is available. Additionally, fixed recipients can be configured in settings in Hub to always receive notifications for failed or partially successful deliveries, even if notifications are disabled at the order level.
POD emails are available with Advanced and Enterprise subscription levels. Press Hub: Environment Settings to learn more about sending POD notifications.
How can I track real-time drivers' location?
Drivers’ location can be tracked on Route view page directly on the map in Geo2 Hub once a route is in Started status and driver has enabled location tracking in the mobile app. The system uses GPS data sent from the driver’s mobile app to display the latest known position of the driver’s vehicle on the route map in Hub, allowing dispatchers to see where the driver currently is in relation to the planned route and stops.
Drivers’ location can also be tracked on Analytics page in the Started Route Driver Position chart in Hub. This chart shows a map with the current positions of all drivers who have started their routes, giving an overview of where drivers are located across all active routes at the same time. This chart is available with Advanced and Enterprise subscription levels.
What does the Free level subscription include?
With a Free subscription in Geo2, you get access to a solid set of core features at no cost both in the Geo2 web-based Hub and the mobile app. It is available for one user per organization, and additional users cannot be added on this level. The Free subscription includes:
- Order management (Hub and mobile app): Create unlimited orders (stops) each month, set time windows, assign them to routes, and view proof of delivery (POD) history in both the web Hub and mobile app. Use multi-address scanning, voice search, map search, import from PDFs and photos in the mobile app for fast adding route stops.
- Route planning (Hub and mobile app): Build unlimited routes with up to 15 orders per route, optimize them with vehicle restrictions, adjust stops and timings, plan driver breaks.
- AI assistant (Hub and mobile app): Manage your daily route work faster and with less manual tapping. It is especially useful when you are working solo and need to adjust plans on the go, add new stops, understand what to do next, or quickly find your way around the mobile app or Hub. You can interact with the assistant using text, voice input, or the hands-free Voice Mode, making it easy to use while preparing for a route, driving between stops, taking a break, or when plans change during the day. Voice Mode lets you keep your focus on the road while asking questions, creating or updating stops, optimizing routes, checking route details, or managing deliveries without needing to type, helping you stay productive and safer on the go. The AI assistant is available to users of all levels. However, Free and Pro users are limited to 5 requests per day, while users with Advanced and Enterprise subscriptions have no restrictions on the number of requests.
- Vehicle loading (mobile app): Set parcel placements with optional photos.
- Navigation (mobile app):Use your preferred navigation app (e.g., Google Maps, Apple Maps, Waze) for turn-by-turn directions.
- Proof of delivery (Hub and mobile app): Create PODs with photos and signatures (planned or ad-hoc) in the app, store up to 30 days of data both in the web Hub and mobile app.
- Offline mode (mobile app): Work without an internet connection: create routes and stops, add breaks, capture PODs, and record location data, with all offline actions syncing when back online.
- Support: Contact the Geo2 team for help or to request new features.
This gives you the essentials for planning, managing, and executing routes effectively before upgrading to a paid level.
What paid levels does Geo2 offer?
Geo2 offers three paid subscription levels: Pro, Advanced, and Enterprise, each building on top of the Free level.
- Pro — In addition to Free features, Pro includes unlimited stops per route, unlimited data storage in Hub for routes, orders and PODs, as well as the ability to export order data, and ad-free experience.
- Advanced — Includes everything in Free and Pro, plus route optimization with time windows, automated POD and public tracking emails, order import via Excel (CSV), package management with scanning and validation in the mobile app, support for multiple vehicles and vehicle checks, multi-route management on a single map view, and analytics and reporting. With Advanced subscription, you can add up to 10 users to your organization.
- Enterprise (available for purchase in Hub only) — Includes all Free, Pro, and Advanced features, plus product-level order management, driver-to-vehicle assignment based on vehicle categories, multiple route participants, AI-powered route building, automated public tracking SMS notifications, actual stop duration tracking, multiple environments per organization (for example, testing and production), custom fields, and access to the REST API. With Enterprise subscription, you can add unlimited number of users to your organization.
For an additional cost, Enterprise customers can also request custom integrations with existing systems and 24/7 customer support.
What are the prices for the Pro, Advanced, and Enterprise levels?
At Geo2, subscription pricing is calculated per user added to an organization, and the available user limits depend on the selected level.
- Pro — Allows 1 user per organization. Pricing is $8.99 per month or $77.88 per year. It can be bought only through the mobile app.
- Advanced — Allows up to 10 users per organization. Pricing is $15.99 per user per month or $155.88 per user per year.
- Enterprise — Allows an unlimited number of users per organization. Pricing is $49.99 per user per month or $479.88 per user per year.
Annual billing offers a lower effective monthly cost compared to monthly payments.